Add the Simulation
In order to configure the example more realistic, you can add a prepared
simulation. You can find the necessary files in the
<proj_path>/data/directory of the delivered,
completeGettingStarted_<version> application. Copy these according to the
following figureto your project directory(by holding the [Ctrl] key when
dragging, the content will be copied and not moved - recognizable through the "+"
symbol of the mouse pointer).
When using the presettings for the installation paths, you can find the sought directories under C:/WinCC_OA_Proj/GettingStarted_version/data/GS_copy_to_myGettingStarted or <PROJ_PATH>/GettingStarted_version/data/GS_copy_to_myGettingStarted

If you have executed the copy processes as described in the chapters Import the Current Project State (after creating the data points) orImport the Current Project State (after creating all data point types and data points for each device), you can ignore this first step.
- Copy the content of the named directory to your project directory (for
example
C:/WinCC_OA_Proj/myGettingStartedorGettingStarted_3.18) and confirm the dialog whether possible same files in the sub directories should be overwritten, with Yes, all. - The simulation requires some settings for a data point (SimControl of data point type GS_SIM). You can import the data point type with the ASCII Manager. Open the ASCII manager panel via the System Management and select the file GS_sim_dps.txt for the import. Execute the import according to the figure in the chapter Import the Current Project State.
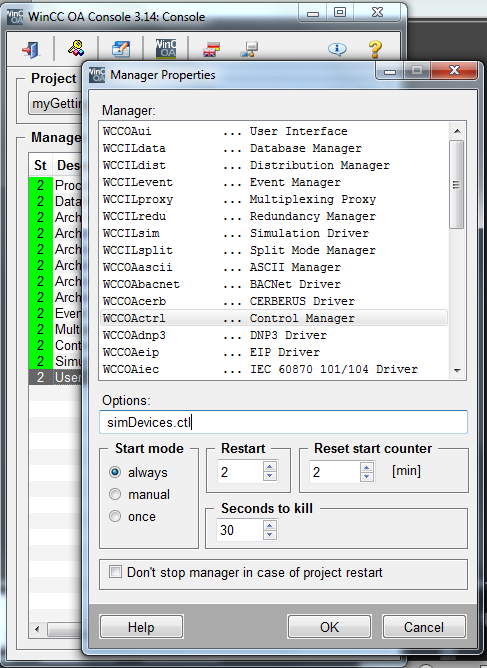
- Switch to the console and add a new control manager to the manager list. At first, only select the script simDevices.ctl as option (a confirmation simulation, see the chapter Configuration of the Simulation also Model simulation).
- Start the control manager ([rightMouseClick] > Manager Start or use the green start symbol on the right next to the manager list).
As soon as the control manager is running, the inputs that can be entered using the input dialog of P1, will be transferred to the appropriate state confirmations. Thereby, the simulation script generates an intended, simulated time delay of 100 msec.
The now activated confirmation simulation is also related to the 3 existing valves V1 to V3. You will immediately detect reactions of your set points.
If the manager will not start, check if the script simDevices.ctl is already available in the /scripts/ directory of your project or if you have used the right spelling (note the case sensitivity!) for the name in the manager options (see figure above). When the manager starts correctly (green column with the state "2" next to the manager description in the console) but your confirmation simulation will not work, check the data point identifier (data point name, element name).


