Creating Data Points with the Database Editor PARA
Since you already created complete types with master data points in the previous chapter, you can easily create further data points using the database editor PARA.

To create a single data point, activate the context menu [rightMouseClick] of the data point type and click the entry "Create data point". Enter the name of the new data point in the dialog box that will be displayed. The data point will be created with OK.
Data point identifiers have to start with an alphabetic character or with an underline "_". Numbers are only allowed afterwards. WinCC OA differentiates between upper and lower case - these names are "case sensitive".
-
Create a data point called T1 of the data point type GS_LEVEL.
-
Create a second data point (T2) of the same type.
In the tree view of the module PARA you should now see the following data points.
In order to create data points at least the corresponding data point type has to exist. If you create data points of a data point type for which nomaster data point exists, the data points only "inherit" the structure, naming of the elements and data types.
If there is also a master data point, the data points also contain configs. Which attributes of a config can be set individually for a data point, will be defined by the selection of the respective PoerConfig.
In WinCC OA, several data point elements could be created in a single operation.
For example, you can create the valves V1 to V3 of data point type GS_VALVE at once:
-
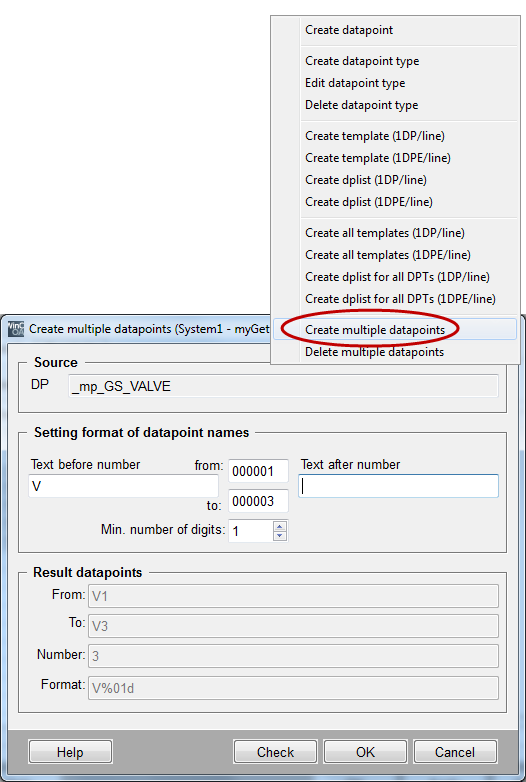
Select the entry "Create multiple data points" in the context menu [rightMouseClick] of the data point type GS_VALVE.
-
In the following dialog, enter the data point identifier "V" as prefix in the "Text before number" field and enter the number range "1" to "3". A single numeric position (Min. number of digits = 1) is sufficient.
-
Leave the possible suffix for the data point identifier blank (field "Text after number").
-
Close the dialog with OK and confirm the following dialog:
As soon as the data points have been created, the instance names V1, V2 and V3 will be shown in the tree view of the PARA module for the data point type GS_VALVE.
The database editor PARA is a great tool within the scope of data point design and prototypes. If you would, however, like to create a number of data points (devices), you should use external data point lists. The data points will then be imported to WinCC OA using the ASCII Manager. For more information on the ASCII manager, see chapter Import from ASCII file (Mass Engineering) of this tutorial as well as the chapters ASCII-Manager, Basics and Mass Configuration, Basics of the online help.
In the PARA module you can also delete data points individually via the context menu of the data point type or data point. It is also possible to delete several data points simultaneously.


