Production
The Production process display
(<proj_path>/panels/mainpanels/production.pnl)
shows the section of a production line. When switched on by the On/Off switch in the
bottom left corner, imaginary production units are re-annealed in a furnace. They are
taken by conveyor belt to a gantry laser scanner that inspects the surface geometry. If
the laser detects that an object lies outside the tolerance range, a red monitoring lamp
on the scanner lights up. The unit is then declared a reject and is transferred by a
linear unit (pusher) to the recycling conveyor belt.
A third conveyor belt transports the units to an assembly station where an articulated robot (SCARA) integrates another piece. These additional parts are fed to the robot on a separate conveyor belt combination.
Clicking on the button with the ellipsis to the right of the scanner opens a display showing the workpiece surface structure recorded during the scanning process. Out-of-tolerance zones are shown in red or blue.
Figure: Production Process Display
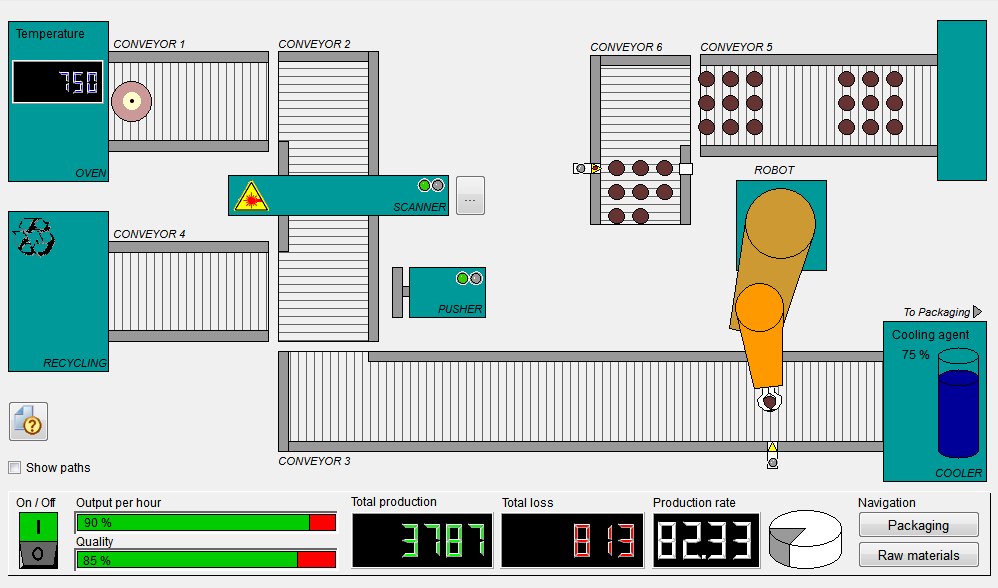
The information area below the process diagram provides statistical production data.
Simple operations
The following actions are possible activities when working with this process display:
-
Starting and stopping production with the main switch in the lower left corner.
-
Opening the detailed view for the scanner for displaying a bar profile of the surface.
-
Displaying the routes taken by the objects (path checkbox above the On/Off switch).
-
Displaying the action radius of the robot by double-clicking on the pedestal frame, another double click cancels the display again.
Special features
Movements of objects along user-definable paths (polylines and freehand lines). The robot is an example for visualizing complex trigonometrical calculations and movement sequences.
Associated data point types
The Production process display uses data points of the following data point types:
-
PC_PRODUCTION_CONTROL
-
ROBOT_CONTROL
Structures and parameter settings can best be viewed in the PARA module. Open the PARA module by starting the last manager in the console list (see also PARA fundamentals). For more information about data points and data point types, see the sections Data point types and Data points.


