The graphics editor - GEDI
The graphics editor is started from the console by selecting the user interface. In the DemoApplication right-click on the line containing the following entry:
User Interface -m gedi
Then select the Start/span> option in the context menu. To open the graphics editor in English, you have to add the entry -lang en_US.iso88591 to the start option as follows: -m gedi -lang en_US.iso88591. Double click on the entry User Interface -m gedi in the WinCC OA console and add -lang en_US.iso88591 after the entry User Interface -m gedi. Select the Start option. The graphics editor opens now in English.
Figure: The Graphics Editor - GEDI - first Steps
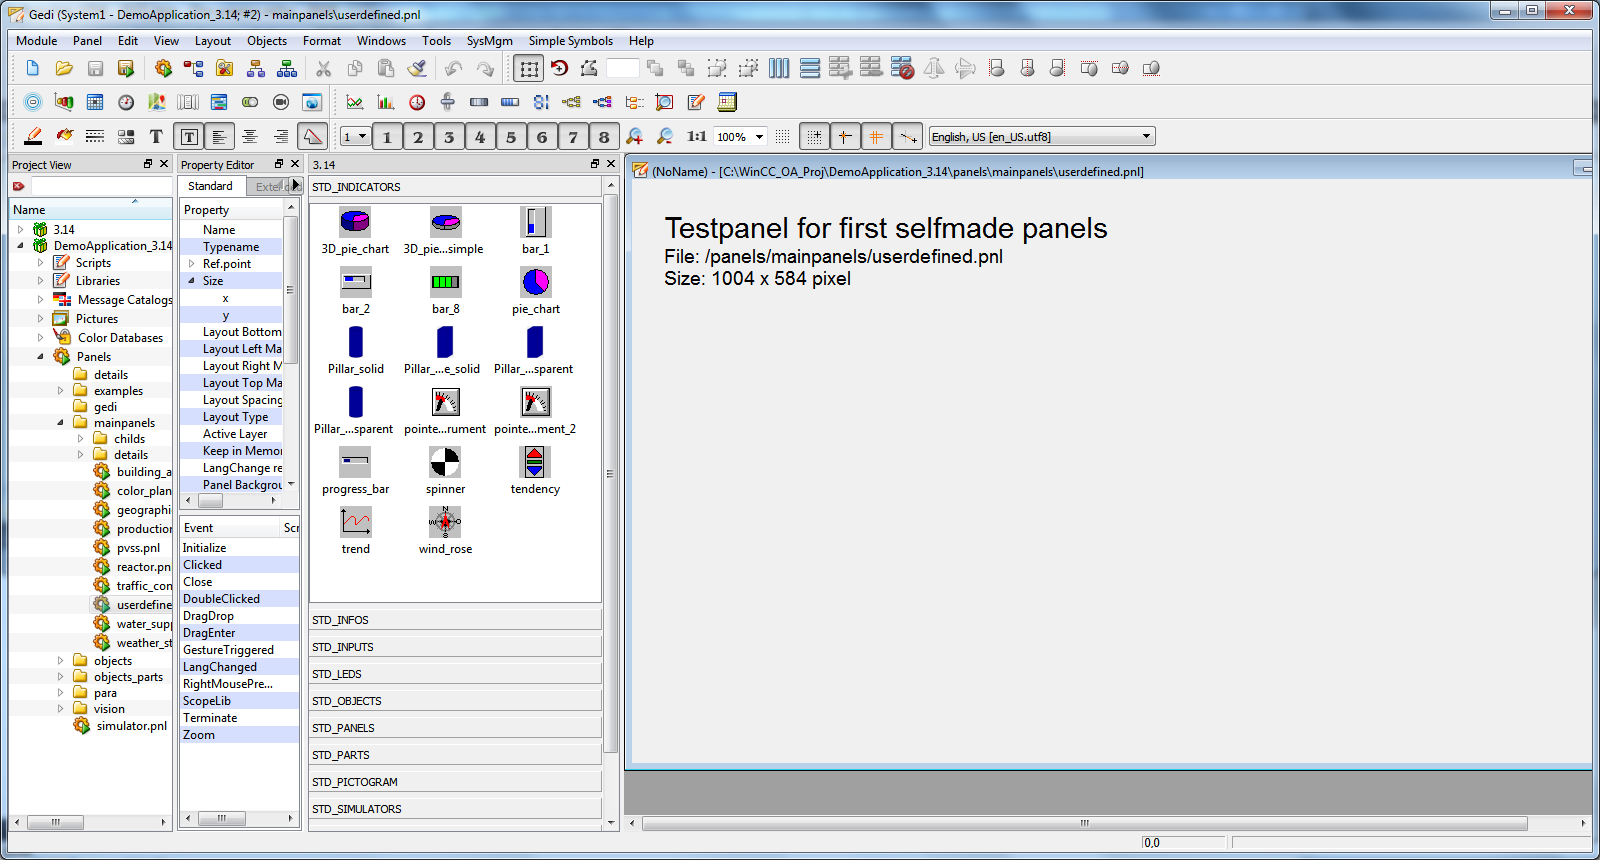
It is best to use the prepared panel
<proj_path>/panels/mainpanels/userdefined.pnl as a
test panel. This fits perfectly into the central operation panel (see also User interface) and can also be opened directly from the
panel list of the specified directory by right-clicking on the layer icon.
For more information on the graphics editor and details on creating panels and symbols, see the sections Getting Started, Module GEDI, Simple configuration and Graphics objects.
Animating the graphics objects can be configured by a Control script or by using the dialog-based utility, Simple configuration.
Overview of graphics capability
Specific panels in the DemoApplication demonstrate in a small way the graphics capabilities and basic functions of WinCC OA. You can access these demonstration interfaces by selecting the last option GUI Possibilities from the Main screens selection in the DemoApplication Start cascade. For more information, see the chapter Introduction to example panels.


