Multi-Screen Configuration
The multi-screen configuration allows configuring user-specific settings for the used screens (multi- monitor mode).
These settings are:
-
selection of the default template with preview for all screens
-
individual configuration of each screen (template selection, resolution, start panel selection)
You can configure the screens at two different points in time and for different purposes:
-
before login - for the user logging in
-
in the template settings - for specific users
At run time you can easily move panels between different monitors. See the end of this chapter.
Multi-screen configuration before login
Through the user login you can specify user-specific settings for the connected screens if these should be different than the default settings. You can specify these settings before a start panel will be displayed in a template after the login.
The multi-screen configuration will open automatically after the login if "Change user-specific multi-monitor configuration" was checked.

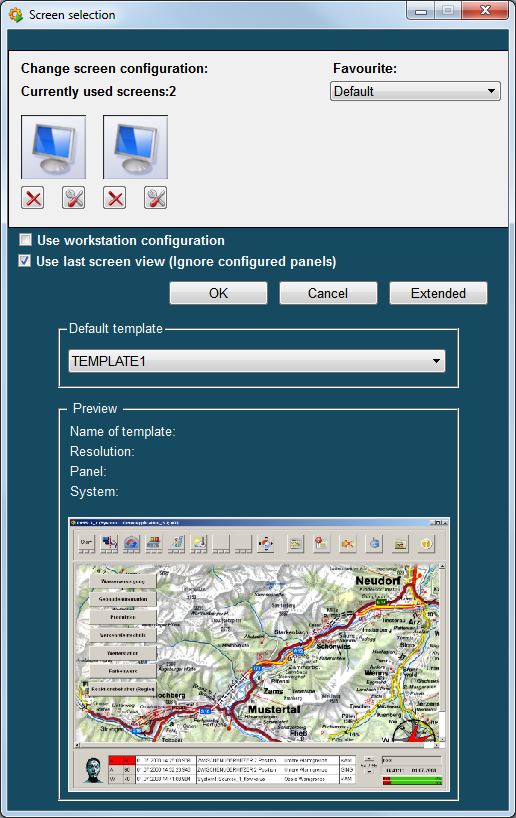
After successful login the following panel is opened.

The "Screen selection" panel shows how many screens are currently connected and can be used. The number of the currently used screens is displayed under "Number of currently selected screens:" (here 2 screens).
The screens that can be used are shown next to each other in the "Screen selection" panel and can be deactivated or individually configured. The view order of the screens does not depend on the location of the monitors, but on the number defined by the used operating system.
Screen deactivation/activation
A screen can be deactivated or re-activated for the user-specific use by
clicking on the icon ![]() or
or![]() .
.
Screen configuration
By clicking on the icon below the illustration of a screen, you can configure it (see User-specific configuration).
Use Workstation Configuration
If you tick this check box, the configured workstation settings will be used.
Use last Screen View (Ignore Configured Panels)
The last opened panel view will be shown. Note that in order to show the last opened panel close the visualization using the "Close visualization" option. Right-click on the user down right in the basis panel.
Favourite
Select your favourite. You can create favourites at run time in the basisPanel. See Favourite Management.
For favourite management and multi-monitor functions (msc_<function name>), see chapter Functions M....
Extended screen selection
Open the extended view of the screen selection by clicking on the "Extended" button (see figure below).
In the extended view it is possible to:
-
specify general settings for all screens
-
view the screen-specific properties
For more information about the view and the settings see General configuration.
Multi-screen configuration in the template settings
The multi-screen configuration in the template settings can be used to configure an arbitrary number of screens for specific users. The user possessing configuration rights can configure settings for other users. These settings will then be opened by default.
You can open the template settings/screen configuration by clicking on the "Template" button in the panel topology (for example menu GEDI "Module->Panel Topology").
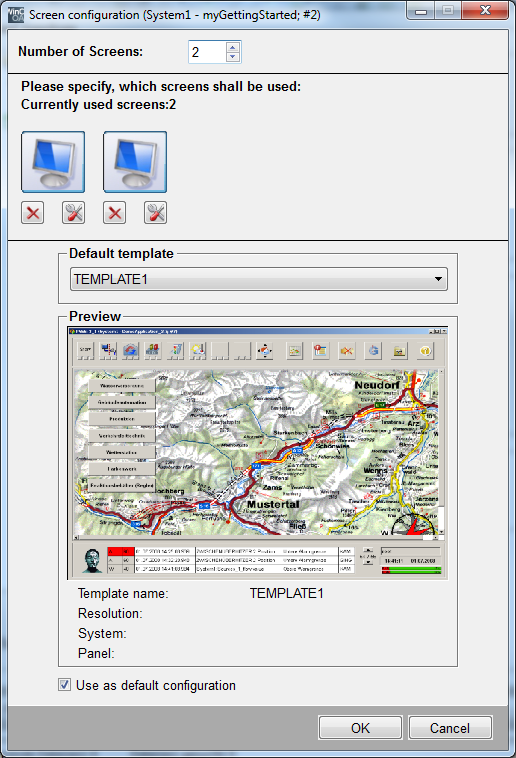
The panel "Screen configuration" is divided into the general configuration and the screen-specific configuration.
General configuration
The general configuration can be used for the configuration of all screens as well as for the view of the screen-specific settings. For the descriptions of the specific fields/settings see General configuration. In the following only the settings that can be configured separately for other users are described.
Number of screens and currently used screens
Enter the number of screens you want to configure or use the spin buttons. The view order of the screens does not depend on the location of the monitors, but on the number defined by the used operating system.
Changes of the display settings at runtime will be applied to the screen only after a reboot of the system.
You can deactivate or re-activate a monitor for the user-specific use by clicking on the icon .
Use as default configuration
Tick the "Use as default configuration" check box if:
-
the currently default template in the screen configuration should be the new default template ("Load default configuration")
-
in the case of a new connected screen that has not been configured yet and should use the default configuration
Screen configuration
By clicking on the icon below the illustration of a screen, you can configure this (see screen-specific configuration).
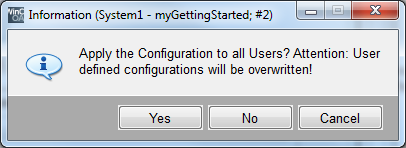
Applying the configuration to selected users
After you confirm the screen configuration by clicking on "OK", a dialog box will be displayed. Confirm by clicking on "Yes" if the configuration should be applied to all users. Note that user-specific configuration will be overwritten.
If this configuration shall be applied only to specific users, click on "No". The panel "User selection" will be opened.
Select these users and add them into the left list "Apply for:". Confirm with "OK".
User-specific configuration
You can use the user-specific configuration to configure individual screens. Click on the button of a screen to do so. This opens the "Screen configuration" panel (see figure below).
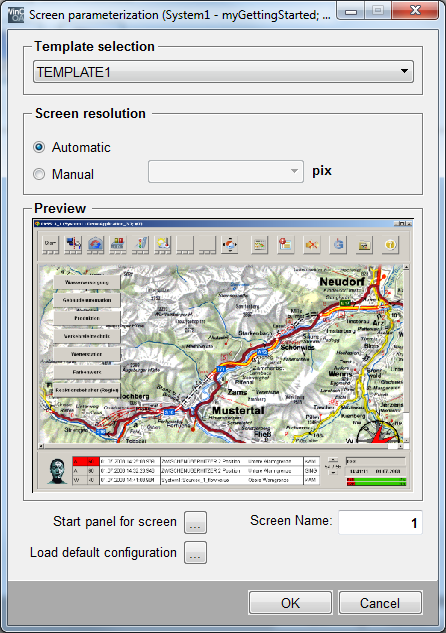
Template section
Select an available template. The template will be adjusted to the resolution automatically. What resolutions are available for the templates is described in the chapter Selecting a panel template.
Screen resolution
Automatic sets the resolution automatically and by selecting manual you can set the resolution manually (in pixel).
Preview
Preview of the selected template.
Start panel for screen
Opens the "Reference configuration" panel. The panel allows choosing a reference panel (see Configuration of the direct-selection feature). You can open this panel through a right mouse-click on the screen illustration in the screen configuration panel.
Load default configuration
Replaces the screen-specific configuration by the default configuration. Hereby the default start panel (reference panel) will not be restored.
OK
Saves the configuration and closes the panel
Cancel
Discards the configuration and closes the panel
General configuration
General settings
Default Template - select a default template that will be valid for all used screens. Note that specific screen configurations will be overwritten! The template will be adjusted to the resolution. For more information about available templates and their resolutions see Selecting a panel template.
Preview of Default Template - preview of the above selected template
View of the screen-specific settings
You can view the screen-specific properties by moving the mouse over a screen image. The border of the image will be highlighted.
Default Template - you cannot change the template here (see above "Screen configuration")
Preview of Screen<screen number>:
-
Name of template - you can change it in the screen configuration panel
-
Resolution - automatic or manually in pixel
-
Panel - the chosen start panel shown in the template. By default: StartPanel
-
System - by default: single system = System1; redundant system = System2
Favourite Management
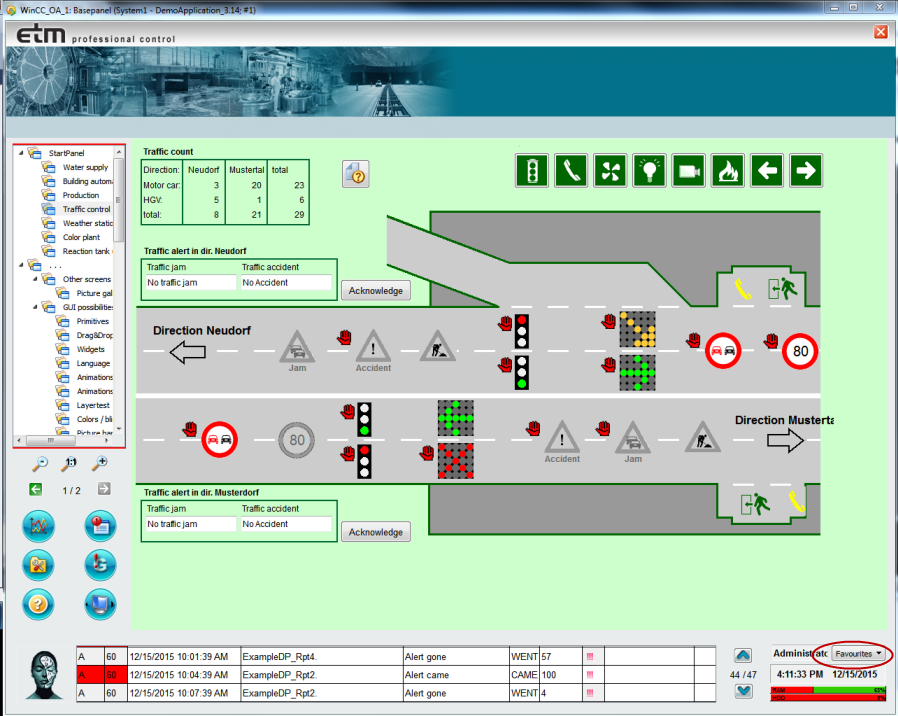
After opening the BasisPanel, you can create favourites (favourite panel views). Left-click on the Favourites button in the lower part of the panel. Select the Favourite Management. You can add the current panel to your favourites. You can also rename and delete existing favourites. You can create several favourites for a user.

To add a new user, click on the Add button and enter a name. The maximum length of the name is 24 characters. Save the favorite by clicking on Apply. The position of the panel will be saved and later opened in the right position.
You can also define different favourites for several monitors. The number of the screen will be displayed next to the screen name. If you want to define different favourites for, for example, two monitors, open the different panels and save the favourite. Two panels will be saved (for example, screen 1 = plant1 and screen 2 = plant 2).
The favourites will be saved user-dependent on data points of type _Ui_Config. The DPs will be named _<userName>_UiConfiguration.
When you click the Favourite button in the BasisPanel, the created favourite will be shown and you can select it.
Move Panel (multimonitor mode)
If you use several monitors, you can easily move panels between these monitors. In the base panel click the button shown below. The screen selection window will be opened and you can move the current panel to another screen.
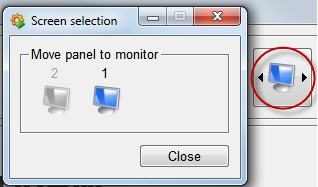
The own screen will be grayed out. If you move the current panel to another screen, the last panel of the panel history will be opened on the own monitor. If there is no panel history available, for example, after a HMI restart, the current panel will be opened.
For favourite management and multi-monitor functions (msc_<function name>), see chapter Functions M....


