PowerConfig Editor, basics
The PowerConfigs included in the software version are usually sufficient when creating a new project and configuring the individual DPs. PowerConfigs are specialized Configs (not so versatile as the Data point configs included in WinCC OA as standard), i.e. special parameters have been predefined that can be changed when the PowerConfig is inserted (for example, "message conversion" PowerConfig - an interpolation curve is used for the conversion type. The parameters WinCC OA Minimum, PLC Minimum, WinCC OA Maximum and PLC Maximum can be changed subsequently). If a message conversion having a logarithmic function is meant to be inserted, for instance, then a new PowerConfig must be created with the specific settings.
Where such specific PowerConfigs are needed, the user can use the PowerConfig Editor (a standard panel included in the software version) to create his/her own PowerConfigs for the project quickly and easily. How to use this panel is explained in more detail on the following pages.
Modifying the PowerConfigs included in the software version, or creating new ones using the PowerConfig Editor, should only be performed by experienced WinCC OA users. Experience in the Control programming language and DP attributes is essential (see Introduction to CTRL and Data point configs).
Settings for the PowerConfigs (for example, fixed and dynamic attributes, default values for configuration of a Config, variables used etc.) are saved in the file <wincc_oa_path>/config/powerconfig. (More details of the structure of this file are given on the page Structure of the powerconfig file). In versions < 2.12.1, the file <wincc_oa_path>/config/dynamic_para.ctl used to be modified accordingly when changes were made to dynamic attributes.
The PowerConfig Editor has been developed to provide a clear and easy framework for
editing the powerconfig file. This panel is divided into 9 tabs
corresponding to each of the sections in the powerconfig
file.
Each tab contains a short information text on what specific settings/functions can be made in this tab.
You must always use the PowerConfig Editor to make changes to the powerconfig file. If you use a text editor to modify the file, then customized entries are not made in the catalog file da.cat (at the end of the file) (see also the Manual input tab).
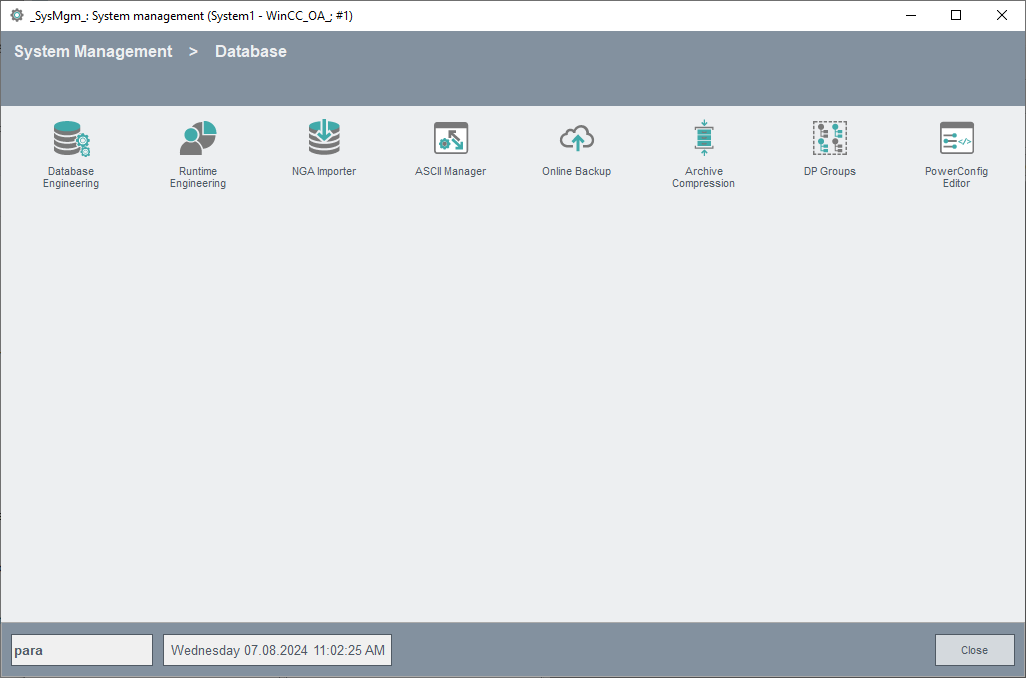
Open the PowerConfig Editor from the System management panel using the PowerConfig editor button in the Database tab.
The user interface, which opens the System management, has to be started with the option "-extend", in order to enable the button for the PowerConfig Editor!

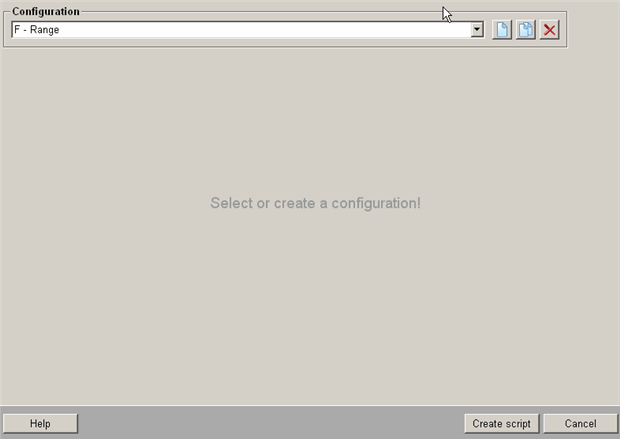
A panel opens for editing the PowerConfigs and dynamic attributes, which the user can modify if required for each data point.

When the panel is opened, first of all the contents of the
powerconfig file are read. Select a PowerConfig from the
Configuration combo box. The other buttons on this panel are:
![]() Create new PowerConfig
Create new PowerConfig
Opens a panel for defining a new PowerConfig (see Creating a new PowerConfig for a DPE or Creating a new PowerConfig for a DPT).
![]() Copy PowerConfig
Copy PowerConfig
With this option you can copy a predefined PowerConfig (selected from the Configuration combo box) together with the specific scripts and parameters into a new PowerConfig. Clicking on this button opens the dialog window for creating a new PowerConfig (see Creating a new PowerConfig for a DPE or Creating a new PowerConfig for a DPT). The settings from the source PowerConfig are automatically adopted in the dialog window (for example, for which data type the Config is defined - bool, string or float; the name of the Config itself - _address, _alert_hdl, etc.). This means that you can change/add to the new PowerConfig according to your requirements without overwriting the predefined PowerConfigs.
![]() Delete selected PowerConfig
Delete selected PowerConfig
Deletes the selected PowerConfig from the Configuration combo box after a
confirmation. The powerconfig file is updated and the deleted
PowerConfigs are not shown in the file first after clicking on the Create script
button.
Deleting of predefined PowerConfigs does not make sense because these are available again in the list after a restart of the PowerConfig Editor. Selected predefined PowerConfigs are deleted from the file in the project directory but after reopening the PowerConfig Editor, the powerconfig file from the project directory is compared with that from the version directory and is updated with the missing points.
Create script: Once all the information has been entered in the panel, clicking on this button opens a panel where you can make an additional check (syntax check) on the full PowerConfig script and save it.
Cancel : Closes the PowerConfig Editor without accepting the changes.
Help : Opens this page of the Online Help.
The following pages describe each of the tabs (possible settings). The PowerConfig for the WinCC OA value range (F - Range) is used to help explain the Editor.
After a new PowerConfig was created or an existent changed, the GEDI has to be restarted in order to apply the changes.
| Chapter | Description |
| PowerConfig Editor, basics | Basic information on the PowerConfig Editor, links to the chapters |
| How the PowerConfigs work | Details on how inserting a PowerConfig works |
| DriverIDs tab | Details of specific drivers for a PowerConfig for the peripherals address |
| Variables tab | Definition of all variables that are needed in the script |
| Input tab | Reading the configured values at the attributes |
| Input calculation tab | Optional calculation of the value |
| Manual input tab | Definition of the attributes that can be changed again for each data point |
| Output calculation tab | Optional calculation of the configured value before setting it to a specific attribute |
| Output tab | Setting the values entered in the configuration panel |
| Default tab | Setting default values for when the PowerConfig is created |
| Source code tab | Display of the PowerConfig script |
| Structure of the powerconfig file | Information on the file that contains the setting for the PowerConfig |
| Creating a new PowerConfig for a DPE | Description of the panel for creating a new PowerConfig for a data point element; step-by-step instructions on creating a new PowerConfig are given using an example |
| Creating a new PowerConfig for a DPT | Description of the panel for creating a new PowerConfig covering a data point type; step-by-step instructions on creating a new PowerConfig are given using an example |


