Configuration of the group alert
Group alerts are used for graphical reporting of alerts occurring in any of the panels defined in the panel topology. This represents a major simplification for the user in handling alerts. If an alert is triggered in one of the panels in the topology it is forwarded through the individual nodes to the central process display panel, and displayed there (in accordance with the configured topology). The symbols used in the navigation bar (below the direct-selection buttons) are used for graphical reporting of the group alerts (see also STD_symbols - STD_PANELS).
In addition to this form of graphical reporting of alerts, a group alert generated from any of the process displays (even those not configured to a direct-selection button) is displayed below the start-cascade button.
The topology shown in the screenshot on the page Setting the node parameters can be used to explain how
graphical reporting of alerts works. If an alert is triggered in the panel
Detail_3 then this alert is reported in the
Plant_3 panel and also forwarded to the Start
panel. The alert is displayed graphically in the embedded symbols
(beside the buttons). This is shown clearly in the screenshots for the Panel
topology/group alert example.
The group alert facility also makes it easy for the user to locate an alert (no matter what panel this alert occurs in and irrespective of whether the panel is open - which makes life far simpler especially when working with large installations containing numerous panels).
The "List of alerts" and "Prio.ranges ..." buttons on the right of the Panel topology/Group alert configuration panel are provided for configuring the group alert function (see also Configuration panel for the Panel topology/Group alert facility - Details).
Configuration of priority ranges
Alerts in WinCC OA can also be classified according to their importance by means of priorities. An alert is classified by setting the priority to a value between 0 and 255 (e.g. a warning has the priority 40 - 59 in WinCC OA). Different alert priorities ultimately affect the color display of the objects used in the panel topology, for instance a flashing yellow signal for a warning. Further details on the WinCC OA alert strategy are given in the chapter Introduction to WinCC OA - Concepts of this Online Help.
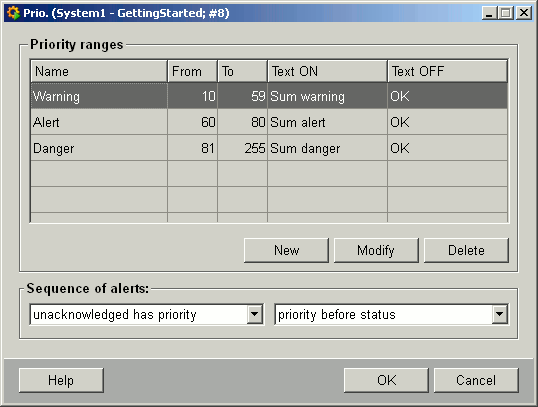
In the panel for configuring the priority ranges you can make general settings that apply to all group alerts. Here you specify the number of different ranges to be handled as a group alert, and their priority.

As described above, alerts are signaled up through the panel tree structure defined in the panel topology. The individual panels can be opened using the standard symbols supplied (see screenshot above) or using the direct-selection buttons, which include additional integrated objects provided for the purpose of indicating alerts. The object displays an active/acknowledged alert using defined colors and flashing frequencies. Three ranges have been configured by default (three integrated objects on the symbol).
The supplied symbols are configured for three alert ranges. If you define more ranges, then you must also modify the standard symbols used for displaying the group alerts to cover the extra ranges.
The ranges defined above can be modified and new ranges can be added in the Priority Ranges configuration panel. The changes are applied across the board to all defined panel group alerts. The panel group alerts are automatically updated whenever the central priority-range settings are changed. This updating is performed on the basis of the panel topology. If, for example, just one range is configured with priority 10-255, then an alert (with priority in the range 0-255) is indicated by the first integrated object for the button.
Clicking on the Prio.ranges ... button opens the panel for configuration of the priority ranges:

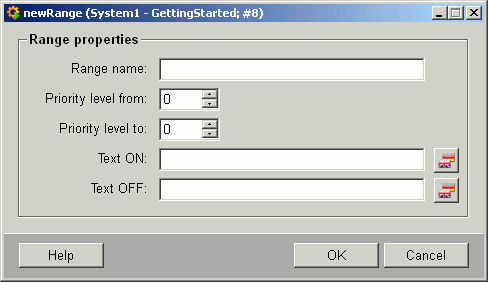
This panel lets you either edit/delete selected priority ranges or create new ones (using the buttons New, Modify and Delete). When you create a new priority range you must also specify the new range name, the priority and the range texts (for ON and OFF).

The default priority ranges in WinCC OA are:
-
Warning: 10-59
-
Alert: 60-80
-
Danger: 81-255
The two combo boxes at the bottom of the priority configuration panel can be used to specify the alert sequence. You can find more in-depth information on alert handling in the Alert Handling chapter.
Left-clicking on the OK button automatically updates all the group alerts in the topology to the new settings.
List of alerts
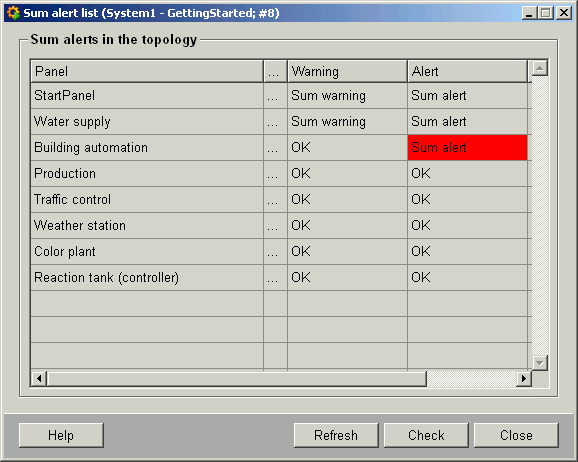
Clicking on the List of alerts button opens a panel listing in a table all the panels that contain a group alert.

Note that alerts, which cannot be acknowledged in the panels of the panel topology, are not shown in the panel topology. Thus, at least acknowledgement (LED display) has to exist in the sub panels.
This panel contains the following buttons:
-
Refresh - Updates the table.
-
Check - Opens another panel in which you can run a check function for all the group alerts. (see also Checking group alerts)
-
Close - Closes the Panel.
-
Help - Link to the Online Help.
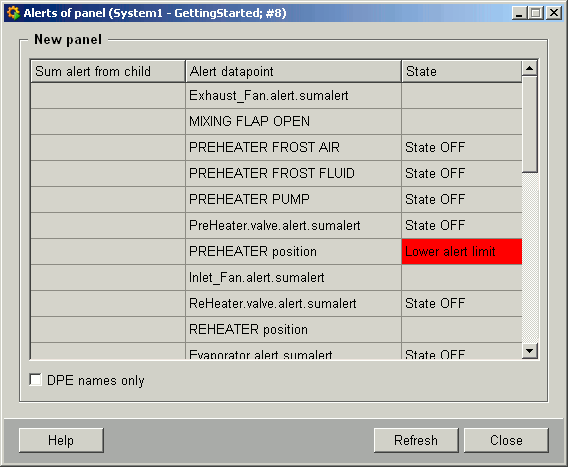
Clicking on any of the cells containing the three dots "..." opens another panel displaying details of the selected line. These details include the associated alert data points (DPE names can be displayed by enabling the lower check box) and the current status (range text) of the alert.

The following buttons can also be used for further actions:
-
Refresh - Updates the table.
-
Close - Closes the Detailed View panel.
-
Help - Link to the Online Help.


