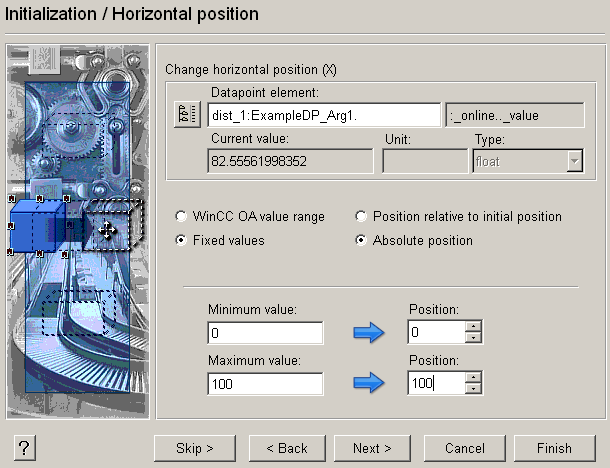
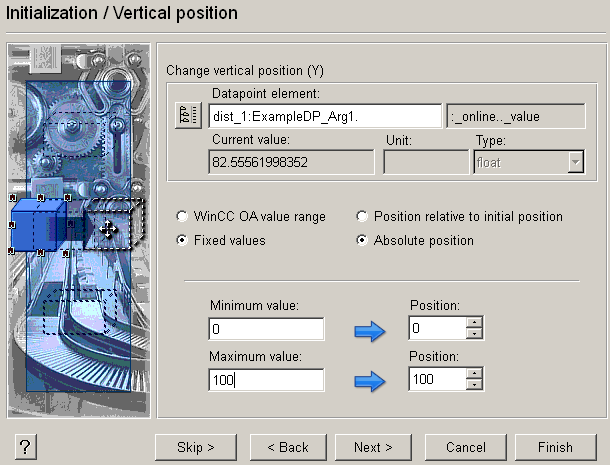
Initialize/Change position
Moves the object depending on the change of the selected data point. Changes in the X-axis and Y-axis direction are configured separately.
Result: The object displays the data point value by its position.
Example: The position of a controller depending on temperature.
The basis for calculating the position of the reference point can be the WinCC OA range created as data point config in the PARA module or fixed values.
Repositioning can be absolute to the panel origin or relative to the starting position of the object.
 Example
For example, you can display an indicator parallel to a scale depending on the shared data point or move it to match the online value. Check the coordinates of the start and end position of your scale in pixels, for example, assume [400, 40] to be the start and [400, 240] the end of the scale. The scale is then 200 pixels in the Y direction.
-
Select the online value of the data point, for example, ExampleDP_Arg1 (see figure above).
-
Select "fixed values" and "relative position to starting point".
-
Enter 0 as "Minimum" and 100 as "Maximum".
-
Enter 0 as "Position" for minimum and 200 as "Position" for maximum.
-
Click Finish.
-
If you want the move to be by fixed values, enter the range in real figures and the related positions in screen pixels (resolution).
-
If you want the move to correspond to the WinCC OA range, just enter the related position in screen pixels (panel unit, depends on resolution).
Open the VISION module and observe how the position ( for example, of your line or reference system) changes depending on the online value. At a value of 45, your "indicator" has moved to 45 ° together with the "line of mercury".


