Configuration of the RDB Archive Manager
After making the settings in the console and the config file, you can now start the project. As mentioned above, you must not launch the RDB Archive Manager when you first start the project as the settings have not yet been made.
Setting the RDB archive parameters is divided into two steps. First you need to make the settings for the RDB Archive Manager itself, then the settings for the RDB archive groups.
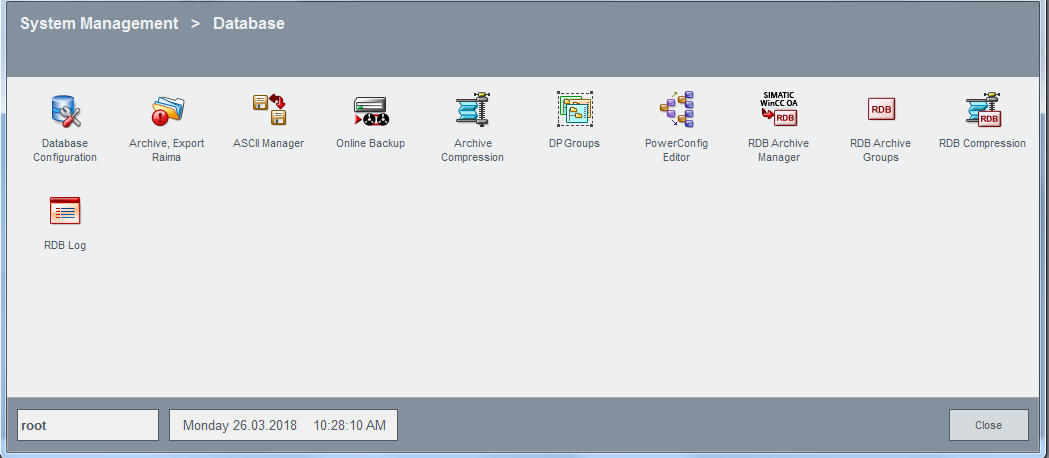
The RDB specific parameter panels are displayed from the System Management panel, Database tab.
RDB Archive Manager settings
Click the RDB Archive Manager button. This opens the main panel for setting parameters and displaying the status of the RDB Archive Manager. The RDB Archive Manager must have been started to perform a successful configuration. See configuration in WinCC OA for information about adding the RDB Archive Manager to the project. See start a manager for information about starting the RDB Archive Manager.
The information box contains a question about the conversion of existing data points that use value archives to RDB, in case if there exist some. Confirm by clicking on "Yes", if the archives from HDB shall be converted to RDB. The value archives will be deleted after this.
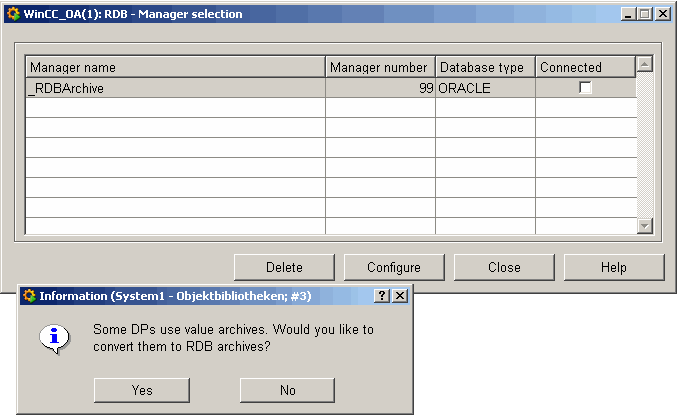
This panel displays a table of the configured managers and their statuses (Manager name, Manager number, Database type and whether a connection or no connection is available to the RDB).
To get information whether a connection to the database is currently opened/closed or when a specific connection has been closed/opened, use the debug and report flags.
It may happen that the internal data point elements "openDBConnection" and "closeDBConnection" have the same value (2 x TRUE or 2 x FALSE) during the RDB manager start. These will be corrected by RDB automatically and a corresponding message is returned in the WinCC OA log viewer.
The other parameter panels for the RDB Manager settings are reached from this main panel. Select a line in the table and click the Configure button to display a panel for editing the settings for an existing RDB manager. The system already has one default manager (name_RDBArchive, number99).
Only one RDB manager may exist in a project.
Note that when using RDB, the value -1 must not be used as the count parameter for the dpGetPeriod or dpGetPeriodRDB functions.
Select an existing RDB Archive Manager and click the Configure button (see figure RDB Manager Selection above) to change the settings.
This panel is divided into four areas:
-
RDB Archive Manager details (top line in panel)
-
Tabs General, Settings, State<computer name>, DB schema
-
Status bar (bottom line in panel)
If the WinCC OA system is redundant and is in split mode, Host1 and Host2 of the redundant system are displayed above the four tabs for selection of the host to configure.
RDB Archive Manager details
The top line of the parameter panel displays the manager name and the internal data point name that stores the settings for this manager. The System name combo box is used to select the system you wish to configure. If the WinCC OA project is not distributed, this combo box appears dimmed.
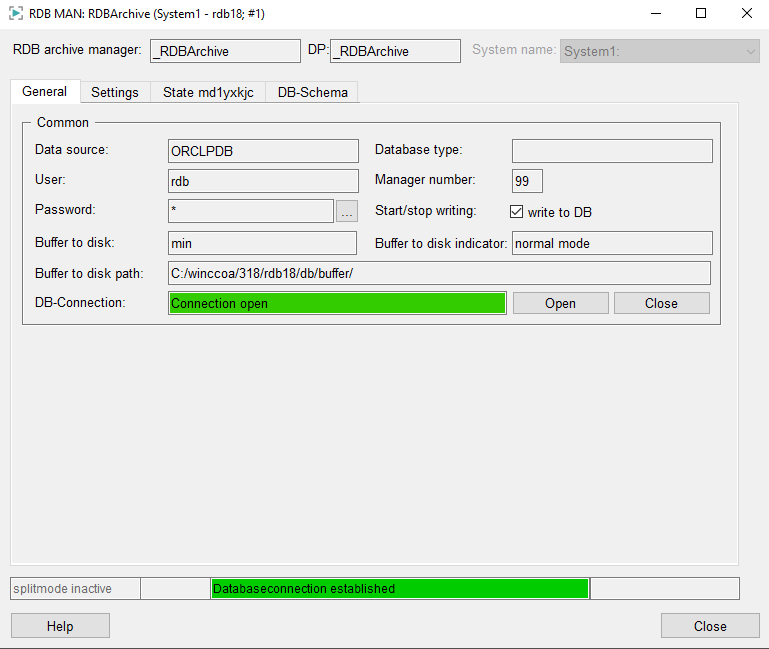
General tab
This tab (see figure above) displays non-editable elements of the internal data point that stores the RDB Manager settings and allows you to input the password for the RDB connection.
Common
RDB archive manager: Name of the RDB Archive Manager.
Data source: Name (for example, Oracle service name from tnsnames.ora) of the computer running the database to archive to.
User: The database user (for example, Oracle Schema). This parameter is applied from the config entry <Db> (see Possible config entries for RDB archiving).
Password: The password for connecting to the database. The ellipsis button alongside allows specifying the password for the database connection. The input of the password and confirmation saves the password in the project. The password that should be specified in this area is the same password as defined while configuring the Oracle database for the application respectively schema user (see also Requirements and installation).
A password can contain up to 15 characters. Do not use longer passwords.
Buffer to disk : The current mode that is used for data buffering (bufferToDisk = 0 without BufferToDisk; bufferToDisk = 1 BufferToDiskMin (Default); bufferToDisk = 2 BufferToDiskMax)
Buffer to disk Path: The path to the directory, where the data are buffered on the HDD using bufferToDisk = 1|2 (for changing see Possible config entries for RDB archiving).
DB Connection: Shows the status of the database connection. You can use the button Open to open the database connection and Close to close it. If you close the connection, the data is buffered. When you open the connection by clicking the open button, the data is processed and values are written into the database.
Database type : Type of relational database (for example, ORACLE). This parameter is applied config entry <DbType> (see Possible config entries for RDB archiving).
Manager number : Number of the RDB Archive Manager (range from 90 to 99 available for selecting a manager number).
The write to DB combo box defines whether you can write data to the RDB or not. You can disable this check box if the database is not available for a brief time, for example for servicing and therefore no archiving of values or alerts is possible.
Buffer to disk Indicator : indicates the current buffer behavior, if buffer to disk is used (see Indicator of the buffer behavior BufferToDiskMax and Indicator of the buffer behavior BufferToDiskMin).
Settings tab
On this tab you can edit the necessary settings for the RDB Archive Manager.
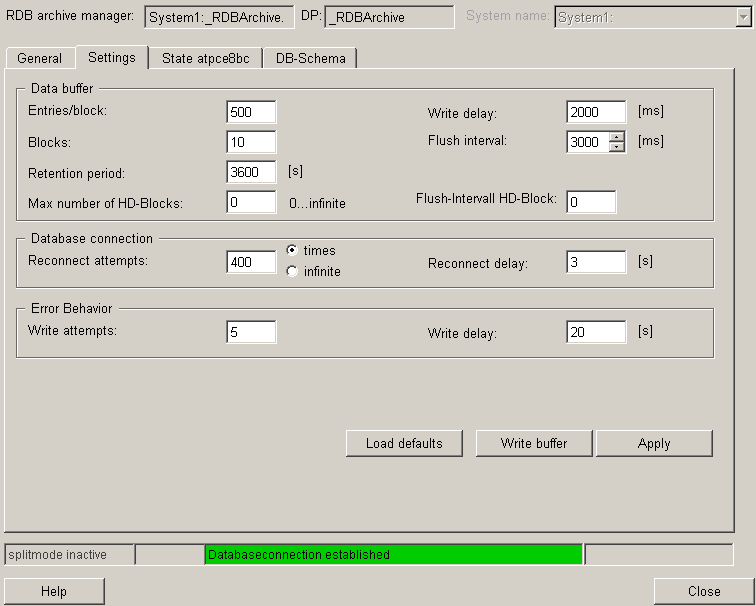
Data buffer
Entries/Block : Number of entries per block.
Blocks : The DB has an internal block buffer. This value specifies how many blocks are in the buffer. If this value is exceeded, a new block is started. Therefore, this value specifies how many blocks may exist at most.
The number of blocks in the internal buffer is written to the internal data point leaf _RDBArchive(_2).buffer.currentBlocks. The leaf always contains the current number of blocks.
Retention period : Retention time in seconds indicates how long a block may be in the buffer. If a block reaches this time limit, the block is removed from the buffer without writing the data to the linked database.
Max. number of HD blocks: Maximal number of blocks, which will be saved on HDD (default: 0 = infinite number of HD blocks).
Write delay: Interval in [ms] between two write attempts.
Flush interval: 0 = flush interval deactivated. Otherwise a block (also when it is not full) is written in the set time interval (milliseconds) into the database.
Flush interval HD blocks: number of entries in a block. If the number is reached the block is written on the HDD (default = after a full block the flush is executed; 1 = after every block entry a flush is executed - minimum of possible data loss, but that increases the system load (on HDD)).
The following parameter values are recommended depending on the system load:
Low load (< 10 values/second)
Entries/Block: 100
Blocks: 100
Write delay: 500
Medium load (< 500 values/second)
Entries/Block: 1000
Blocks: 500
Write delay: 500
High load (>= 500 values/second)
Entries/Block: 1000
Blocks: 1000
Write delay: 200
Database connection
Reconnect attempts : This setting is used if the radio box to the right of the text field is set to Times. This defines the number of attempts to connect to the database (permissible values are integer; default = 400 (= 20 minutes)). If all attempts fail, the RDB Archive Manager cannot start automatically and shuts down. The radio box settings times and infinite allow limiting the settings to a defined number or to set the field to infinite (infinite number of connection attempts until the connection succeeds).
The following applies to the number: If the RDB Archive Manager does not succeed in making a connection within the defined number of attempts, the RDB Archive Manager shuts down (that is, stops) with a corresponding message in the Log Viewer.
Reconnect delay : The interval in seconds between two database connection attempts after one failed.
Error Behavior
Write attempts : Specifies how often the system tries to write an entry to the database if a write attempt failed. If there are more failed attempts to write, than indicated here, to a single block, this block (that is, all elements of this block) is not archived.
Write delay : Interval in seconds until the next write attempt after a write error. When the number of specified write attempts has been reached, there is no further write attempt.
Buttons:
Load defaults : Resets any changed parameters to the default values.
Write buffer : The Write Buffer button instructs the RDB Archive Manager to write the contents of the write buffer to the database immediately and not to wait until the buffer has reached its limit. This button is dimmed while the buffer is being flushed. It is re-enabled once the process is finished. By default, the system attempts to write a full block to the database after the interval set in the Data Buffer section.
Apply: If you change any value in a text box, you can click Apply to confirm the changes. The values are then written directly to the internal data point of the RDB Archive Manager and are then valid for this manager (time depends on parameter).
Max. number of HD blocks: Maximal number of blocks, which will be saved on HDD (default = 0).
State <computer name> tab
Current Error displays the following information:
Error number : Error state of the RDB Archive Manager. The pending error may also have error code 0, that is, no error occurred. The error codes used here always correspond to the error codes generated by the database itself. For more information about error codes, refer to the database documentation (RDB).
Data pointelement: Data point element that triggered this error (when writing to the database).
Error bit: Data point element to append a WinCC OA message handler. If an error occurs, the value is YES (TRUE) otherwise NO (FALSE).
Last Error displays the following information:
Error number : Only error codes that are not equal to 0 are logged, that is, real errors. The error codes used here always correspond to the error codes generated by the database itself. You can therefore read up on them in the database documentation.
Data pointelement: Data point element that triggered this error (when writing to the database).
Connection displays the following statuses:
Connected : Indicates whether the RDB Archive Manager is connected to the database.
Time of connection : Time when the connection was made to the database.
Time of disconnection : Time the database connection was lost.
Redundancy displays the following statuses:
Error state : Internal RDB Archive Manager error state. If the WinCC OA system is redundant, the two RDB Archive Managers can identify which manager has the lower error state.
Switched to active : Time when the RDB Archive Manager was switched to active (if WinCC OA is redundant).
Switched to passive : Time when the RDB Archive Manager was switched to passive (if WinCC OA is redundant).
Under Splitmode you can set the following parameters:
Splitting active : Displays whether splitting is active (YES) or not (NO).
Writing system: The Writing System check box displays whether this system writes in splitmode or the other system (redundancy). If can only be enabled if splitmode is active. Splitmode is set by the internal data point. You can specify which system is allowed to write the data and which is not with this check box.
DB schema tab
This tab can be used to assign database schemas to WinCC OA systems (a database schema can be assigned to each system number). Therefore, it is possible to store several WinCC OA systems in an Oracle database and distribute these to DB schemas.
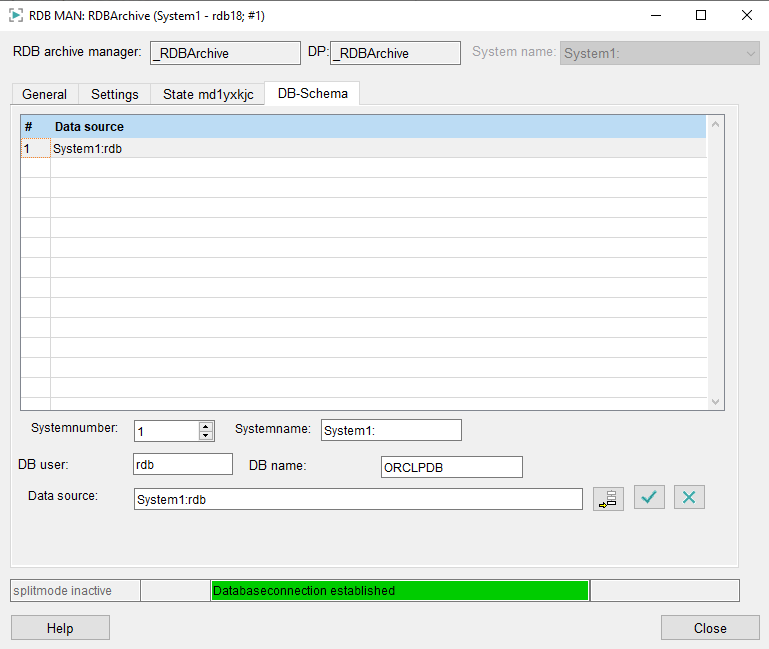
If the configuration of the DB schema and DB links has been changed in the RDB configuration panel, a reboot of the UI is required.
To query data from different databases, the database schemata must be extended with the corresponding WinCC OA system (cf. Configuration of the system name).
Crossed alarm and event queries in a distributed system
To query alerts and events cross a distributed system, the DB Schemata and the corresponding DBLinks must be added inside the RDB Configuration Panel. The settings are applied to the DBs without additional user interaction and allow a cross system access to the stored data.
If there are e.g, two WinCC OA server in a distributed system and they write their data in two separate databases, they must be enabled (linked with each other) in order that crossed system queries are possible. To do this, proceed as followed:
-
Create on each WinCC OA server the RDB project.
-
If the systems are part of a distributed system, the database user and the data source are automatically inserted. Note that if both database schemata are in their separate database, a DB link must be added.
Example 1
System1 writes the data to DBSchema1 in Oracle database "ORCL"; System 2 writes to DBSchema2 which is as well in database "ORCL". No database links are required.
Configuration on System1:
| System2:DbUser2 |
Configuration on System 2:
| System1:DbUser1 |
Example 2
System1 writes the data to DBSchema1 in Oracle database "ORCL"; System 2 writes to DBSchema2 which is located in database "ORCLB".
Configuration on System1:
| System2:DbUser2@DBLINKORCLB |
Configuration on System 2:
| System1:DbUser1@DBLINKORCL |
The database links (names can be selected freely) are automatically created afterwards.
If queries shall be made on a "foreign system" (= the system is not part of the distributed system) or the remote system is not available during configuration, the entries must be set manually.
-
Selection of the foreign SystemNr:
Insert the Oracle DB (as in the tnsnames.ora entry)
Data Source:"SystemName:DbUser[@DBLINKFOREIGN]"
Now the insert of the password for the DB schema on the foreign system is necessary to create a database link. Already existing database links can also be stated.
-
If a event/alert on one system is raised for a database element with _archive config and afterwards the historical events/alerts for both systems are queried (both systems must be set to "Display" inside the Properties of the alert table "Filter system" tab) the alerts and events for both systems are displayed inside the alert and event screen..
Status bar
The status bar at the bottom of the panel displays the current states.
The first field indicates whether split mode is active. The second field shows whether the system writes in split mode or not. The third field states whether a connection has been made to the database or the error. The fourth field details any error that occurred when writing to a DPE.


