Example for an RDB query
The following example illustrates querying Oracle tables with relatively simple means such as an Excel sheet. The procedure described here applies equally to all history data accesses that are not performed directly by WinCC OA. When querying through WinCC OA itself, the usual corresponding methods apply.
Preparing the ODBC data source
If you have not already done so, register Oracle as a new ODBC data source in the system. You can do this in the Windows XP Control Panel under Administration, Data Sources (ODBC). The settings are similar in other Windows versions.
Clicking the Add button displays a list of database drivers available in the system. In the example, connection to an Oracle database called ORAETM2 is intended.
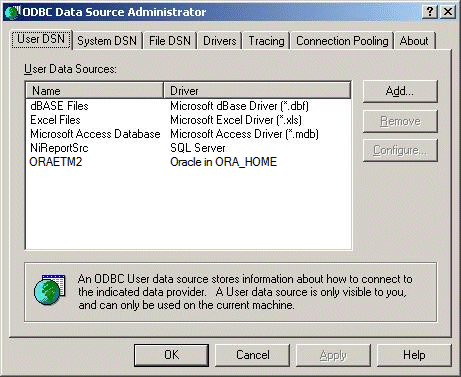
Contact your system administrator to clarify the necessary options.
Preparing Excel
Once the ODBC data source is registered in the system, you can use it in Excel to query data and enter the results in the appropriate cells. The first step is to integrate the ODBC data source in Excel.
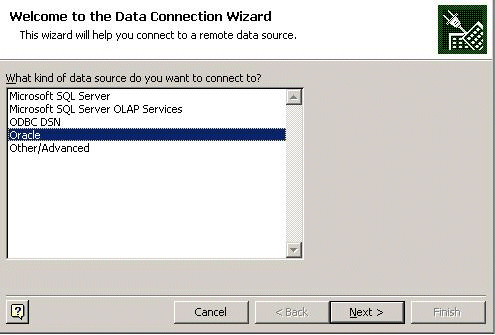
Select the Import External Data from the Data menu and then Import data... . In the Data Connection Wizard dialog box, click on the New Source... button. You can now select the data source type Oracle.
Click the Next button to display a dialog for inserting the server name and registration information such as user name and password. You can obtain this information from your system administrator and it must be identical to the details used for installation of the RDB Archive Manager. You already created a schema with all the necessary tables at least for the user indicated there.
If the details are correct, click the Next > button to connect to the desired data source. The following Connection Wizard dialog shows the tables and views in Oracle for the logged-in user.
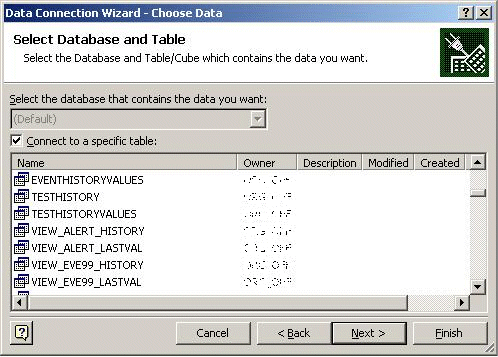
After selecting, for example, the Default-View VIEW_EVENT_HISTORY, you can then query the values with an SQL statement and allocate the results to a cells in the worksheet. The advantage of querying the view is that, unlike Excel, the view itself joins the tables defined in the queries.
Click Next > again to display the final Connection Wizard dialog for entering a name for the new connection. Complete the operation by clicking on the Finish button.
In order to perform a query from Excel, select first the appropriate cells in the worksheet. Assuming that you want to query the data point name, timestamp and value of archived data from this view, you will need to select three cells.
The next steps are basically the same as those for selecting the data source, whereby you now can access the data source you prepared earlier (in this case the selected VIEW_EVENT_HISTORY).
Then, select again Import External Data from the Data menu and thereafter Import data... to display the data source selection menu. This time, however, do not select a new data source but instead the selected view.
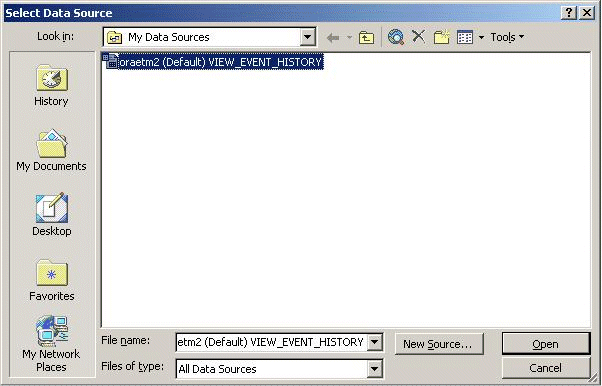
Open the selected data source for reading by clicking the Open button. The next step is querying the data. The Import Data dialog allows selecting the worksheet cells you want to fill and to make any corrections.
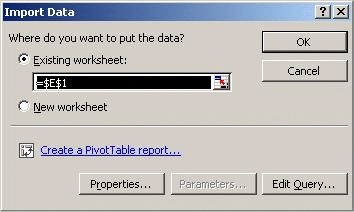
Click the Edit Query... button to request the desired data.
Queries with wildcards take always longer than specific queries of a data point element. Queries of several archive groups take also longer than queries of a single archive group. Queries are executed faster when a query only contains data point elements that are saved in the same archive group.
The changes of the dpIdentification data (unit, alias and comment) that were made when the database connection was lost are not cached and therefore lost.
When a query to the RDB manager leads to an error message (i.e. no data is sent back to the client but an error message), memory is not released and memory usage of the DATA manager is increased.
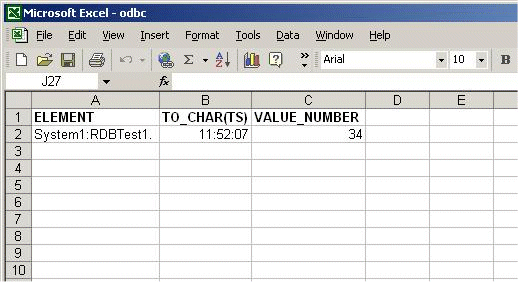
Select the following SQL statement as the Command Type:

The arguments "element", "TS" and "value_number" are of course the names of the tables contained in this view. See Description of tables and views for a breakdown.
If several queries are executed in the UI, a thread is started per query via queryRDBdirect. All threads share the same DB connection. When the UI is closed, the currently active query should be closed too. The UI displays the message 'Database query has been cancelled'. The system, however, waits until the query has been executed before closing the connection.
Use the "to_char" instruction to display the timestamp in the correct format. Click the OK button to close the query editor and return the following result (for example):