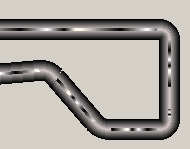
Pipe
With a pipe you can construct pipe layouts in a 3D presentation including T or cross connections.
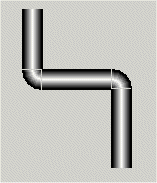
![]() To create a PIPE
To create a PIPE
- Click on the pipe symbol
 in the GEDI.
 - Click in the panel work area. Specify the size and form (drag and left click).
- Open the Property Sheet
- Enter the object name (Name).
- On the "Standard" tab, specify the attributes of the pipe such as begin and endStyle as "open", "closed" or "connector" (see also Properties of complex graphics objects and Control/Control Graphics/Pipe functions).
A double-click on the pipe in the panel during engineering opens the Clicked script.
Fix width for pipes
In order that the width for a pipe does not need to the set separately for each drawn pipe ("width" attribute in the Attribute Editor), with the option "Pipe Width" from the GEDI menu "Format" a fix width in pixel can be set. This will be applied to all new drawn pipes - the width of the pipes that already were drawn will not be changed.
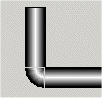
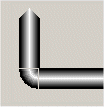
Pipes in edit mode
The usual edit mode is indicated by nine editing points for an object. These can be used for stretching a pipe, moving or editing it.
The following functions are available in the property sheet: Line style, line width and surface formatting such as color and hatching.
The property Dash color can be used to display a two-colored pipe. With the default color "transparent" you get a single-colored pipe.
The "Edit Mode" option of the Layout menu can be used to edit the shape of a pipe. In this you can enable the editing points. Change the shape or contour by clicking on and dragging the corresponding points. The edit mode is disabled by activating the "Move/Scale Mode" (see also Drawing and editing contours).
Note that a click + Ctrl button on an edit point deletes this point and also the surface between this point and the next one.
If you hold down the Shift key during the process, you can draw pipes in a vertical, horizontal, or angled orientation with 15 degree steps more easily.
Flowing effect within a pipe
With the aid of the attributes "flowing" and "flowFillPercent" it is possible to animate a flowing effect within a pipe. The colors for the flow consist of the background and foreground color of the pipe - all WinCC OA colors inclusive dynamic effects are allowed.
Adjustable are:
- the flowing speed
- the flow width
- the flowing direction


