Working with laboratory values
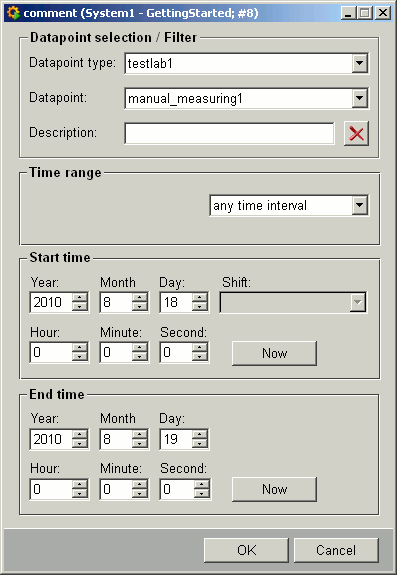
In the following example, use the data point "manual_measuring1" that you have created earlier using compression configuration. The "Laboratory Values Settings" panel suggests this data point because it has the manual input function enabled in the first compression level.
This panel also contains an option for filtering the data points against the description text, for example, against the term "probe" (see Settings panel).
 Displaying data points
In the System Management panel, click on the Laboratory values on the Reporting tab. This opens the Laboratory Values Settings panel.

-
Select testlab1 and manual_measuring1.
-
Select any time interval for the time interval.
-
Enter a start and stop time, for instance, 05.02.02, 00:00 and 06.02.02, 00:00 (see figure above).
-
Click on OK to retrieve and display the data for this interval from the database.
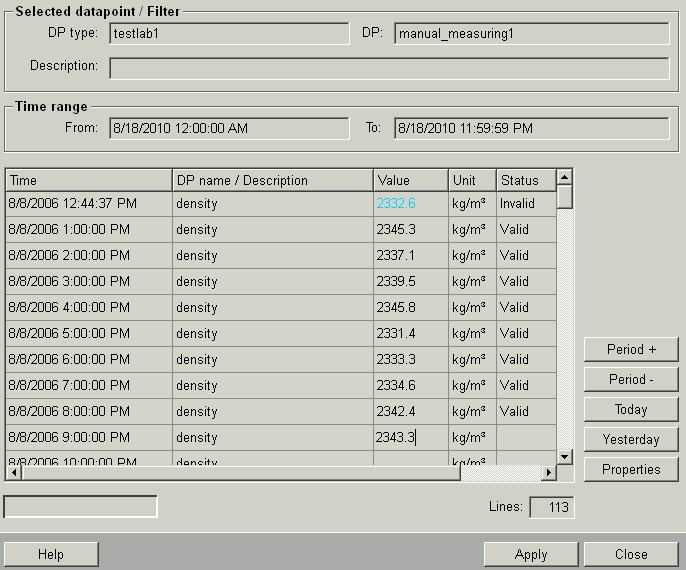
Provided the data points have been saved in the database, they will be displayed (see Laboratory Values panel).
 Entering values
The main purpose of the Laboratory Values panel is to save values in the database that have been generated manually.
In order to save a manually generated value, proceed as follows:
-
Click on the empty value field in the row with the required time value.
-
Enter the reading.
-
Click on Apply.
You can enter values retroactively up until the first deleted or defective file change.
You can only enter values if the archive was enabled at this point in time.
 Changing values
You want to change the value of the "density" at 04:00.
-
Click in the Value column of the row for 04:00 in order to select it.
-
Clicking again changes the background color of the cell to white.
-
Enter the new value into this cell.

-
Click on Apply to save this value in the database.
-
The table now shows the new value.
Clicking on the Period + button displays the following two days for this value provided they do not lie in the future.


