Working with recipes
Once you have created one or more valid recipe types, switch to the Recipes tab. In this panel you will define the set point values for the individual recipes.
Creating recipes
- Click on the New button in the Recipes tab
 .
. - Enter a recipe name, for example "Guinness_beer".
- The Recipe editor opens displaying the data point elements for the recipe type:
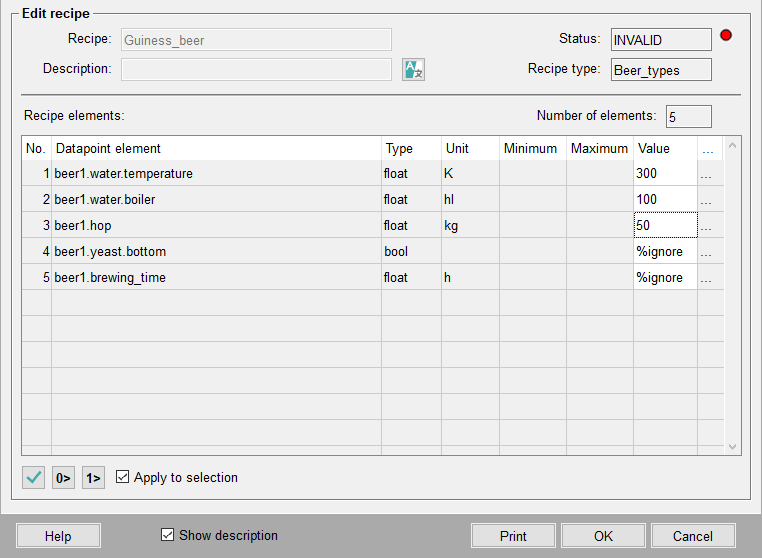
If the Show description check box is enabled then the DPE descriptions are displayed instead of their names (description depends on language).
- Initially the Values column just contains the control code %ignore.
- Click in the columns and enter the required values directly.
- Alternatively you can use the "..." button to set the values in a dialog box:

- Enter your set point values, or use Ignore to exclude elements or Default to use default values (_default config) for the data point elements. If there is no default value then the element is treated as for Ignore.
- Click on OK when you have assigned all the set points you want for the recipe.
Once you have assigned the set points the recipe is added to the list of recipes and is given the status of VALID.
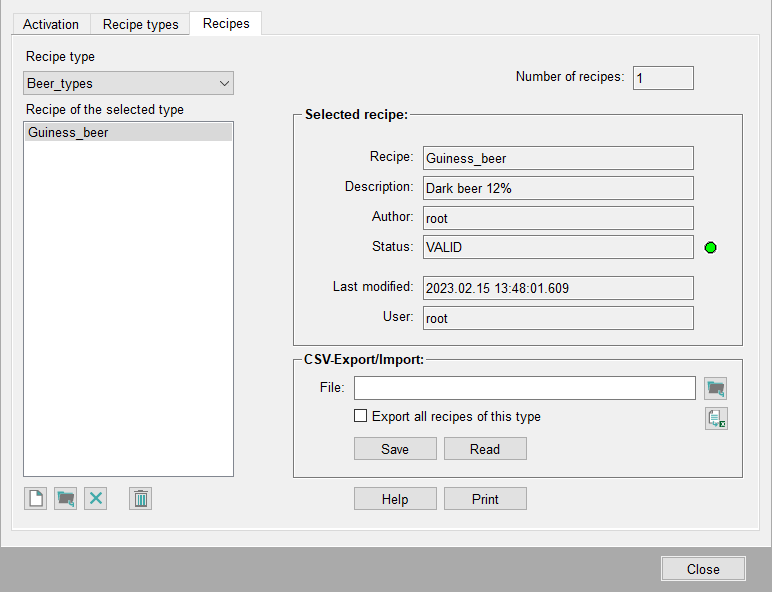
If you have assigned an incorrect value then an error message appears and the erroneous value is highlighted in red. You can only close the panel once valid values have been assigned to every element.
Exporting recipes/recipe type
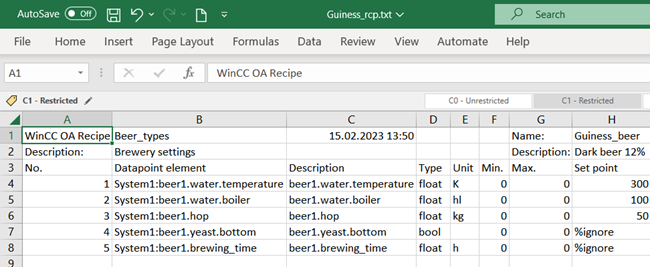
- Enter the required file name for a recipe in the File field, for instance "Guinness".
- Click on Save and Export

- Click on the Excelbutton to view the exported file
 .
.
Clicking on the Read and Import button  lets you import recipes/recipe types from a CSV file into the panel (see Recipe types tab and Recipes tab).
Once you have created a valid recipe for a valid recipe type, you can then transfer the set point values to the relevant data point elements (peripheral devices) using the Activation tab, i.e. you can Activate a recipe.


