Recipe editor
In this panel you can edit the recipes, i.e. this is where you define the actual set point values.
Before you can create a recipe, a valid recipe type must exist. Recipes can be created in three different ways in WinCC OA:
- By entering the data point elements and their values in a table in a WinCC OA panel.
- By creating a CSV file (ASCII) containing data point element names and value strings and importing the file into WinCC OA.
- By saving the online values from a process display in an existing recipe or a new recipe.
All the data in a recipe is saved in the recipe data point. The following checks are performed on a recipe before it is saved (except when the values are taken from the online process display):
- The recipe type is valid
- The recipe is complete
- The recipe contents have the correct type
No check is made to ensure that the values in a recipe lie in a valid WinCC OA value range. This is because recipes can also be used to test installations under abnormal operating conditions.
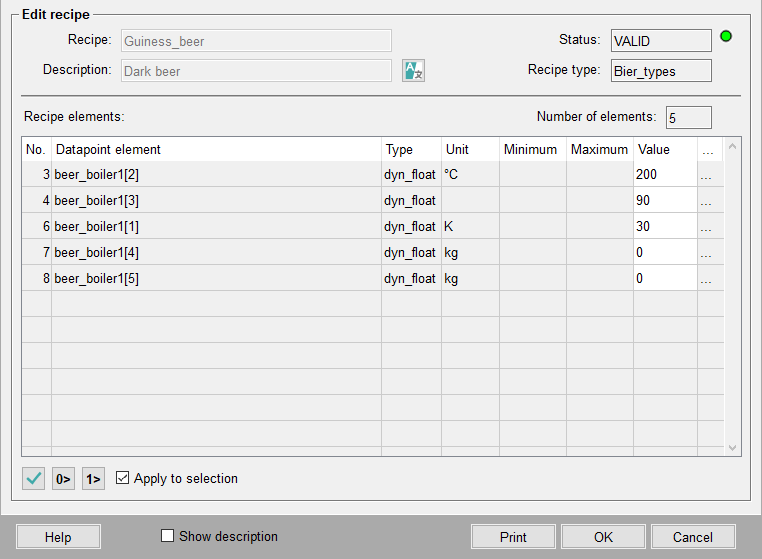
The top of the panel displays the following:
- Recipe name
- Description
- Status
- Recipe type
Descriptions are always shown in the current user interface language. Clicking on the "Language Editor" button (flags icon) lets you specify "Descriptions" in other languages however.
The following information is displayed in the table in the center of the panel:
- No.: Shows the number assigned to an element, which depends on the order in which it was created.
- Data point element: Displays the name of the data point element.
- Description: Shows the description of a DPE (if available) if this option is selected in the check box below the table.
- Type: Data type of the DPE.
- Units: Shows the units of a DPE if applicable.
- Min/Max: Shows the WinCC OA value range, if defined. The min/max values are only provided for orientation purposes; NO check is performed to ensure that values lie within the value range.
- Value: The value that is written to the data point element concerned when the recipe is activated. To specify a value, click on the field and enter a value directly.
- "..." depending on the data type of the DPE, clicking ... opens a child panel to assist you in entering a set point value:
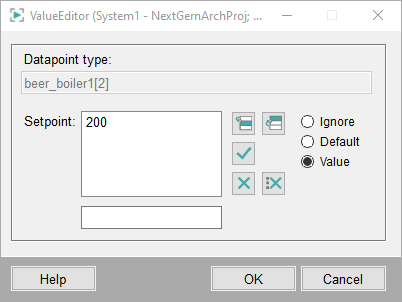
There are 2 important control codes that can be used as set point values and entered directly in the table.
- Ignore: No value is passed to this data point element of this recipe when the recipe is activated.
- Default: If a default value has been configured for the DPE concerned then this is set. If there is no default value then the element is treated as for %ignore.
These control codes can also be set using the radio box buttons in the child panel. The child panel contains an additional radio button Value. Selecting this option provides you with a list or text field for entering the values. The list is provided for data point elements with a dynamic data type (list), i.e. if more than one value is meant to be set. For boolean (bool) data types you can select from either TRUE or FALSE.
Either 0/1 or FALSE/TRUE are accepted for boolean values.
There are three further buttons and a check box located below the table: Adopt online values

This option adopts the online values of the data point elements concerned as the setpoint values for the recipe. It is useful to adopt values from a process display when you want to save (preserve) in a recipe an operating status that you have set up manually.

Set value(s) to 0: Sets set point value(s) to FALSE.

Set value(s) to 1: Sets set point value(s) to TRUE.
Apply to selection: The 3 actions are only applied to the selected element (more than one element can be selected).
Right at the bottom you can select "Show description" in order to display any descriptions provided for the data point elements.
Clicking on OK checks that the set point values are all defined and have the correct data point type. If, for instance, text appears in a value field for a boolean DPE, then this value field is highlighted in red and the error is flagged.
If all elements are correct the window is closed and the status set to VALID.
The recipe can be activated if both the recipe and recipe type are valid. Cancel discards the settings you have made.

Help Opens the relevant section of the Online Help.
The section Working with recipes contains details of how to create recipes.


