Activation tab
The Recipes button opens the following panel which displays the Activation tab by default. If you have not created any recipe types or recipes yet, then you must first create a recipe type in the Recipe types tab. Then you can create recipes for this type (Recipes tab).
Existing recipe types and recipes can be selected from the combo boxes and activated.
This panel contains the following information:
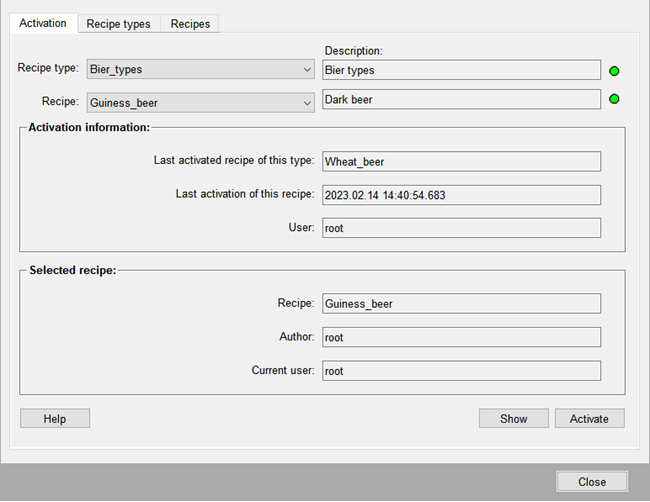
- Recipe type: all available recipe types are displayed here.
- Recipe: after selecting a recipe type, the recipes of this type are listed.
- Description: Contains the description of the recipe type and recipe respectively.
- Color indicators (LEDs): Two LEDs on the right of the text fields indicate the current status. Green means VALID. Red indicates that this type or this recipe cannot be activated because of an error (INVALID).
Note:
Both the recipe and the type must have a valid status before a recipe can be activated. Invalid recipes cannot be activated.
- Activation information: This displays the information that is saved when a recipe is activated. These three fields are empty if no recipe has been activated for the previously selected type.
- Selected recipe: This area displays the recipe name, its creator and the user who last edited this recipe.
- Show: Opens the Recipe editor panel. You cannot make any changes however - it is simply for showing the recipe details and as a final check.
- Activate: Clicking on this button runs a validity check on the type and the recipe. If both checks are positive then the values are transferred to the relevant data point elements, otherwise the process is aborted.
Note:
The section Activating recipes explains how to actually activate recipes, i.e. how to send the set point values to the
peripheral devices.


