File synchronization
It is possible to configure an automatic file synchronization between redundant systems of the standard redundancy. The settings for file synchronization and the directories that should be synchronized are adjusted in a separate panel. Once these are set the synchronization will take place automatically when the system leaves the split mode, or the file synchronization can be initiated manually in the panel.
Principle and functionality
After the extension has been activated (see Activating the file synchronization), the button FileSync is visible in the WinCC OA system overview. After a click on it a panel is opened which allows the configuration of the file synchronization (see View in the system overview and settings for file synchronization).
Standard redundancy
Accordingly the synchronization for the standard redundancy is carried out:
- Automatically: After switching back from the split mode to the redundancy mode.
- Manually: In the panel for configuration of the file synchronization, regardless of whether the system is currently in split mode or in the redundancy mode.
Activating the file synchronization
In order to activate the extension for file synchronization, a Control Manager with the following options must be added to the consoles on the servers.
1. redundant Server:
fileSync.ctl -connectToRedundantHostsStart mode: always
Use a unique manager number for the Control Managers on both systems. Note that the same number may not be used on both redu systems.
2.redundant Server:
fileSync.ctl -connectToRedundantHostsStart mode: always
If the redundancy system is switched during the file synchronization, the file synchronization process is stopped.
(messages are shown in the log viewer). The file synchronization is not automatically restarted or continued.
If the connection between the redundant partners is lost, the Control Manager will try to reconnect to the redundant partner and the connection is re-established when both redu partners are available. Change the manager parameters (e.g. Restart: 99, Reset start counter: 1, see also Administration of managers) for the CTRL manager to continuously try to reconnect.
View in the system overview and settings for the file synchronization
When the system overview is opened, the FileSync button is shown.
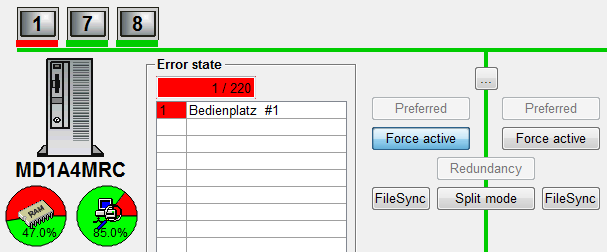
Click on the button to open the panel with the settings for the file synchronization.
Note that the files can only be synchronized from the active partner to the passive one.
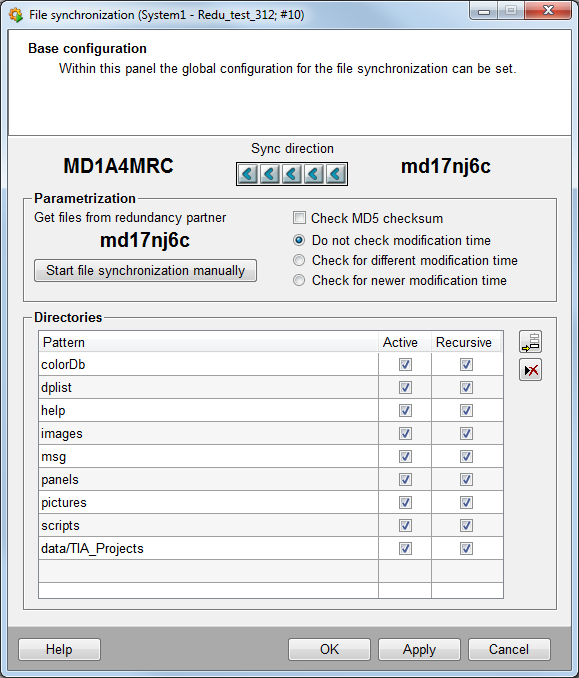
The settings and directories for the file synchronization can be configured in the file synchronization panel. By default the table contains all directories, which are recommended for the file synchronization.
To add a new directory for synchronization click on the ![]() button and enter the directory name in the "Pattern" column.
button and enter the directory name in the "Pattern" column.
The data directory and the backup directory (see Deleting and archiving files via the file synchronization) may not be synchronized.
To remove an existing directory from the synchronization, select the directory from the table and click on the ![]() button.
button.
Using the check boxes in the " Active " column you can specify for a directory whether it is synchronized.
Using the check boxes in the "Recursive" column you can specify for a directory whether the files of the sub directories are synchronized.
By clicking the "Start file synchronization" button a manual file synchronization is initiated.
If the "check MD5 checksum" check box is ticked, a file synchronization takes place, when the MD5 (cryptographic hash function with a 128-bit hash value) checksum of both files is different.
Via the radio boxes you can set, when a file synchronization should be carried out:
- "don't check modification time" - the synchronization takes place without checking the timestamp of the file; Is used when e.g. the MD5 checksum is checked.
- "check of different modification time" - the synchronization takes place when the timestamps on the systems differ; Is used when the system is e.g. a test system.
- "check of newer modification time" - the synchronization takes place when the file on the other system has a newer timestamp.
Deleting and archiving files via the file synchronization
Files that are overwritten or deleted during the synchronization are stored in the data/OnlineBackup project directory (if not another online backup path has been set for the
backup on the host) with the name "projectFileBackUp_<HostName>_<timeInSecondsSince1970>..zip"


