Node-RED - WinCC OA Nodes
The WinCC OA installation of the Node-RED application contains proprietary WinCC OA nodes. They work similarly to the corresponding functions in WinCC OA.
General Configuration of Nodes
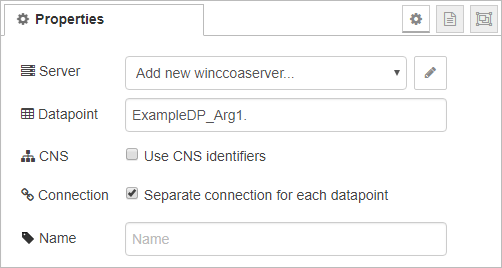
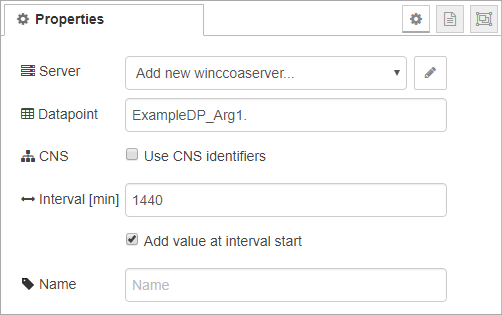
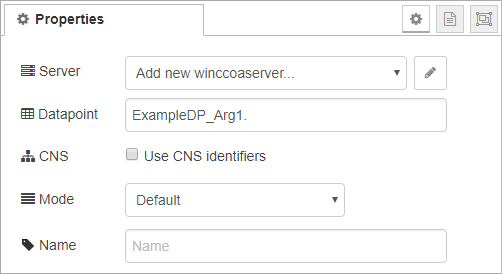
Server Configuration

Every node can specify the server it uses to communicate with WinCC OA. For faster setup, a default server can be defined. After definition of the default server, it is used if this property is left empty.
Clicking the edit button opens the server configuration menu.
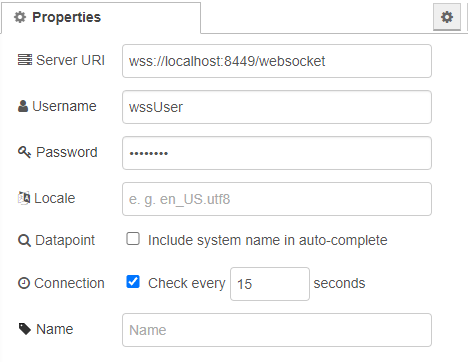
In this menu, first the address of the WebSocket Secure server is specified. The default address is "wss://<hostname>:8449/websocket". If the Port or server name were changed in the config, these changes have to be reflected here.
The WinCC OA User credentials are used to login to the WSS server. These must be the credentials of the user stated in the control manager running the WSS server .
Checking the Datapoint check box defines, if the system name should be included when using the auto-complete function.
Using the Connection option allows the activation of an alive timeout where the length of the timeout can be stated in seconds.
The server can receive a name for better readability in the nodes. Otherwise the full server address is used.
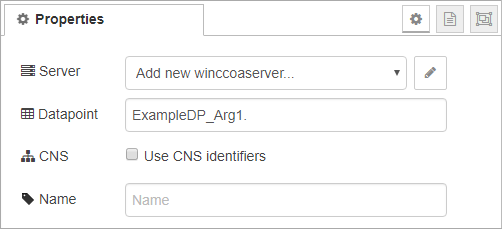
Datapoint Configuration

Most nodes can specify the datapoints or datapoint elements they are connected with. If the server is connected to a WinCC OA system you can use the auto-complete.
Datapoints and datapoint elements can either be specified in the node itself or be set as the topic in the input message. If a datapoint is specified in the input message, while a datapoint has been set as the node property, the datapoint property has priority. This means that the information for the datapoint specified in the node will be retrieved, and the input is ignored. This can be checked in the topic of the output message, as it will always be the datapoint address used.
CNS Configuration

In the nodes containing references to specific datapoints, the datapoints can also be specified by using the CNS identifier. This is done by activating the "Use CNS identifier" check box. If the server is connected to a WinCC OA system, you can use the auto-complete.
Intervall Configuration

Some nodes use a time interval. This interval is set on the node (in minutes) and can be triggered in two ways.
-
The input message contains a timestamp, in which case the interval will start with this timestamp.
-
The input message doesn't contain a timestamp. Therefore, the interval will end at the current time.
The default for these nodes is an interval of 1440 minutes (24 hours), ending at the current time.
Locale configuration

The language for node messages can be filtered directly. This is primarily used for nodes that retrieve a langString from the server (e.g.:alertGetPeriod, dpGetDescription, dpGetFormat und dpGetUnit). The language is defined here in the same format as in the project config file (e.g.: en_US.utf8). If no language is defined here, the project default language is used instead.
The WinCC OA Nodes
dpGet
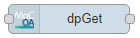
The dpGet node receives an input and then retrieves the current value of its datapoint from the server . The current value is used as output. If a timestamp is included in the input message, the value at the specified time is returned. Multiple addresses can be passed to generate separate output messages for each datapoint.
For more information see the documentation for dpGet() or dpGetAsynch().
dpSet
The dpSet node writes the value received in the input message to the specified datapoint. If multiple datapoints are defined, but the input message only contains one value, then all datapoints will be set to that value. If multiple values are contained in the message, the values will be matched with the datapoints by their index. In case that there are fewer values than datapoint addresses, the values are repeated after the last value is reached (e.g.: for 2 values and 5 datapoints, the datapoints 1, 3 and 5 will be set to value 1 and datapoints 2 and 4 are set to value 2)
See also dpSet() for further information.
dpConnect
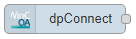
With the dpConnect node a connection to a datapoint is established. The node will pass the current value as output whenever the datapoint value changes. If more than one datapoint is specified, the property "Separate connection for each datapoint" will send a separate output message for every changed datapoint. When this property is deactivated, a separate output message will be sent for every datapoint, including the unchanged datapoints, as soon as one of them changes. If no datapoint is set, an input port is added to the node, and the connections are made to the datapoints given as input. Once the connection to one or more datapoints is established, all other inputs containing the same datapoint addresses will be ignored. The node sends the current value once upon establishment of the connection and afterwards only when a value changes.
The dpConnect node can be disconnected from the connected datapoints by sending a disconnect in the input message. Two different disconnects are possible. The message "dpConnect:disconnect" will disconnect the node from the specified datapoint. The message "dpConnect:disconnectAll" will disconnect the node from all connected datapoints.
Additional information on dpConnect() can be found in the function documentation.
dpQuery
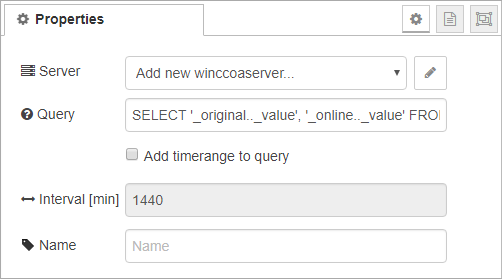
The dpQuery node is used to send an SQL query. The node is triggered by the input node and will then send the query to the server. A time period can be queried either directly by setting an interval ending at the current time or by inputting a timestamp as starting point for the interval. This interval will be added to the SQL query as the "TIMERANGE" parameter if the "Add timerange to query" is selected. If the timerange is already set in the query, the interval input will be cut off. After receiving the queried data from the server, the node passes this data on as output.
For more detailed explanation on usage and structure of SQL Queries, see dpQuery().
dpGetPeriod
This node retrieves the archived values from the time period specified. The given interval either starts at the time specified in the input message or stops at the current time. The first value at the start of the interval is only included if the "add value at interval start" check box is ticked. This value is the current value at the start of the interval, which is typically the value of the last value change before the interval.
See also the dpGetPeriod() function documentation for more information.
alertGetPeriod
The alertGetPeriod node retrieves alert data for a given period of time. The time period is defined with the interval and either the input message timestamp as starting point or ending at the current time. All datapoints elements specified must possess an alert config. You can specify multiple datapoint elements and alert configs. This is either done with multiple datapoint elements with the same alert config, or one datapoint element with different alert-configs. For one datapoint element with multiple alert configs, the messages are combined into one message, containing arrays with the different values and alert attribute names. The node outputs one message for every alarm event.
Further information on alertGetPeriod() can be found in the function description.
dpGetAlias
With this node the alias of one or more datapoints or elements is retrieved from the server. The output message will consist of the topic listing the actual address and the payload containing the alias. A separate message will be sent for each datapoint.
For additional information see dpGetAlias().
dpGetDescription
This node retrieves the description of a datapoint element. You can set a mode specifying what is returned in case no description is found. The description will be given in the language defined in the locale property or in the project default language in the output message.
For more detailed information on the return modes, see dpGetDescription().
dpGetUnit
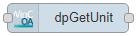
With this node the unit listed for the datapoint elements is retrieved from the server. The unit will be received in the language defined in the locale property or in the project default language.
For more information, see dpGetUnit().
dpGetFormat
The node retrieves the datapoint element format from the server. The format is returned in the language defined in the locale property or in the project default language.
Additional information can be found in dpGetFormat().
dpNames
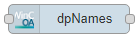
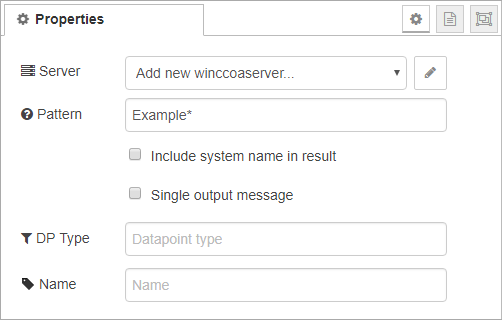
The dpNames node retrieves the datapoint names matching the given pattern from the server. If no pattern is specified, the received message topic is used. Furthermore, a dpType can be specified. This will limit the results to the datapoint type specified. The results can be returned either with system names or not. The output consists of:
-
several messages, with one message for each found datapoint
-
a single message containing an array of datapoints.
To receive the single array, the check box for "Single output message" must be checked.
A more detailed explanation for patterns can be found in dpNames().
Default Server
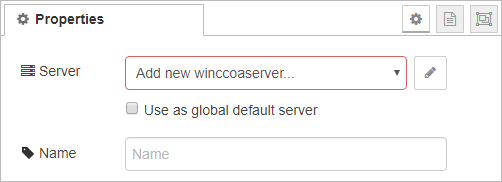
This node configures a WinCC OA server as the Default Server. The server is used for the flow it is placed in. If the "Use as global default server" check box is checked, the server will be used as default for all flows. However, if a flow already has a default server configured, that server will be used instead of the global default.
If a server was not specified in the node configuration, the Default Server is used. Correspondingly, a second server can be used, but has to be specified in all the nodes that use it.
The Default Server node is placed anywhere in the flow and does not have any visible connections to other nodes.


