Node-RED - Overview
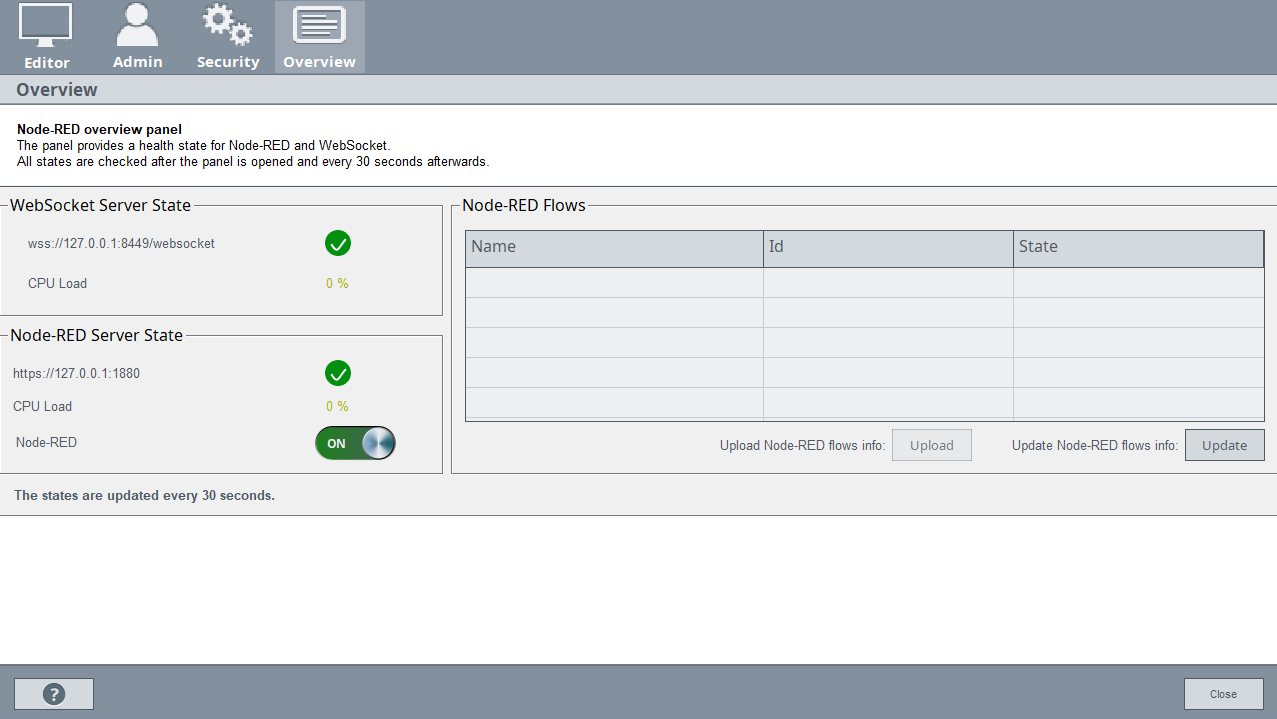
The Overview tab displays Information about the states of the two servers, the currently implemented flows and the programs debug log.
Server State
The Section Server State shows current information about the WebSocket and the Node-RED servers.
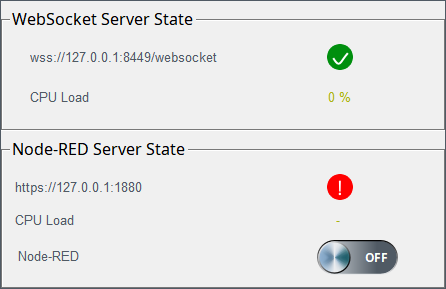
It lists the server addresses with the current connection state as icon. The related CPU usage is estimated as percentage. The toggle-button can stop or start the Node-RED server. Stopping the Node-RED server also automatically stops all flows. The WebSocket server must run in order to operate Node-RED. Starting the Node-RED server triggers a check if the WebSocket server is running. If it is not already running, the WebSocket server will be started. However, stopping the Node-RED server here, will not stop the WebSocket server.
Flows
This section provides an overview of the current state of the flows and a central option to enable and disable them.
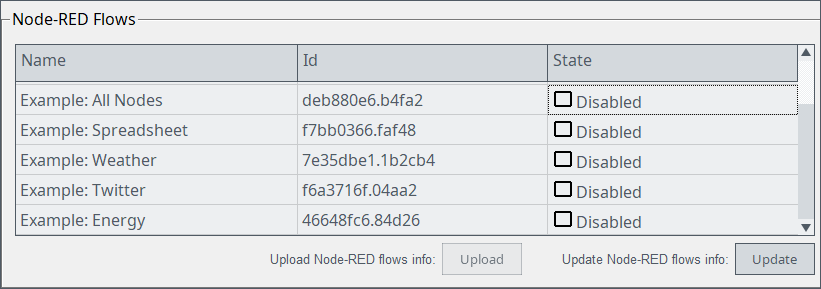
Updating the flow status requires a login by a Node-RED User. You can enable or disable a flow with a simple left click. Any changes made to these states will only become active in the editor if they are uploaded by using the "upload" button. All three columns can be used to sort the flows.
Synchronization of flows within a redundant system
Within a redundant system the flows have to be synchronized between the active and passive servers. This can be done either with the synchronize button or manually.
In order to automatically synchronize flows between servers, the user needs to click synchronize button on the active server. If the WinCC OA project is not configured as redundant, the synchronize button will be hidden.

A manual synchronization requires the following steps:
- Copy Node-RED user data from the active server to the redundant passive server. (The user data storage location is defined in the Node-RED settings file under the 'userDir:' key.)
- Restart Node-RED on the redundant passive server.
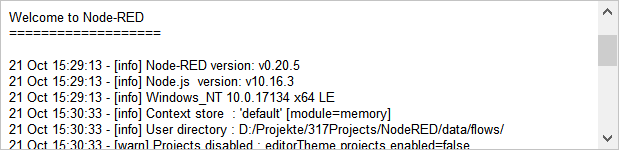
Debug Log
The Debug Log section provides the Node-RED debug messages during start and stop of the Node-RED server. The debug level in the Node-RED Security tab allows you to configure the amount of information displayed.