Mailing list
With Report version 3.1 upwards, it is possible to send reports by email. Once again, the finished report can either be sent automatically using the schedule or manually.
In order to be able to send a report at all, you first need to define the mailing lists that specify the subject and the recipients. To do this, you need to use the Mailing list option of the Report menu.
If Outlook is configured, it is used for the e-mail transmission. If it is not configured, the e-mails are sent via the Excel sendmail mechanism (via another program).
By defining the mailing list, the user of the report has the option to send reports by email. The finished report is added to the email as an attachment. The following screenshot shows a defined mailing list.
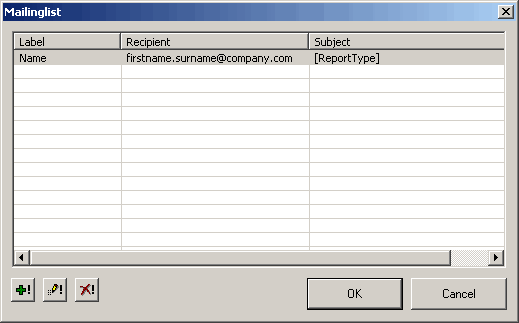
Please refer to Frequently used control elements for details of the button functions. A settings window opens when creating or editing an entry in this list.
-
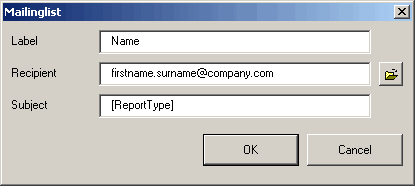
Label : Here you can specify a name for the mailing list that must always be provided when a report is to be sent by email. The label has to be unique. Each label can contain a list with several email addresses separated by a semicolon. The same address can occur in several labels.
-
Recipient : A valid email address must appear in this field.
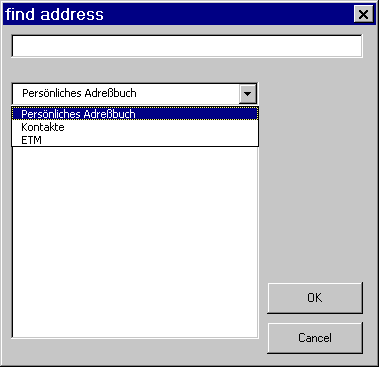
Using the
 button, you can access the email addresses saved in the Outlook address book for
the mailing list in WinCC OA Report:
button, you can access the email addresses saved in the Outlook address book for
the mailing list in WinCC OA Report:
-
Subject : A short text describing the email can be entered in this field. Just as in the header or footer of a report, code words can be entered for the subject (for example, [Reporttype]). See also Control keys for headers and footers.
When entering a code word in the subject line, do not forget the square brackets.
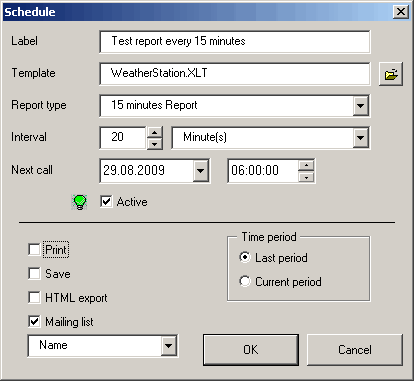
Sending an email using Schedule
When setting up a schedule for automatic report generation, you can now use the Mailing list check box to specify whether the finished report is also to be sent by email to the pre-defined distribution list.
Sending an email manually
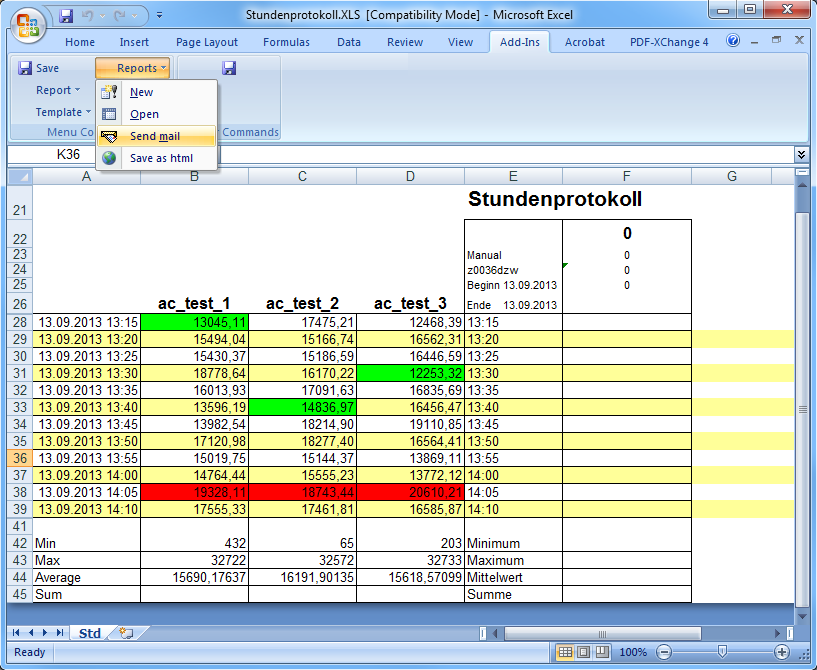
A completed report that is open can also be sent directly by email using the Send mail option in the Reports menu.