Requirements and Installation
Following steps must be performed for a successful configuration of the server-side authentication for UI managers.
Server-side Configuration
- Activation of the automatic unlock in the device management
- Definition of the used Access Control Plugin
- Definition of the web server
Client-side Configuration
- Performing the client specific configuration, e.g. Remote user interface or ULC UX
- Make additional optional configurations.
- Starting the server project, the -ssa option and the webclient_http.ctl.
Server-side Configuration
The server-side authentication for UI managers is not supported when Single Sign On is used.
After adding the Config entries and the CTRL manager start your project. If the project is already running a restart of the project is required.
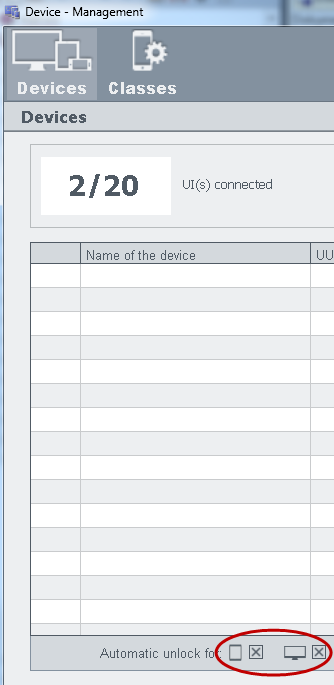
Device Management - automatic unlock
Enable the automatic unlock in the device management (System Management panel -> Settings -> Device - Management) before setting the config entry "AccessControlPluginUser" (see figure below).
Start the user interface once after enabling the server-side authentication for UI managers activation. Thereafter deactivate the automatic unlock in the device management again.
Figure: Device Management
Configuration - Access Control Plugin
Following 2 parameters are required inside of the config file to successfully configure the server-side authentication for UI managers.
[general]
accessControlPlugin = "AccessControlPluginUser"
[general]
accessControlPlugin = "AccessControlPlugin"
The entry "accessControlPlugin" defines which plug-in is used for the server-side authentication for UI managers or for the server-side authentication for managers. See also Access Control Interface, Basics
[webClient]
clientSideAuth = 0The entry clientSideAuth = 0 specifies that the server-side authentication for UI managers is used.
Configuration - WebServer
Specify the WebServer as follows:
[ui]
httpServer = "https://localhost:443"
Client-side Configuration
Following configuration is required for the corresponding used clients:
Remote UI / Desktop UI Configuration
When using a Remote user interface or the Desktop UI following config entries must be added to the config file of your server project:
[general]
accessControlPlugin = "AccessControlPluginUser"
When you use the Server-side Authentication for Managers, use the config entry
[general]
accessControlPlugin = "AccessControlPlugin"
In order to use the HTTP server authentication, add the httpAuth=1 config entry and the httpsPort and httpPort entries to the webClient section of the config file.
[webClient]
httpAuth=1
httpsPort = 443
httpPort = 0
ULC UX Configuration
Activate the server-side authentication of the ULC UX by adding following config entries to the config file of your server project:
[httpServer]
uiArguments = "-p vision/login.pnl -centered -iconBar -menuBar -ssa"
Optional Configuration
aliveTimeout
In case of a high latency of the network connection between client and server it may be necessary to increase the aliveTimeout for the data and event manager communication, e.g.:
[data]
aliveTimeout = -2
[event]
aliveTimeout = -2
uiUsesMainServerAsFileServer
The entry "uiUsesMainServerAsFileServer =0" is required to prevent redirection of the UI to an additional web server for downloading project files. In this case all files (panels, scripts, ...) that are required for the UI must be located inside of the project which is used to start the ULC UX server.
[httpServer]
uiUsesMainServerAsFileServer = 0
Start-up panel
To specify a start panel when the UI is started, use either the rootPanel entry for UI:
[webClient]
rootPanel = "vision/login.pnl"
or the mobileRootPanel entry for the mobile UI application:
[webClient]
mobileRootPanel = "vision/login.pnl"
If these config entries are not set, the login.pnl is shown.
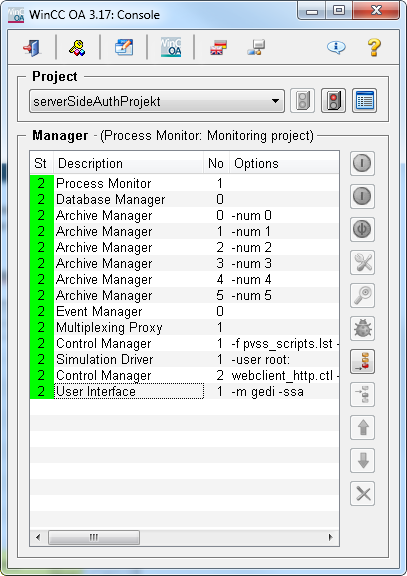
Starting the server project
Start the server project. Add the -ssa option so that the client can connect to the WinCC OA HTTP server and add the webclient_http.ctl script to the project. See figure below (here the local computer localhost is used as server):
Figure: Server project and the -ssa option as well as the script webclient_http.ctl
Now you can start the client of your choice such as ULC UX via https://localhost/data/ulc/start.html
-
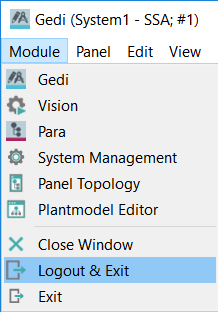
Every module has a "Logout & Exit" option if the UI was started with the option -ssa. The "Logout & Exit" option removes a user/password that were saved via the check box of the authentication dialog, from the list of stored credentials. Therefore, the HTTP authentication dialog is shown the next time the UI is started.
Figure: "Logout & Exit" option
In the GEDI status bar there is now an additional field showing the current user name:
Figure: User Name in the Status Bar
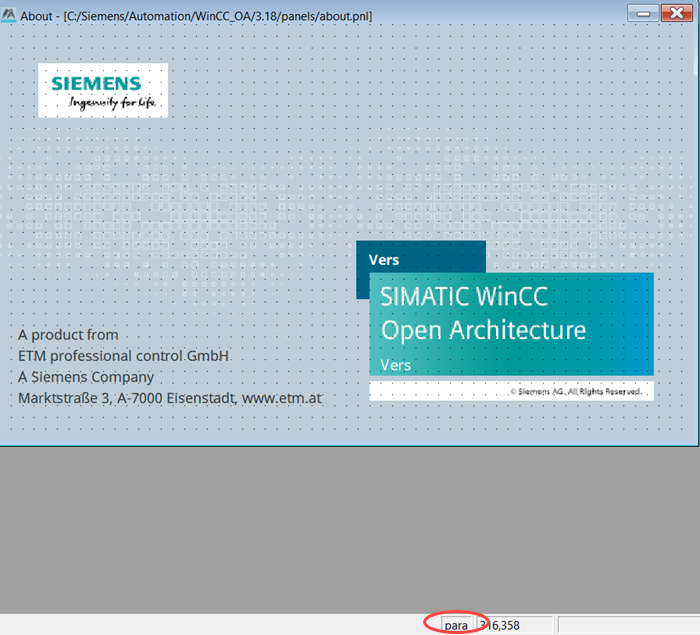
Note that the user name is only filled on startup. If a user change occurs while GEDI is running, the field will not be updated.


