Remote UI
If you want to open a user interface on a remote computer over a network or dial-up connection, proceed as follows:
- A TCP/IP connection is required
- The same WinCC OAversion is required on the server and on the client. At the least, a minimum installation of WinCC OAhas to be available on the client computer. Note that if the configuration module (PARA) has to be used in a remote UI project, you must perform a full WinCC OAinstallation on the client.
- The project directory must be shared on the server computer (data and event host) for client user. Note that a project that is not executable, cannot be selected as the server project. Under Linux, the project directory has to be mounted with nfs.
- The license file of the server must allow enough user interfaces (UIs) for all locally used UIs as well as for all remote UIs.
- The user interface numbers used on the remote computer must not be in use on the server computer when using a remote UI. This is only valid if you assign fixed numbers to the UI Manager on the remote or server computer by using the command line option "-num". If you do not use this option, the Data Manager automatically assigns the numbers to the UIs in your project.
- Mixing of 32-bit and 64-bit on client and server is supported. For more information please refer to software-requirements.
Example for creating a remote UI project
- Click on the New project button in the project administrator panel.
- Select the option Remote UI project.
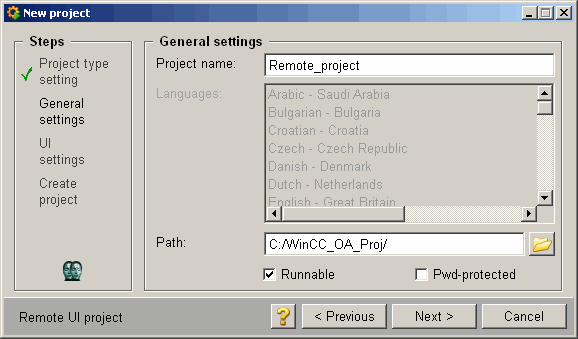
- Define a project name and project path for the project (see figure below).
Figure 1. Create a new Project 
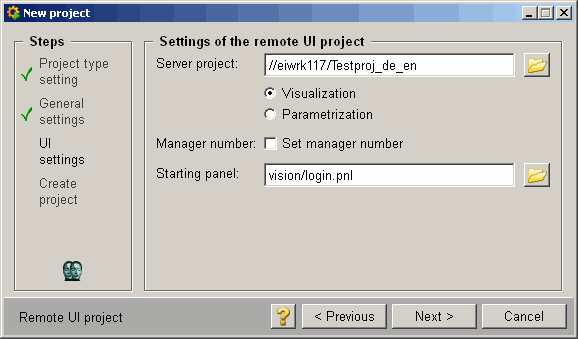
- Click Next > and select the server project.
Figure 2. Settings of the remote UI Project 
- Click Next > and create the project. Select the created project from the project administrator panel.
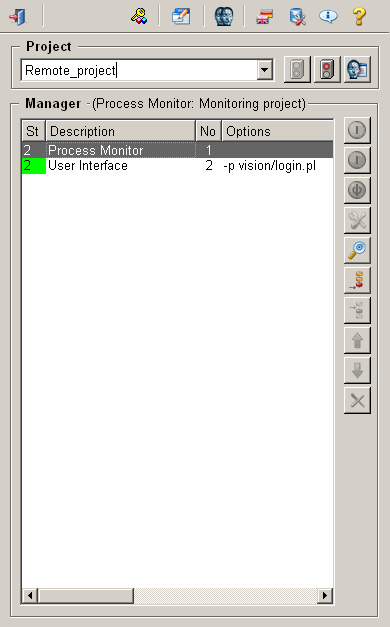
- Start the project with the start project button. The
console opens and the project will be started. The console should look as in the
figure below.
Note:If you choose the configuration option for your project, no starting panel can selected. The GEDI will automatically be used as starting panel. The visualization mode allows only to display panels, The configuration mode also allows to configure data points.
Figure 3. Start the Project 
The config file of the remote project could look as follows:
[general]
pvss_path = "C:/Siemens/Automation/ WinCC_OA/<version>/"
#Remote project path
proj_path = "//eiwrk117/Testproj_de_en"
#Local installation directory
proj_path = "C:/WinCC_OA_Proj/Remote_project"
#Local project path
proj_version = "<version>"
langs = "en_US.iso88591"
event = "Eiwrk117"
#Computer name of the server
data = "Eiwrk117"
#Computer name of the server
pmonPort = 5001
The config entries "data"/"event" have to be set correctly and can also be specified using the IP addresses, for example:
data = "192.168.0.2"For more information on these config entries, refer to Config File Entries.
The console writes messages into the log file of the local project
<proj_path>/log/PVSS_II.log. Error messages are written
into the local log directory only for local managers.


