Users
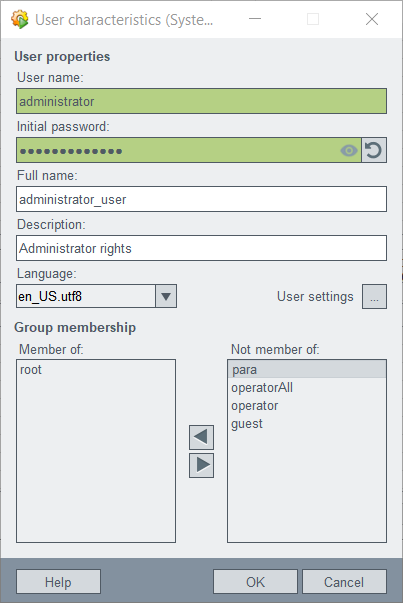
An arbitrary number of users can be defined in the WinCC OA user administration. Users can be added via the User characteristics window shown below. The User characteristics window also allows assigning group memberships to users. A user has to belong to at least one group. The default password of the predefined users is an empty string. The user root cannot be deleted.
The maximum number of users depends on the operating system (maximum number of unsigned integer).
User Properties:
User name : Name of a user. Note that the User name is unique and cannot be changed.
Full name : Define a more specific name for a user.
Description : Description of a user.
Language : Select a project language.
Group membership :
Member of : Shows the groups a selected user is member of. Note that the group membership is only shown in the WinCC OA user administration. Specify which permissions a user has via the Group Membership - see chapter Groups.
Not member of : Shows groups that the user does not belong to.
 Assigns a group membership to the user.
 Deselects a group.
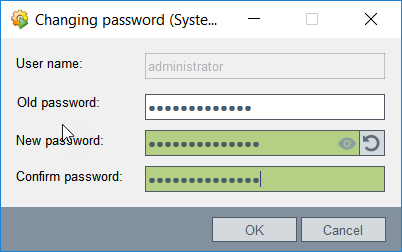
Password: Opens a window where you can change the password. The Password button displays three text fields: Old password, New password and Confirm password. Note that a password can only be set after the corresponding user has been created!
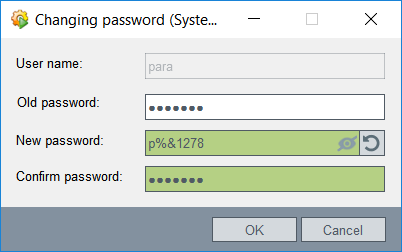
The password policy specifies that a password must contain at least eight characters. One of these characters must be an uppercase letter . The password must also contain a special character .
The password policy is valid only for users created in WinCC OA. You can use the config entry passwordPolicy in the auth section of the config file to deactivate the password policy.
The policy is not valid for users of the OS Auth. User Administration (Windows/Linux).
You can change the "Password Policy" in the script "PasswordPolicyConfig.ctl". You can find the script in wincc_oa_path/scripts/libs/classes/userManagement. Change the constants: UPPERCASE_LEN, UPPERCASE_CHARS, LOWERCASE_LEN, LOWERCASE_CHARS, SPECIAL_LEN, SPECIAL_CHARS, DIGIT_LEN, IGIT_CHARS, PASSWORD_LEN and PASSWORD_CHARS.
A WinCC OA password should be changed by users, especially administrators only on secure clients. A description of secure clients can be found within the WinCC OA Security Guidelines.
In the Windows user administration, Passwords may only be changed by users with root rights!
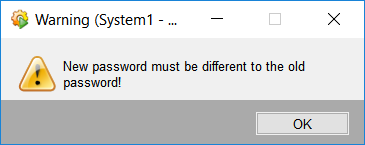
In order to change your password, type the old password in the Old password text field and the new password in the New password text field. An empty password is not allowed. Confirm the password and press OK. The password has been changed. Note that your new password must differ from the previous password. If you enter the same password, an error message is shown:
If the password is not allowed such as an empty password, an error message is shown and the password field is colored red.
Note that only users who posses the administrator rights can change the password for other users. A user who possesses the administrator rights does not need the old password in order to change a password. Specify what bit defines the administrator rights in the panel System Permissions.
You can display the password via the eye symbol. Use the  button to generate a random password.
Deactivated WinCC OA users can be activated by pressing the Activate user... button in the user administration panel. The button opens the user activation window shown further on. All deactivated users are shown in the user activation window. Only activated users may use the system.
A user with the required authorization can activate and deactivate users only in the WinCC OA user administration. The user root can additionally compare WinCC OA users (that were copied from the Windows administration into the WinCC OA user administration) with the Windows users. The users are enabled (activated), disabled (deactivated) or locked in WinCC OA depending on their state in the Windows user administration.
Figure:
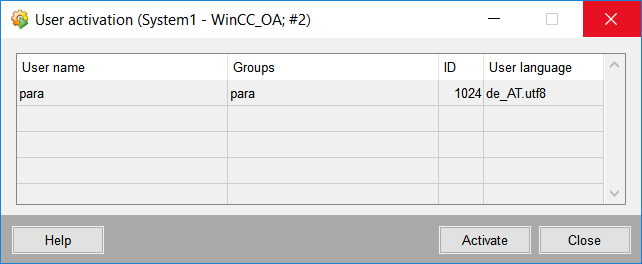
The user activation window shows:
- User name: Name of the user that can be activated. Note that several users can be selected and activated at once.
- Groups: Shows the group(s) the user belongs to.
- ID: Shows the user ID.
- User language: Shows the chosen project language.
The Activate user button activates the chosen user(s).
Predefined users
The following predefined users are created by default when creating a new project.
| User Name | ID | User Permission (Authorization level) |
|---|---|---|
| root | 0 | User root possesses all bits. |
| para | 1024 |
User para possesses the bits: 1,2,3,4, and 5. |
| operatorAll | 2048 |
The operatorAll possesses the bits: 1,2,3 and 5 |
| operator | 3072 |
The user operator possesses the bits: 1,2 and 5. |
| guest | 4096 |
The user guest possesses the bit: 1. |
| gast | 4097 |
The user gast possesses the bit: 1. |
| demo | 4098 |
The user demo possesses the bit: 1. |
For the description of the user permissions (authorization levels (bits)), see chapter Authorization levels.
Clean up Engineering and Test Users
- Back up the project or copy the project to a "preparation"-computer.
- Delete the engineering/test user by using the button "Delete user" (deactivated permanently). The user is saved to the data point _Users: _Deleted_Users).
- Delete engineering groups and engineering areas if these exist.
- Stop the command channel manager. By default the command channel manager is automatically started with the winccoa_path/scripts/pvss_scripts.lst script when a project is started. See also chapter Command Channel.
- Delete the _Deleted_Users data point via PARA.
- Start the command channel manager.
- Create users, groups and areas as needed on the target system. Assign rights as needed.
- Delete value archives (HDB).
-
- Stop the project.
- Delete VA directories (<projname>\db\wincc_oa\VA_[number]).
- Start the project.
- Test if the system works with the groups and users as intended.
- If the test is positive, copy the project to the target system.


