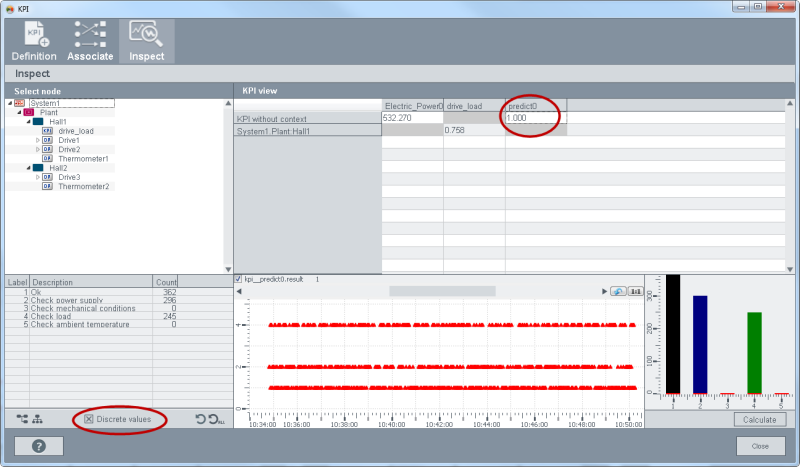
KPI Wizard - Inspect - Discrete Values
The Discrete Values check box is only available when a KPI Instance is based on the built-in ssc_predictCondition function and the KPI instance is selected in the inspect panel. The ssc_predictCondition calculates a system state based on the previously generated Random Forest model and the current values. The Discrete Values check box switches from a continuous view to a categorical view in the inspect panel. The following example use case shows predicted labels and the frequency of the labels in the system as well as displays a histogram. It describes how to define a KPI which is based on the ssc_predictCondition function and the usage of the Discrete Values check box.
How to proceed to control the concrete values of a specific random forest model:
Classification wizard
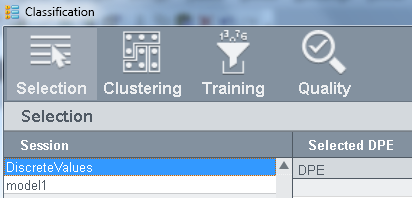
Open the Classification wizard and the Selection panel:
-
Create a new model "DiscreteValues".
Classification wizard - Selection panel - new model
-
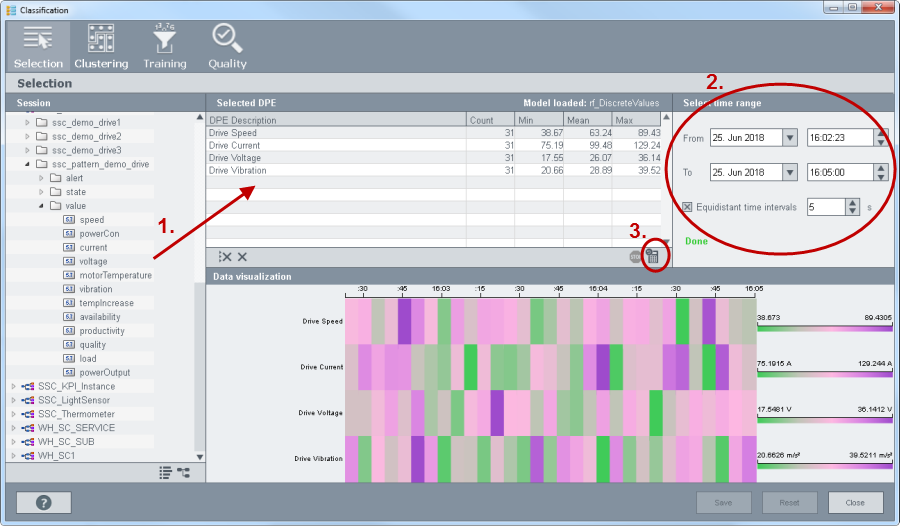
Select the DPs "ssc_pattern_demo_drive_value.speed", "ssc_pattern_demo_drive_value.current", "sc_pattern_demo_drive_value.voltage" and "sc_pattern_demo_drive_value.vibration" from the data point view. Drag these DPs to the model.
-
Select the timeRange (current day) and check the check box "Equidistant time interval" and set the time to 5 seconds.
-
Click the button to load the values. See figure below.
Open the Clustering panel:
-
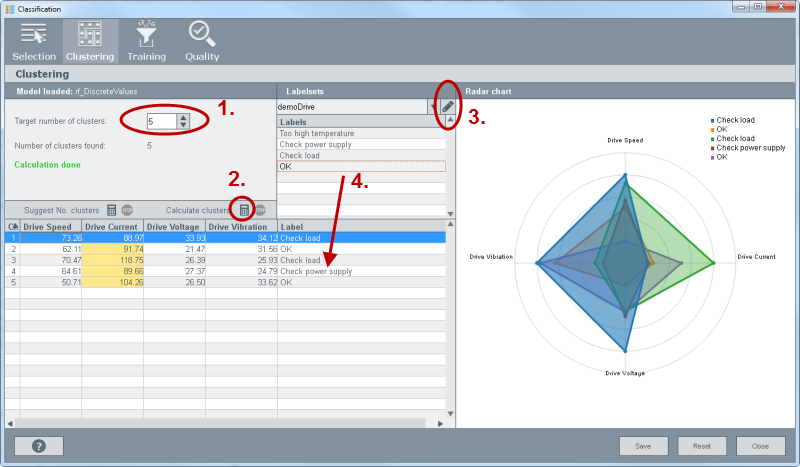
In the clustering panel, set the number of clusters to, for example, 5. Note that the minimum cluster number is 2.
-
Calculate clusters.
-
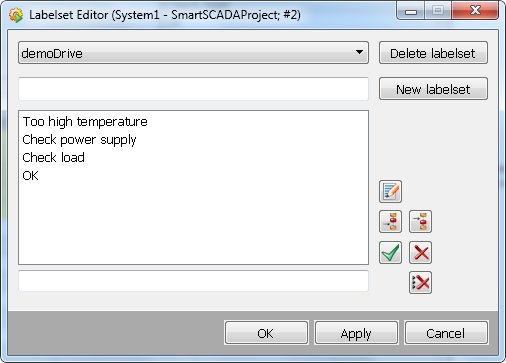
Create a labelset with labels of your choice. In this example the labels "Too high temperature", "Check power supply", "Check load" and "OK" are created.
-
Assign the labels to the values.
Open the Training panel:
-
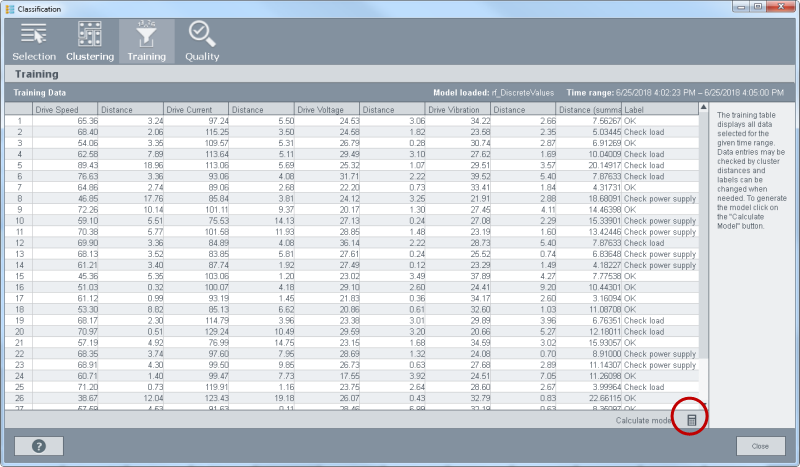
In the training panel, generate the model "DiscreteValues" by clicking the button "Calculate model".
-
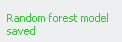
The following message is shown:
 . The model
was saved.
. The model
was saved. -
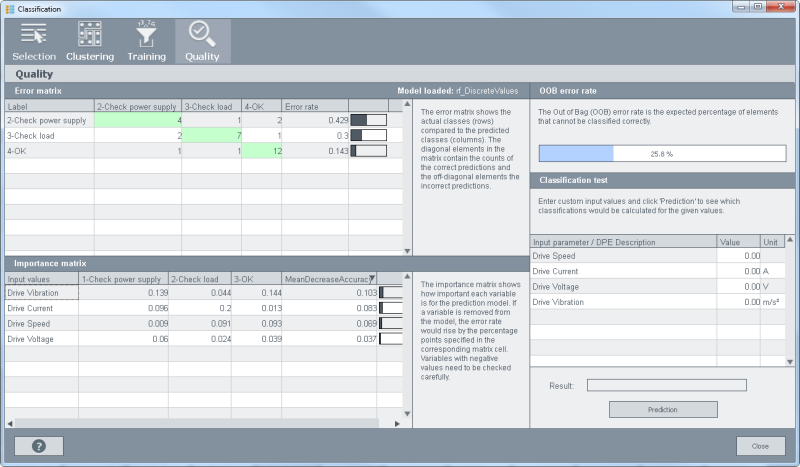
Check the quality of your model in the quality panel.
KPI Wizard
Open the KPI wizard and the Definition panel:
-
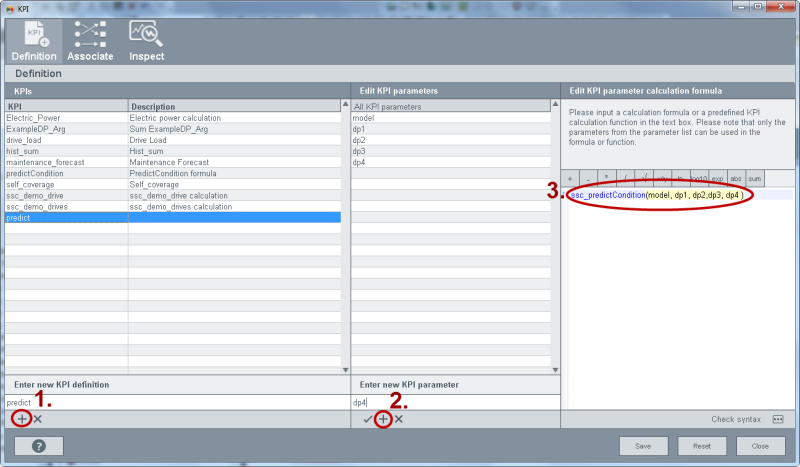
Enter the name "predict" for a KPI in the "Enter new KPI definition" text field and click the plus sign. Create a KPI Definition with the function "ssc_predictCondition". ssc_predictCondition is predefined function delivered with the WinCC OA installation. You can specify a variable number of parameters. The number of parameters must correspond to the number of DPs from the Classification wizard - Selection + 1.The one additional parameter is the model parameter. CAUTION: the order of the parameters must be the same as for the model. The model parameter must be the first parameter.
-
Enter five new parameters by entering a name into the "Enter new KPI parameter" text field. Four parameters for the DPs and one parameter for the model.
-
In the "Edit KPI Parameter calculation formula" field, enter the function "ssc_predictCondition" and the parameters for the data points as well as for the model: ssc_predictCondition(model, dp1, dp2,dp3, dp4 ). You can drag the parameters to the function as soon as you have created the function ssc_predictCondition() in "Edit KPI Parameter calculation formula" field.
-
Save the KPI definition.
Open the Associate panel:
-
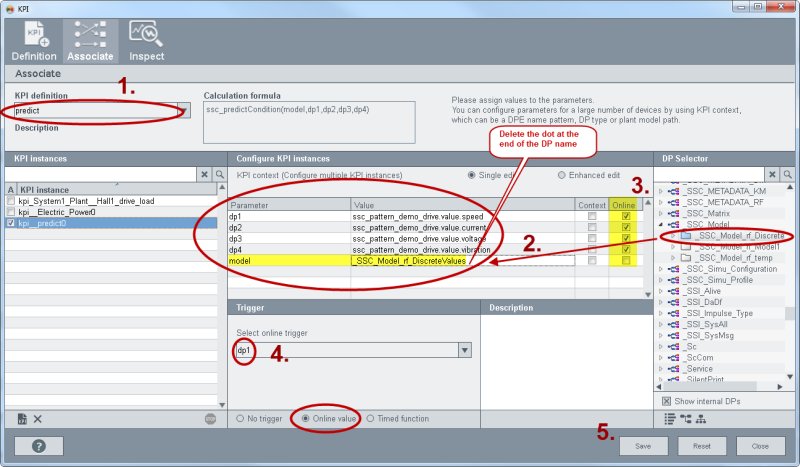
Select the "predict" definition from the KPI definition combo box
-
Assign the same DPs as you selected in the Classification wizard - Selection panel, now under "Configure KPI instances". To select the data points check the check box "Show internal DPs" and select the model, which you created in the Classification wizard in the Selection panel, from the internal DP type _SSC_Model.Note that you have to add the whole model data point and delete the dot at the end of the DP name (see figure below).
-
Check the check box "Online" for the data points except for the model data point and select the option "Online value" for the trigger. Select, for example, the data point "dp1" for the trigger.
-
Save the KPI instance by clicking the Save button. The "kpi__predict0" instance is created.
Open the Inspect panel:
-
Click the KPI instance “kpi__predict0" that contains the model. Now you can check the "Discrete values" check box.
-
Now you can see the DP values (for the selected time range) sorted by the labels that you created and assigned to the random forest model in the clustering panel. Note that the KPI is recalculated when the value of the data point "dp1" is changed since the data point "dp1" was selected for the trigger. The predict0 column displays the relation between the data point values and the labels.