KPI Wizard - How to create a KPI Instance
This chapter comprises two examples:
-
how to create a single KPI instance with directly attached DPE addresses and no context.
-
how to create several KPI instances by using theKPI context of the associate panel.
How to create a single KPI instance with directly attached DPE addresses and no context
To create a KPI instance, a KPI definition must already exist. This example shows how to create a new KPI and attach it to the process image. The example comprises an electric drive with current and voltage to calculate power. For this example a drives data point type as shown in the figure "Drag and Drop a Data point" must exist.
-
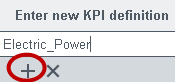
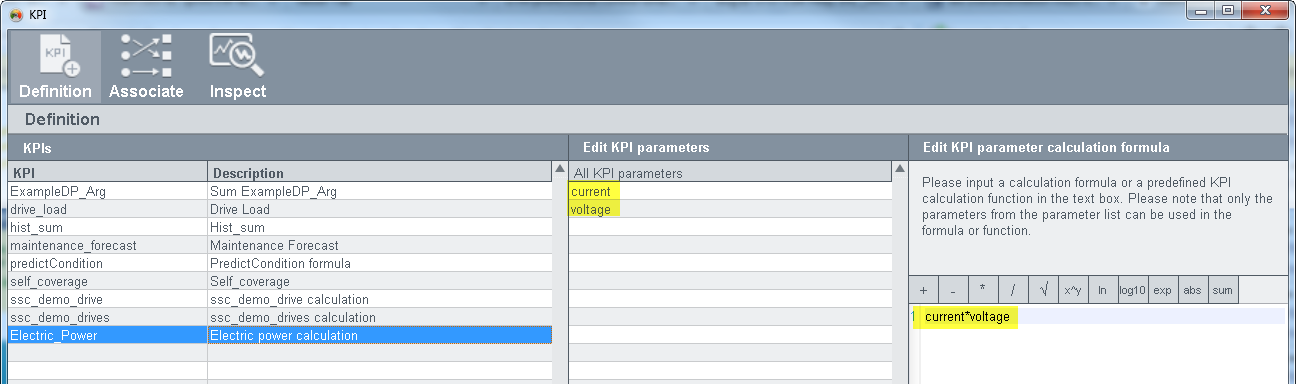
Create a KPI definition via the Definition panel. Create a new KPI definition type, for example, "Electric_Power" in the Definition panel. Enter the name "Electric_Power" to the "Enter new KPI definition" text field and click the plus sign
 (see figures below).
All examples in the help are based on a fictive project in order to represent the processes.
The name of the KPI definition must correspond to the WinCC OA DP name guidelines! See chapter Rename Data points for information on the name guidelines.
-
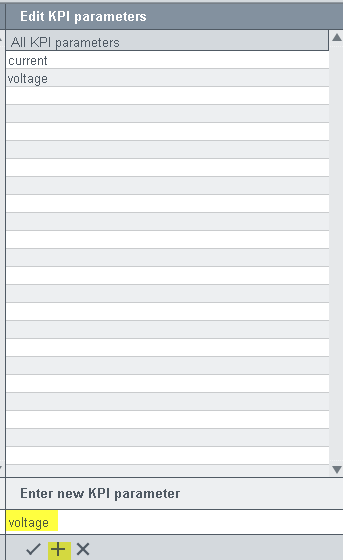
Enter the parameters "current" and "voltage" into the "Enter new KPI parameter" text field and click the symbol or press Enter.
-
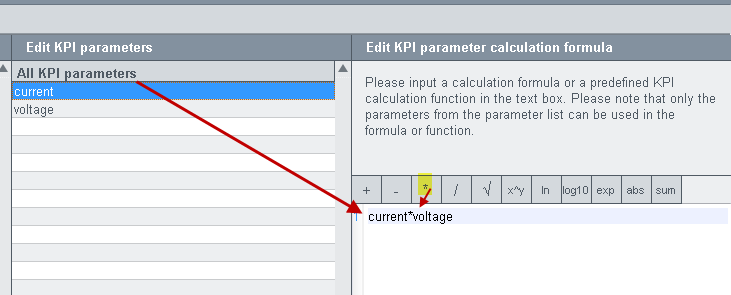
Enter the calculation formula "current* voltage" into the text area "Edit KPI parameter calculation formula" (see figure below) by typing or dragging and dropping the parameters from "Edit KPI parameters" table to the "Edit KPI parameter calculation formula" text field.
When using a function call from the wincc_oa_path/SmartSCADA_3.15/scripts/libs/SmartSCADA/kpi/kpiFunctions.ctl this function must return a value.
-
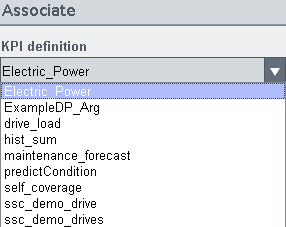
In the Associate panel select the KPI type "Electric_Power" from the "KPI Type" combo box:
-
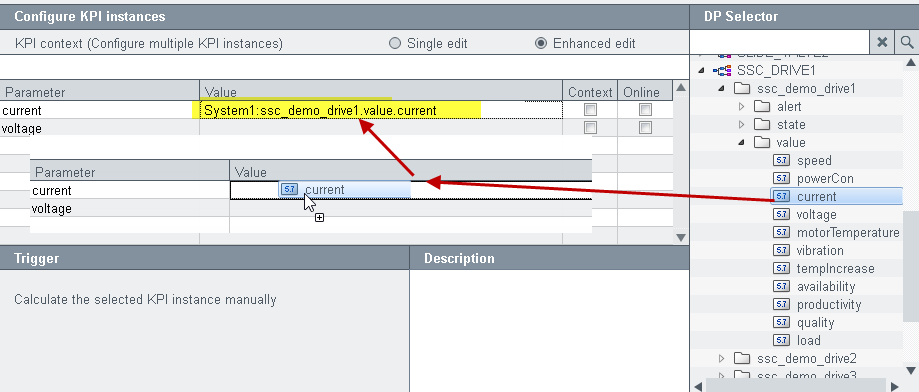
Drag and drop the current element of the data point "ssc_demo_drive1" from the Data selection PARA window to the current text field (see figure below). Repeat the step for the voltage parameter and drag the voltage element of the "ssc_demo_drive1" data point to the voltage value text field. This example shows how to create a single KPI instance with directly attached DPE addresses and no context.
-
Check the check box "Online".

-
Activate the radio button "Online value" and select the trigger "current" from the "Select online trigger" combo box and save the KPI instance. A KPI is calculated when a value is entered into the "current" data point element.
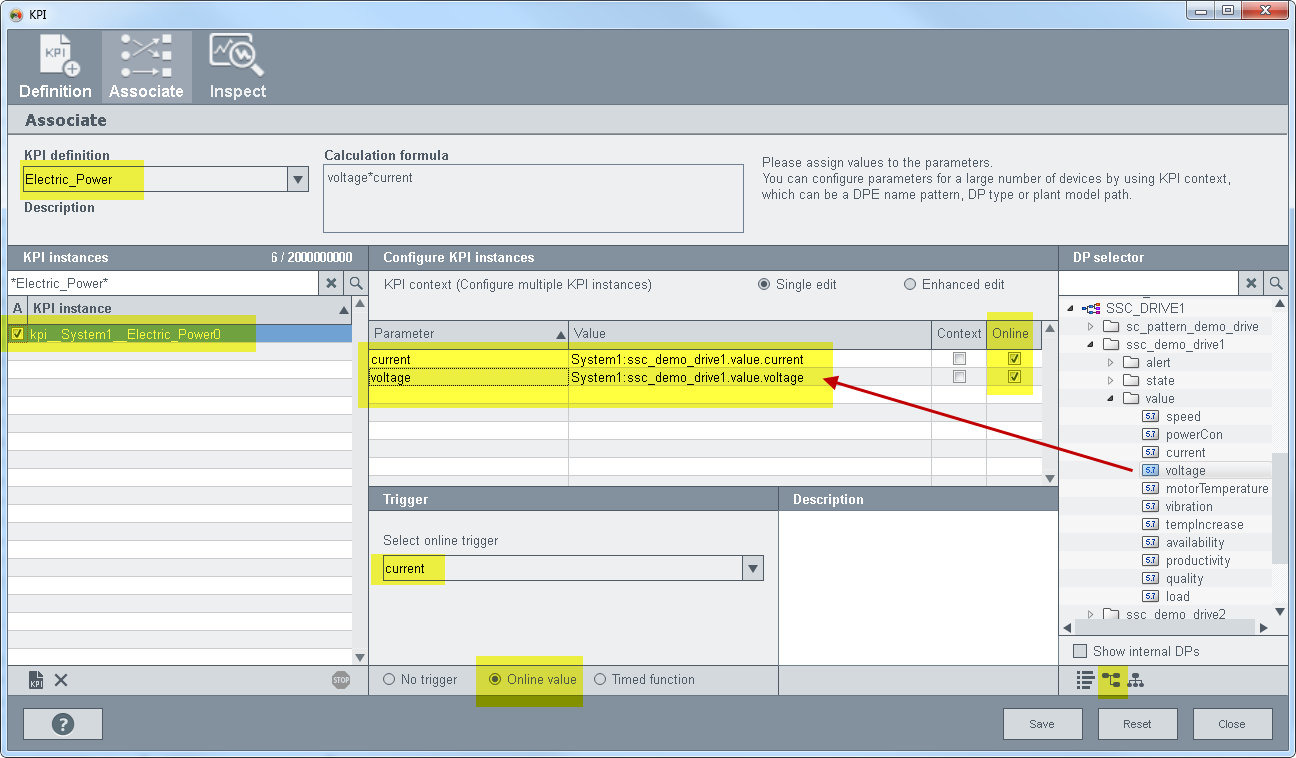
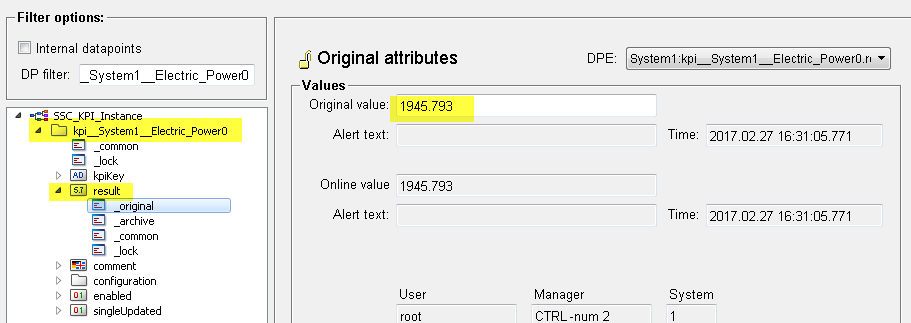
The KPI instance "kpi__System1__ElectricPower0" is saved in the Associate panel and a KPI instance data point is created.

When you enter a current and a voltage value into the data points, the result of the calculation is saved in the result data point element of the KPI instance.
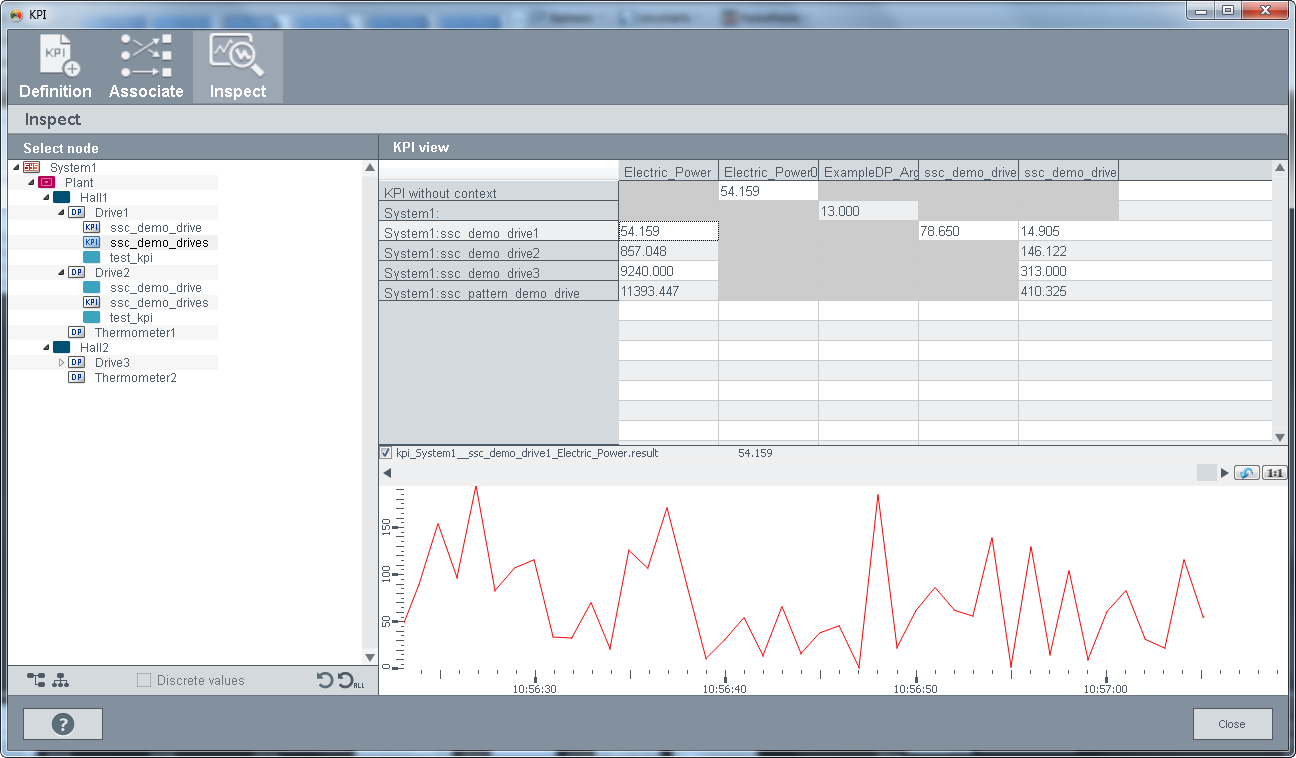
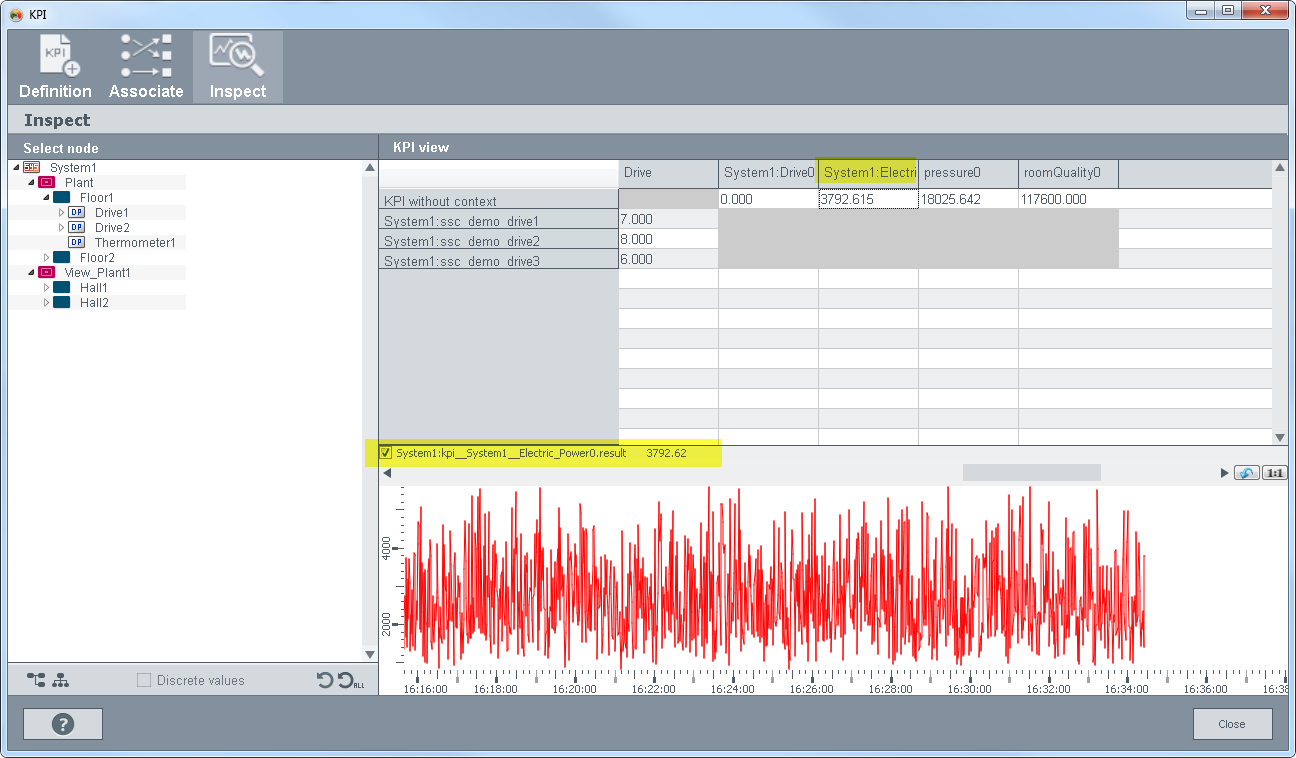
You can inspect the KPI result in the Inspect panel of the KPI wizard:
How to create several KPI instances by using the KPI context of the associate panel
-
If you worked through the first example, continue with the step 2 of this example. If you did not work through the first example, work through the steps 1 to 4 of the first example. Then proceed with the step 2.
-
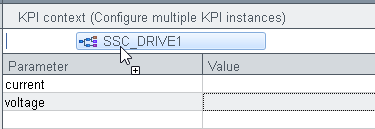
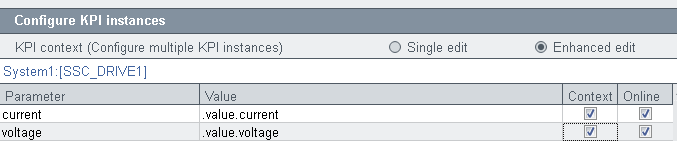
Drag and drop the data point type "SSC_DRIVE1" to the KPI context field
-
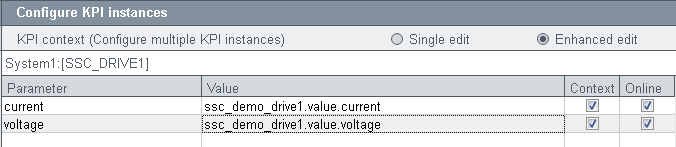
Drag and drop an "ssc_demo_drive1" data point to the "Value" field.
-
Delete the first part "ssc_demo_drive1" of the value and leave the texts ".value.current" and ".value.voltage".
-
Check the check boxes "Context" and "Online".
-
Select the trigger "current" for the KPI from the "Select online trigger" combo box.
-
Save the configuration.
-
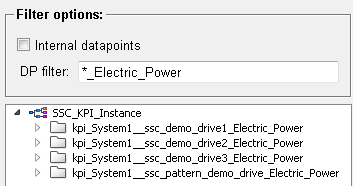
Four KPI instances are created since there are four data points of type "SSC_DRIVE1":
You can also inspect the KPI result in the Inspect panel of the KPI wizard: