Configuration of the Dist-Management
To use the Dist-Management a new CTRL manager with the parameter "distSyncMan.ctl" must be added on the master system.
All client systems that are part of the distributed system must be running and a connection to the master system must be available.
Base configuration
The base configuration is located under "System Management > Settings > Dist-Management". To define a system as master system, the checkbox "Master system" must be ticked inside the Configuration Panel.
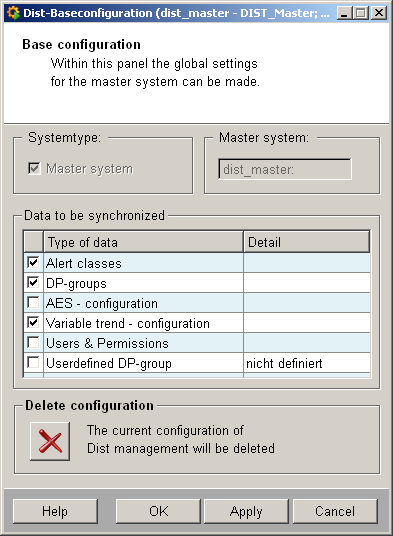
In the configuration panel the data which must be synchronized can be selected. The settings are used as default settings for all assigned clients.
Settings of the clients can be overloaded. See client configuration panel for more details.
The current configuration can be deleted with the  button. Can only be used if no client is assigned to the master system. If the
configuration is deleted, the master system must be again selected.
button. Can only be used if no client is assigned to the master system. If the
configuration is deleted, the master system must be again selected.
By confirming the configuration with the "OK" button the Dist-Management is opened.
After the first configuration, the Dist-Management panel is automatically opened with "System Management > Settings > Dist-Management".
The base configuration panel can be opened in the Dist-Management using the "Configuration" button.
Dist-Management
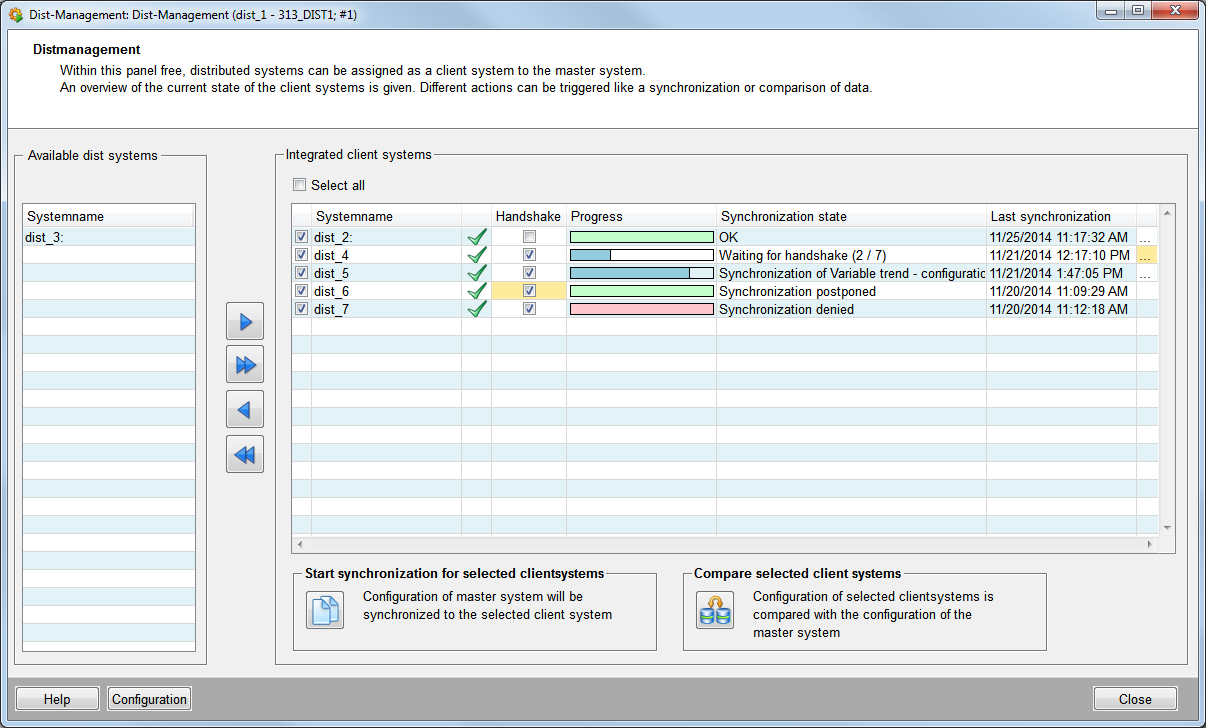
The panel gives an overview of all current available and integrated client systems.
Available dist systems
Shows all current available clients. The clients can be assigned to or removed from
the master using the 


 buttons
Integrated client systems
Shows all client systems that are assigned to the master system and the current status.
The checkboxes (left to the clients system name) allow to select which systems are synchronized or compared to the master system.
The symbols  (connected) and
  (not connected or the control manager with the
distSyncManscript is not
running) shows the connection state for each client.
(not connected or the control manager with the
distSyncManscript is not
running) shows the connection state for each client.
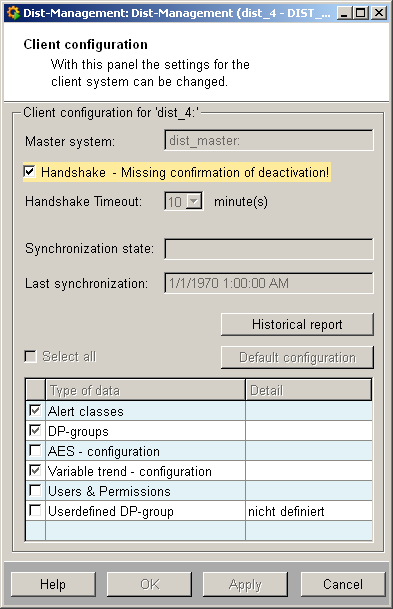
It can be specified whether a client must response to the synchronization or not using the "Handshake" checkbox (see also deactivate handshake).
Client Configuration Panel
The client configuration panel is opened with the "..." button or a double click on the row of the client.
On the client system the client configuration panel can be opened under "System Management >- Settings > Dist-Management"
You can change the selected client configuration. Note that you can only change this selected client but not the other clients.
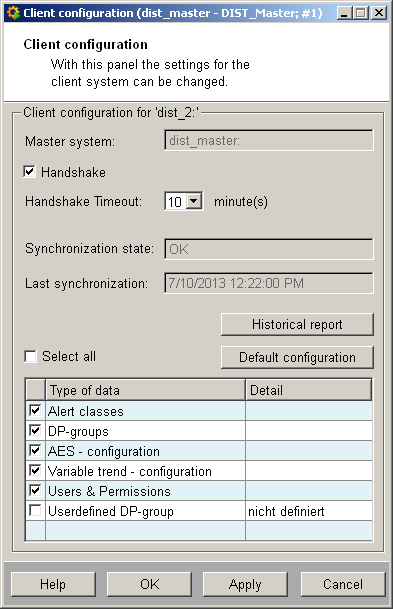
The panel allows to overload the specified default settings for each client. The overloading can be reset by clicking on the "Default configuration" button. If the default configuration is modified, the "..." button inside the Dist-Management panel will be highlighted in yellow for the client system.
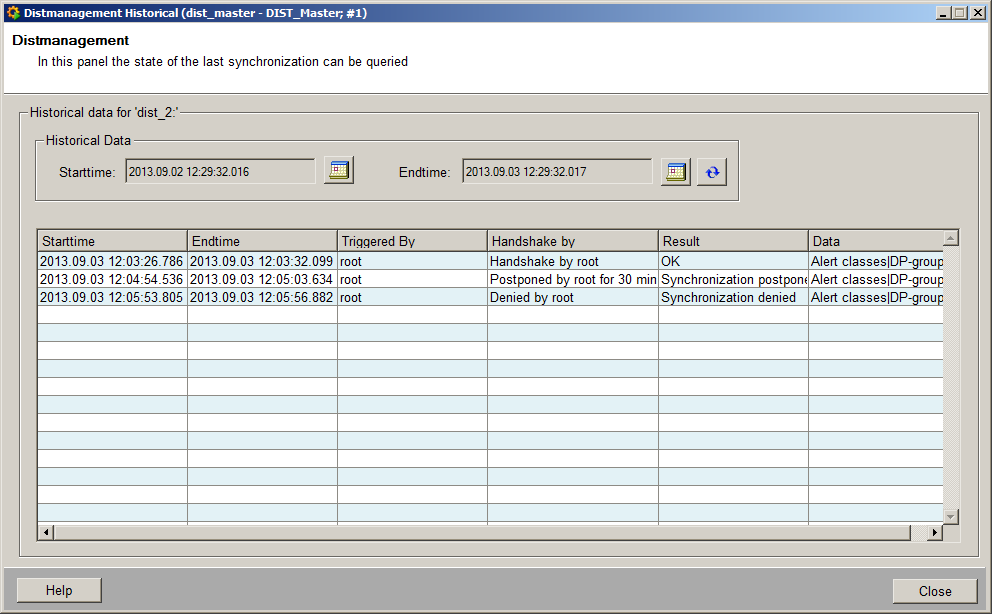
With the "Historical report" button a historical report of synchronizations within an arbitrary time period is opened (see also Historical report).
Compare selected client systems
The  button opens the configuration comparing
panel which allows to check the differences between master and client system
configuration.
button opens the configuration comparing
panel which allows to check the differences between master and client system
configuration.
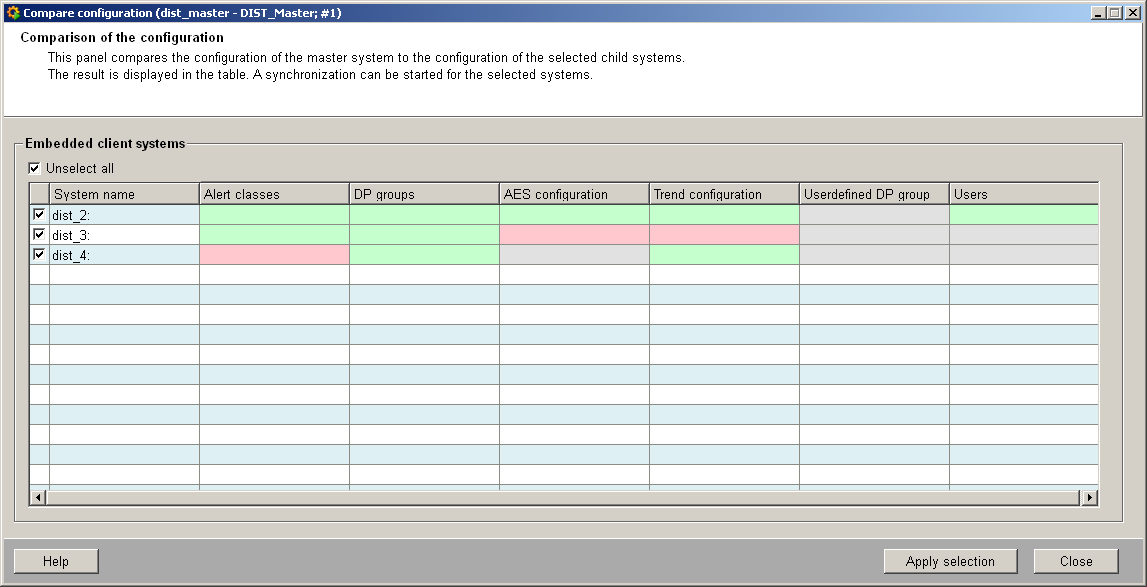
The panel shows which configuration is different between master and server system.
Following states are available:
- Green = Data is identical
- Red = Data is different
- Grey = Data is not selected for synchronization
Start synchronization for selected client systems
When the configuration is completed, the synchronization of the master and the
selected clients is started with the  button.
By default a handshake panel is displayed on all assigned clients (Settings can be changed, see .Deactivate handshake) The clients have to respond to the synchronization request.
Following responses are available:
- Ok: The synchronization is performed.
- Postpone: The synchronization is not performed but the dialog reappears after a selectable timespan.
- Deny: The synchronization is not performed. A corresponding update of the client systems state is sent to the Dist-Management panel (= "Synchronization denied").
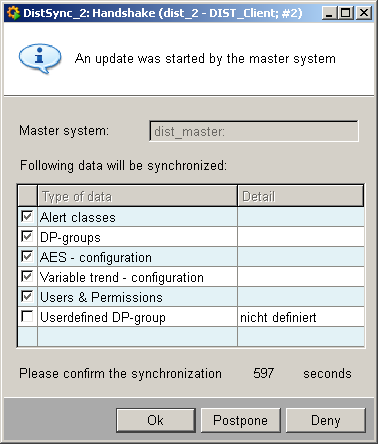
- In case that there is no response from the client within the configured handshake time-out (default: 10 minutes), the handshake panel will be closed and the handshake is automatically postponed for 30 minutes.
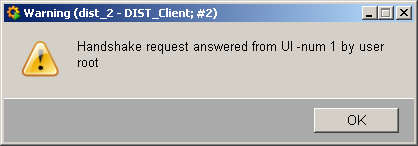
- If one UI instance of the client responds to the synchronization request all other UIs of the system receive a pop up note which informs the users about the sent responds.
If the client confirms the synchronization the following panel is displayed for the client after finishing the synchronization.
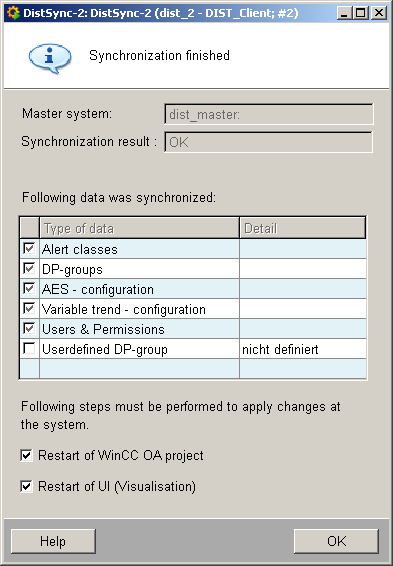
This panels shows the synchronization result (OK or NOK) and which steps must be performed to apply the changes.
Historical report
The "historical report" button on the client configuration panel displays the states of the last synchronizations.
Deactivate handshake
By default a handshake is necessary for each assigned client. This means that the client has to confirm, postpone or deny the requests for synchronization sent from the master system.
The handshake can be deactivated by disabling the checkbox in the Dist-Management panel (except when One Way Dist is configured, refer to Notes and Restrictions for further information). In this case, the "..." field is highlighted in yellow and the following information panel is displayed on the master system.
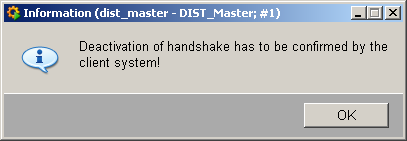
The client must confirm that handshakes are not necessary anymore. Therefore the client has to open the client configuration panel and must disable the yellow highlighted "handshake" checkbox.