Export Explorer
|
An export can be started with the export button in the playback operation or via the export overview panel (button export explorer). 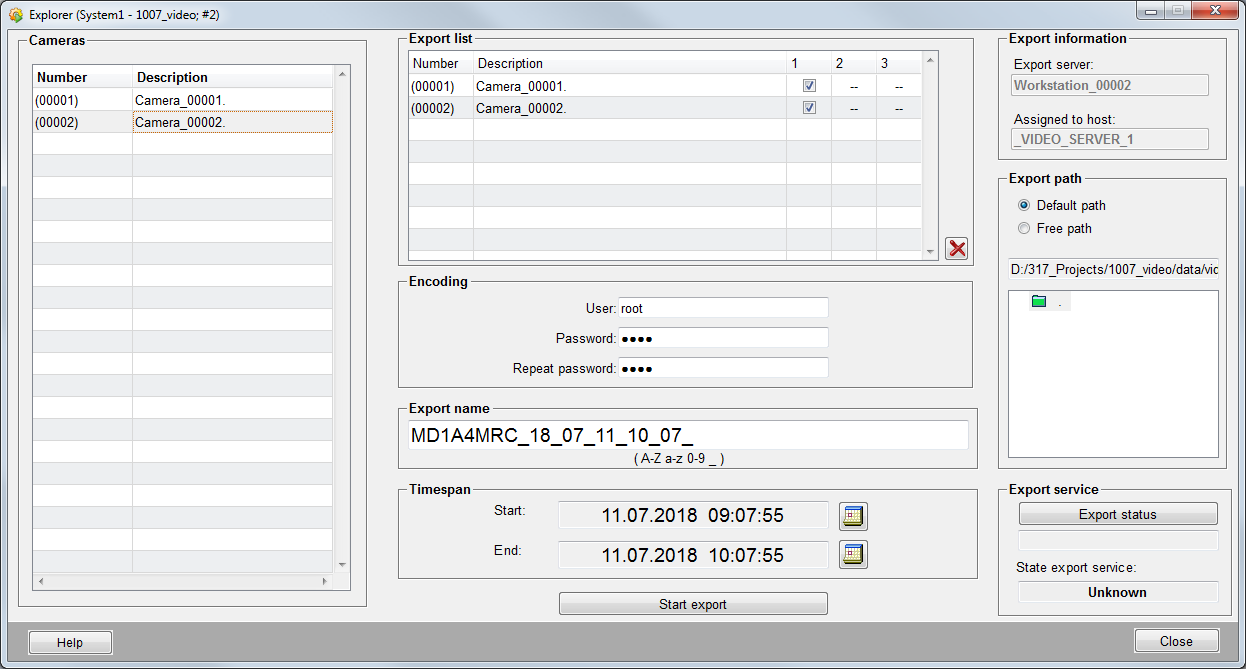
The predefined time range and a camera are passed to the dialog when starting the export dialog via the playback handling. It is the camera from whose playback handling the export dialog was started. If the export dialog is started via the export overview panel no camera is predefined. CamerasAll cameras for whom a recording exists for at least one configured stream are shown in the camera tree on the left side. The camera number and the description text are shown in the columns number and description. The cameras can be added to the export list per drag & drop. Export listAll cameras meant for the export are listed in the export list. Camera number, description text and information for which streams recording is available are displayed in the table. Those values cannot be edited. With the Shows the selected export server as well as the assigned host. Export pathIt is possible to choose between default path or free export path. With default path the export path configured in the workstation or a sub directory within this path can be defined as destination for the export. Exports in this directories can be managed with the file overview. With the option free path an arbitrary destination can be specified for the export. EncryptionIf the data shall be exported in encrypted form, a user and a password must be defined. The exported video data can only be opened with the provided player and only after entering the defined user name and password. Export nameThe export name is automatically generated when opening the panel. The export name is the later folder name of the export and is structured as follows: [host name]_[year]_[month]_[day]_[hour]_[minute] The export name can be manually changed. Following characters are allowed: A...Z, a...z, 0...9 Time rangeAllows to modify the predefined time range for the export task. Export startThe export is started with this button. Export statusShows the current export status of the workstation. With the export status button a more detailed status overview of export tasks is displayed. 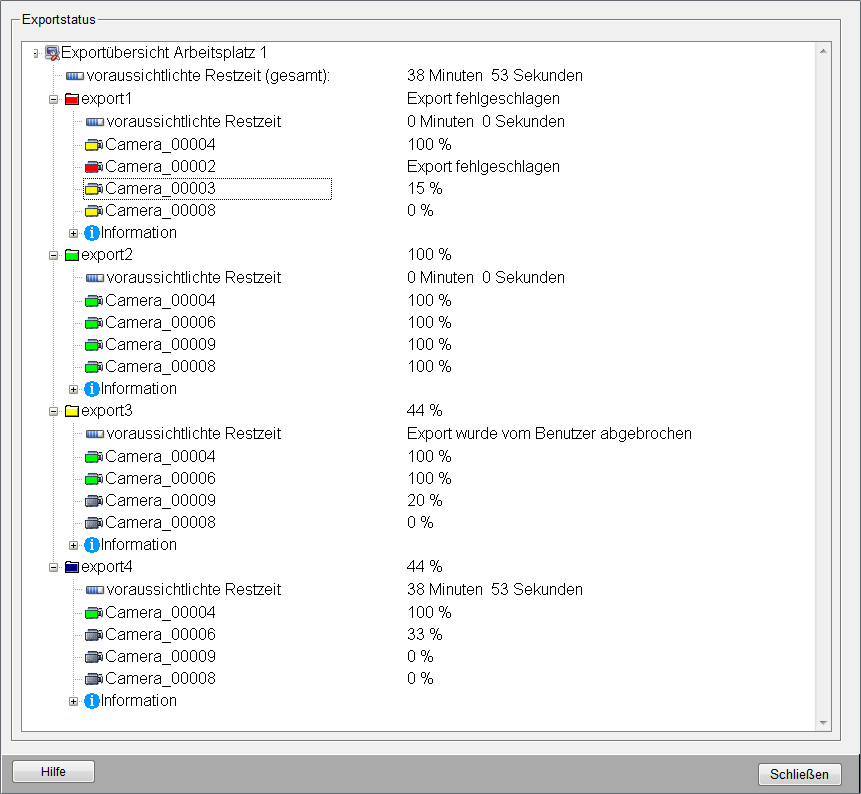
This panel shows all running, canceled or failed exports are shown. If an export is completed without errors it is automatically removed from this list. With a right mouse click on the appropriate export a context menu with the following entries is opened:
The following color and text indication are possible for the export status: Status export1: This export has failed. The export must be removed from the list by the user. Camera 4 is completely exported. An error occurred during the export of camera 2. The export of camera 3 is 15% completed. The export of camera 8 is 0% completed. Status export2: This export is completed and will be automatically deleted with the next status update. The export of camera 4, camera 6, camera 9 and camera 8 is 100% completed. Status export 3: This export was cancelled by the user. The export of the data is 44% completed. The export must be deleted from the list by the user. Status export 4: This export is currently running. The export is 44% completed, the estimated remaining time is 38 minutes and 52 seconds. The export can be cancelled by the user. Camera 4 is already finished. The export of camera 6 is 33% completed. |
 button selected lines can be deleted of the list.


