DCOM settings for Remote Servers
To start a server as remote server, the DCOM settings must ensure that the client can access the server and that the server is able to reach the client via callbacks and can send data.
You have to check the following settings on the computer on which the OPC server is running in order to establish DCOM connection:
-
General (system-wide) DCOM settings
-
Server-specific DCOM settings
-
User Account (only if you are using workgroups)
-
Disable the Windows firewall
DCOM was meant to be used in networks without any active firewall and where all computers belong to the same domain. Therefore, the configuration of DCOM in current networks is rather complicated and does not meet the increasing security requirements. The settings described in this chapter also have a negative impact on the network security. Therefore, to maintain the network security, we recommend to install a minimal WinCC OA version on the computer on which the OPC server is running and start the OPC driver as remote WinCC OA driver.
DCOM-Konfiguration
To use OPC via DCOM you have to configure DCOM correctly. It is possible to configure DCOM system-wide as well as server-specific.
System-wide DCOM settings
Open the window Component Services ("Windows button + R" > Enter "dcomcnfg" > OK).
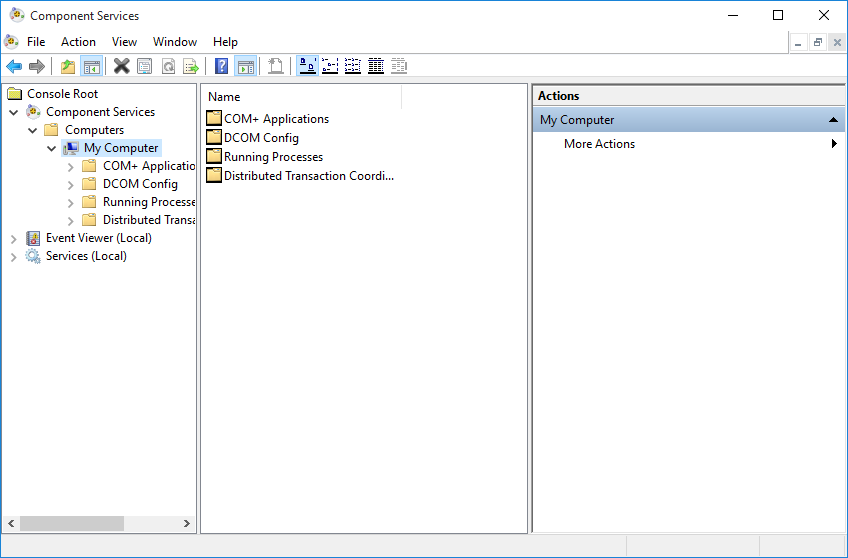
Go to Console Root > Component Services > Computers in the tree view, click on My Computer with the right mouse button and select the context menu entry Properties.
Default Properties
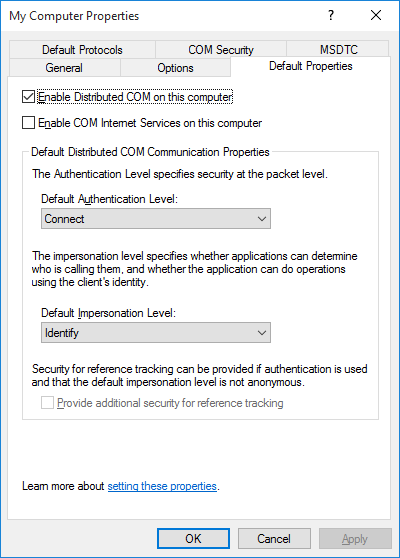
Change to the Default Properties tab and apply the following settings:
-
Select Enable Distributed COM on this computer
-
Set the Default Authentication Level to Connect
-
Select the Default Impersonation Level to Identify
COM Security
Change to the COM Security tab.
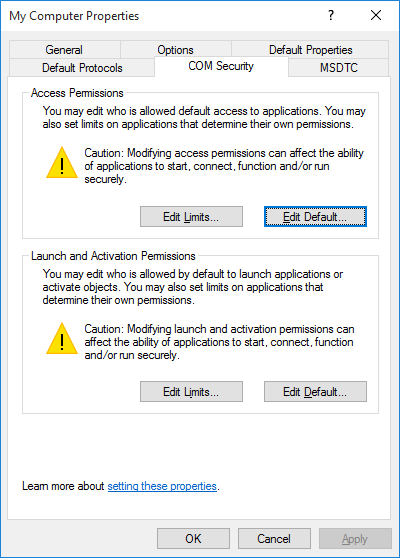
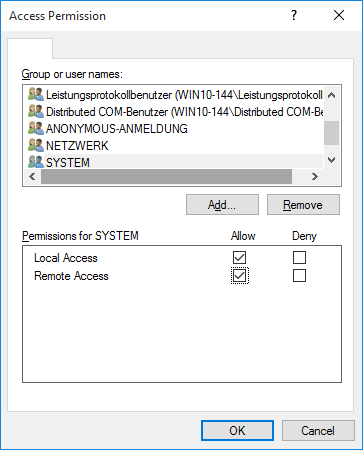
Access Permissions
Click on the Edit Default button in the Access Permissions area and apply the following settings:
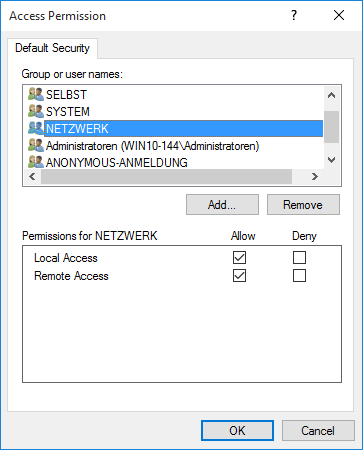
-
Add the users Anonymous, Everyone, Interactive, Network andSystem
-
Set Local and Remote Access to Allow for all mentioned user names.
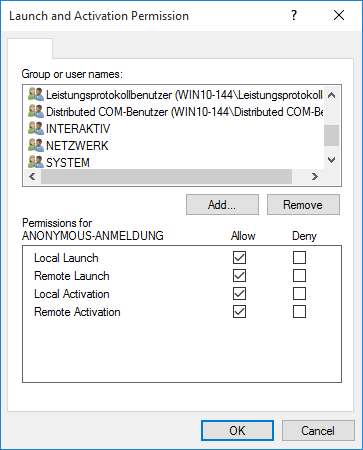
Launch and Activation Permission
Click on the Edit Default button in the Launch and Activation Permission area and apply the following settings:
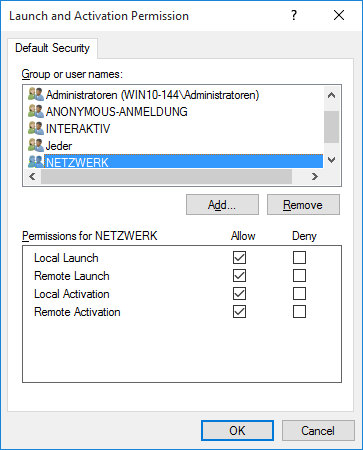
-
Add the users Anonymous, Everyone, Interactive, Network and System
-
Set Local and Remote Launch respectively Local and RemoteActivation to Allow for all mentioned user names.
Server-specific DCOM settings
Proceed with the server-specific DCOM settings after completing the general DCOM configuration.
Component Services - DCOM Config
Under Console Root > Component Services > Computers > My Computer click on the DCOM Config folder and select the appropriate OPC server.
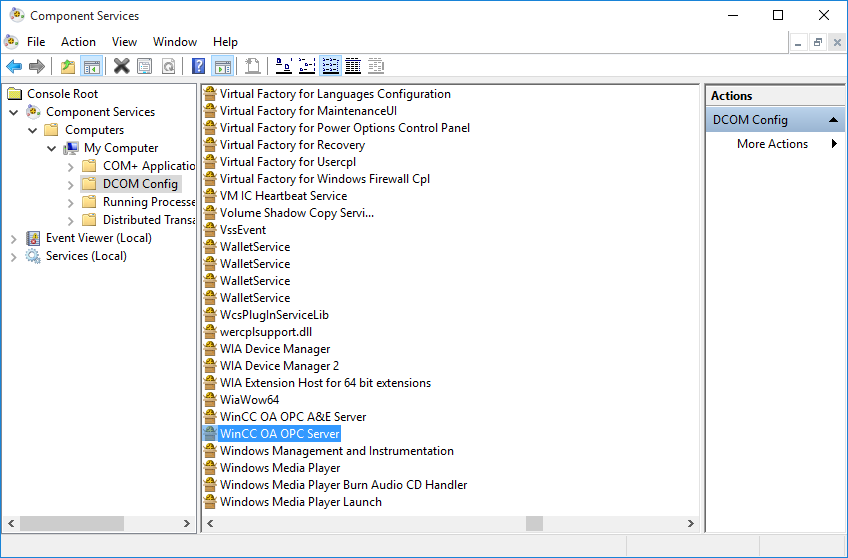
Open the context menu with a right mouse click on the OPC server and select the entry Properties.
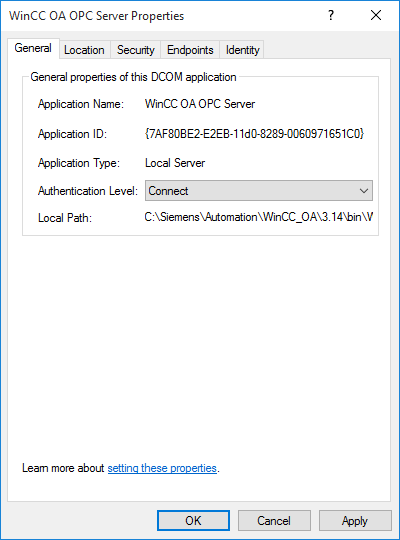
General Tab
Select the Connect entry from the Authentication Level selection list.
Security Tab
Change to the Security tab.
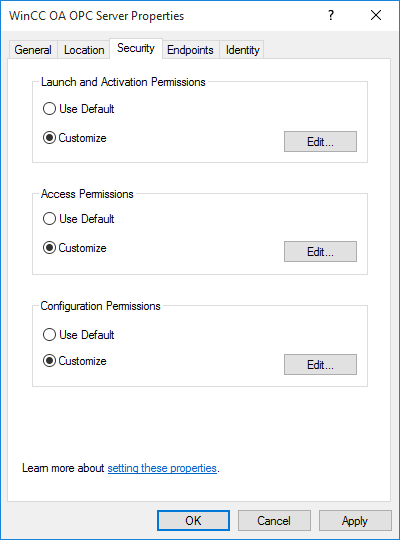
Select the Customize option in the Launch and Activation Permissions and Access Permissions area.
Launch and Activation Permission
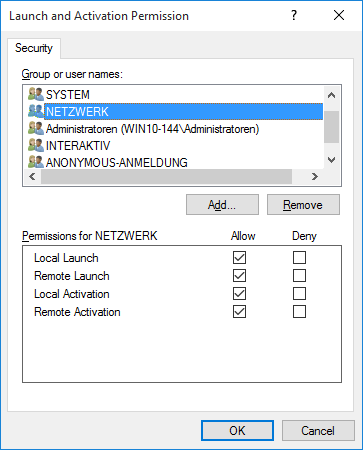
-
Add the users Anonymous, Everyone, Interactive, Network and System
-
Set Local and Remote Launch respectively Local and RemoteActivation to Allow for all mentioned user names.
Access Permission
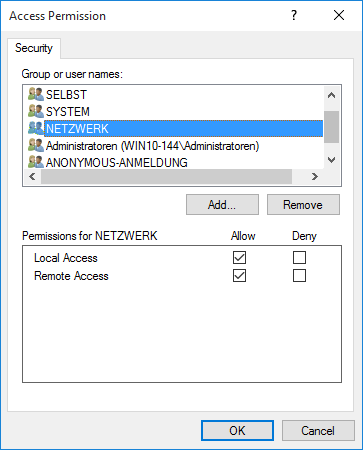
-
Add the users Anonymous, Everyone, Interactive, Network and System
-
Set Local and Remote Access to Allow for all mentioned user names.
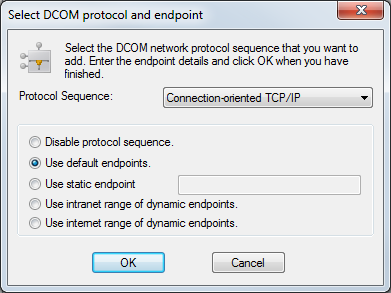
Endpoints Tab
Change to the Endpoints tab. If the Connection-oriented TCP/IP entry is not displayed in the DCOM Protocols and endpoints field, you have to add it as follows:
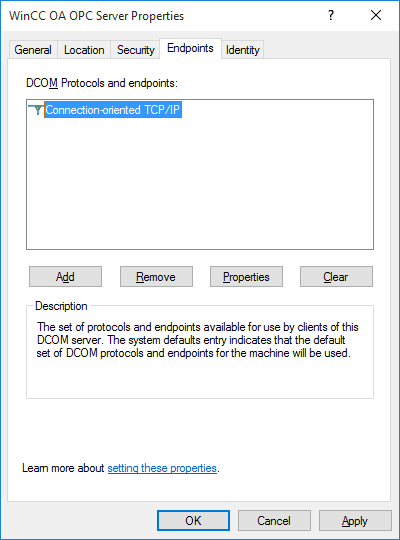
Click on Add, select Connection-oriented TCP/IP from the selection list and enable the Use default endpoints checkbox.
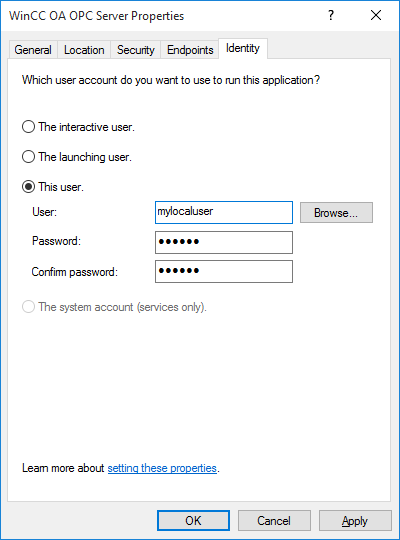
Identity
Change to the Identity tab and select the This user option. Enter the appropriate user name and password.
Local Security Policy
To establish a DCOM connection between two computers, both computers must have appropriate access permission. If both computers are running in the same domain, user data is automatically synchronized. In this case, the steps described in this section are not necessary. However, if you are using workgroups you have to consider the following settings.
This configuration may have a negative impact on the network security.
Local Security Policy
Open the following window (Start > Control Panel > Administrative Tools > Local Security Policy).
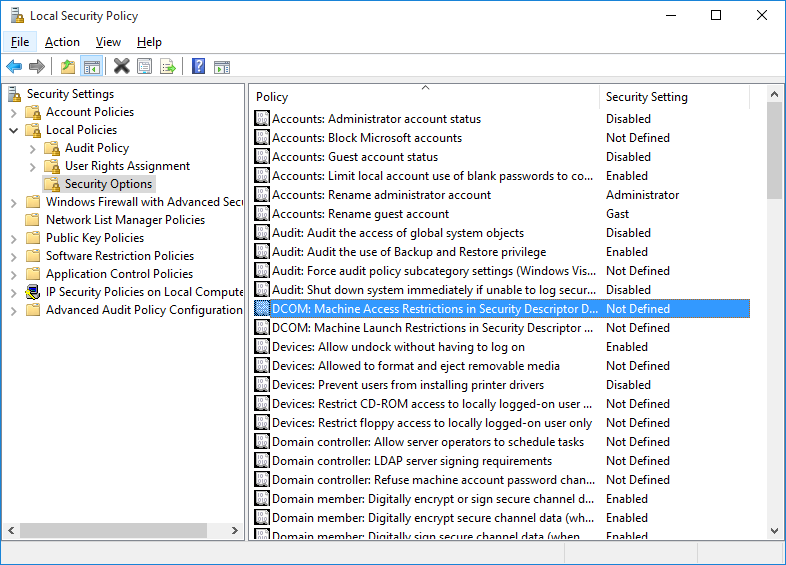
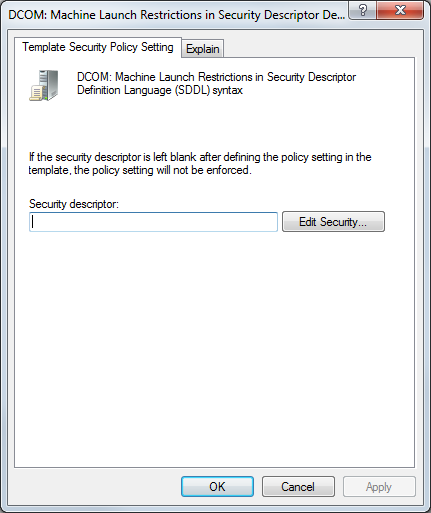
Security Options - DCOM: Machine Access Restrictions
Go to Security Settings > Local Policies > Security Options,open the context menu with a right mouse click onDCOM: Machine Access Restrictions in Security Descriptor Definition Language (SDDL) syntax and select the Properties entry.
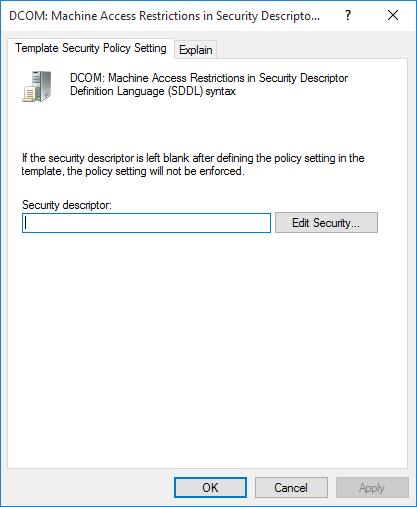
Click on the Edit Security button.
-
Add the users Anonymous, Everyone, Interactive, Network and System
-
Set Local and Remote Access to Allow for all mentioned user names.
Security Options - DCOM: Machine Launch Restrictions
Back in the security options list, open the context menu with a right mouse click on DCOM: Machine Launch Restrictions in Security Descriptor Definition Language (SDDL) syntax and select the Properties entry.
Click on the Edit Security button.
-
Add the users Anonymous, Everyone, Interactive, Network and System
-
Set Local and Remote Launch respectively Local and RemoteActivation to Allow for all mentioned user names.
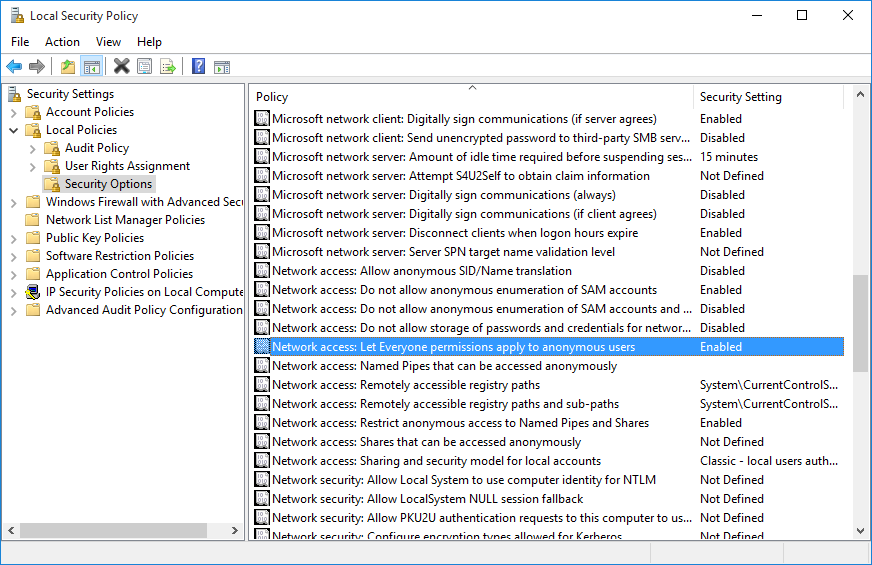
Security Options - Network access: Let Everyone permissions apply to anonymous users
Open the context menu with a right mouse click on the Network access: Let Everyone permissions apply to anonymous users entry and select the entry Properties. Choose the Enabled option in the Properties.
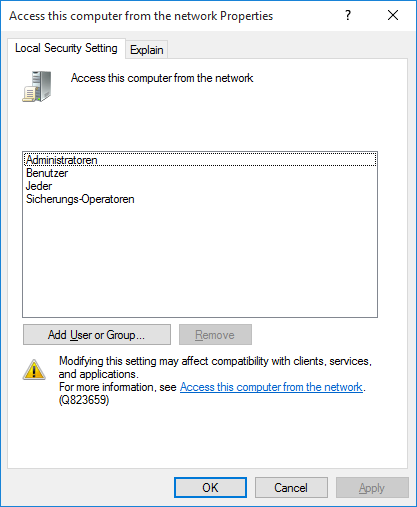
User Rights Assignment
Change to Security Settings > Local Policies > User Rights Assignment, open the context menu with a right mouse click on Access this computer from network and select the Properties entry.
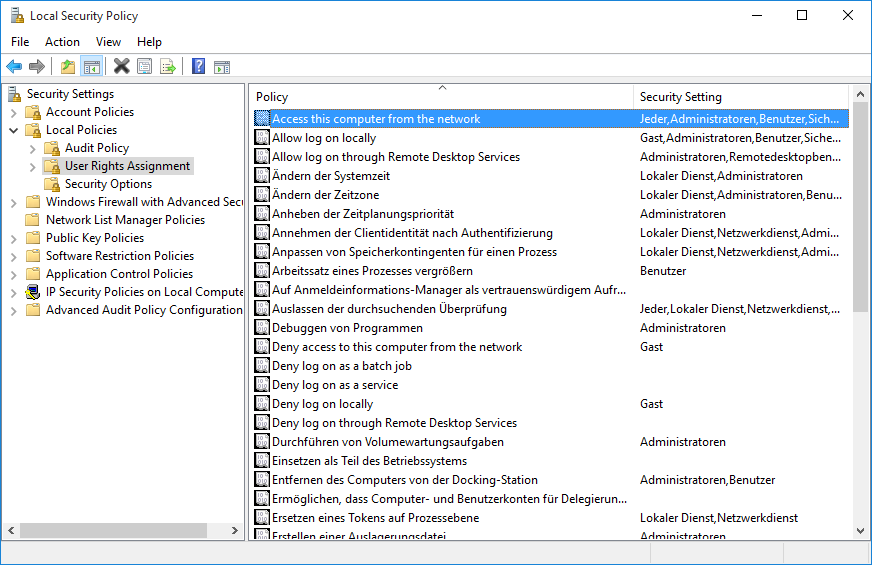
Add the users Everyone and Users.
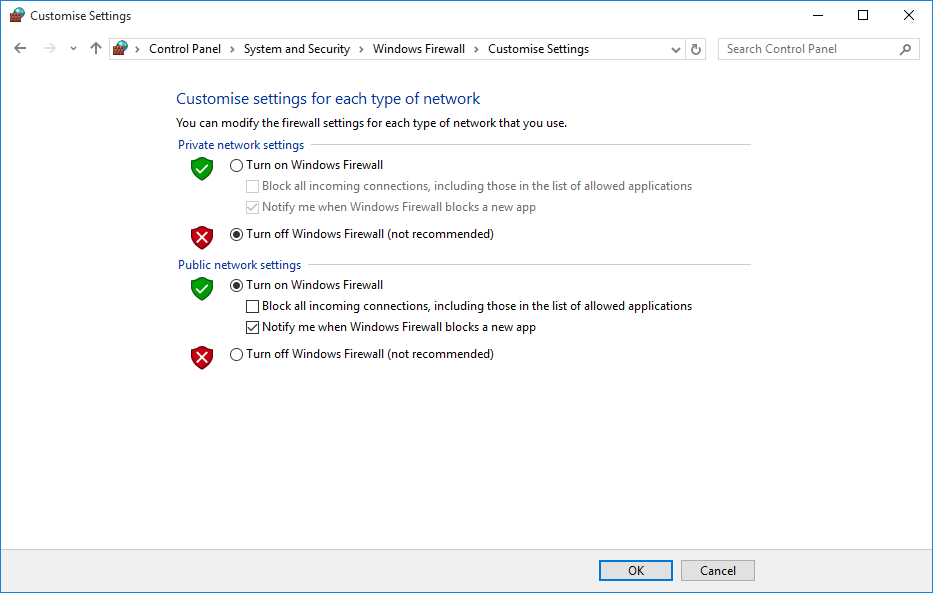
Firewall
The Windows firewall prevents the DCOM communication. Go to Start > Control Panel > Windwos Firewall, select Turn Windows Firewall on or off and disable the Windows firewall.
If the following error occurs, you have to disable the firewall on the client as well:
WCCOAopc2:Could not connect shutdown interface!: The RPC server is unavailable
WCCOAopc2: (0x800706ba