Example for the SNMP driver
This chapter shows with the aid of an example how to use the SNMP feature. In this example you:
-
Create source and target data points of self-created type "TestDPT".
-
Configure a Live Agent that provides your data.
-
Add the necessary entries to the config file.
-
Configure the SNMP manager.
-
Add an address config to the elements of the target data point that should represent the queried data.
-
Start the SNMP manager and the Live Agent.
-
Set values on the source data points and control values on the target data points.
The second example shows the configuration of a Windows computer on which the SNMP service is running. This service is an SNMP agent.
Proceed as follows:
-
Open PARA and create a new data point type "TestDPT". The type includes a string and a dynString element.
-
Create the data points "Data_of_LiveAgent1", "Data_of_SNMP_Pmon_Agent", Data_of_Windows_Agent", "Source_DP_LiveAgent1" of the created type "TestDPT". The source data points provide the data. This means that you have to enter values here. The "Data" data points show the data that was set on the source data points.
Figure 1. Data point type "TestDPT" and data points 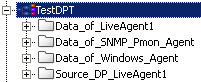
-
Open the SNMP configuration panel via System Management > Driver > SNMP Manager. Open the Live Agents tab and create a new Live Agent "LiveAgent1" with the number 1 via the New button. configure the Live Agent via double click on the agent or via right click on the agent by selecting the Param option from the context menu. Select the string element of the data point Source_DP_LiveAgent1 with the aid of the data point selector and apply the elements in the current DP table. Select in the same way the dynString element of the data point.
Figure 2. SNMP Live Agent Configuration 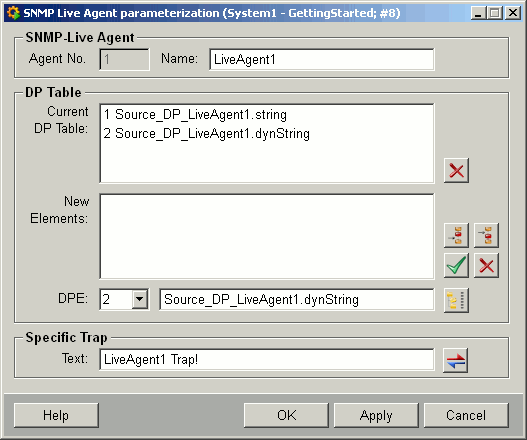
-
Add the following entries for the SNMP Live Agent to the configuration file:
#Entries for the SNMP Live Agent
[snmpa]
SNMPPortNr = 4701 #Port number of the LiveAgent
v1ReadCommunity = "public" #Defines the ReadCommunity
v1WriteCommunity = "admin" #Defines the WriteCommunity
PmonPortNr = 4700 #Port number of the Pmon. This is necessary since the Pmon
#acts as a proxy for the LiveAgent
enableUserTraps = "Yes" #Allows the sending of traps
-
Create a SNMP manager via the New button. Create new SNMP agents "LiveAgent", "PmonAgent" and "WindowsAgent" for the SNMP manager.
Figure 3. SNMP configuration - SNMP Agents 
-
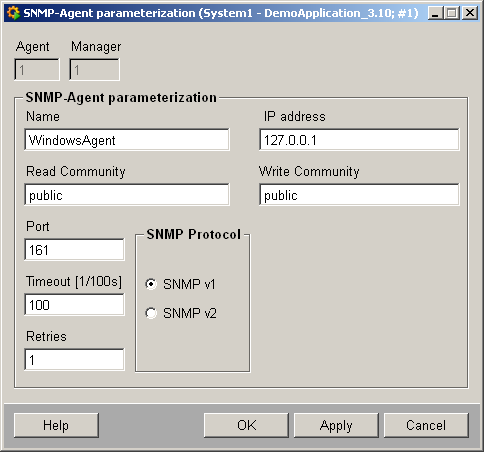
Configure the SNMP agent named "LiveAgent". The agent should be queried by the SNMP manager. Enter the IP address of the computer on which the agent runs. Add the read and write communities "public" and "admin" as well as the port number 4701. Timeout should be 1000 msecs. This defines how fast you should get a reply to a SNMP message. Retries defines that a message should be resent 1 before an error is shown. In this example the protocol type SNMP v1 is used.
Figure 4. SNMP-Agent configuration 
-
Configure a SNMP agent called "PmonAgent". Enter the port number 4700. Enter the name of your computer instead of the IP address.
-
Configure a SNMP agent called "WindowsAgent" with the same options but specify the port number 161 (Default port of the Windows SNMP agent).
-
Define config entries for the PmonAgent:
[pmon]
allowSNMP = "Yes" #Allows the SNMP access to the Pmon
SNMPPortNr = 4700 #Specifies the port number of the Pmon
v1ReadCommunity = "public" #Defines the ReadCommunity
v1WriteCommunity = "admin" #Defines the WriteCommunity
LAProxyPortNr = 4701 #Port number of the Live Agent for which the pmon acts as #a proxy
v1TrapTarget = "192.168.150.68" #Specifies the IP address/Port number to which #the traps are sent
-
Add a SNMP address config to the string and dynString data point elements of the data point "Data_of_LiveAgent1" (right click on the data point and choose the option Periphery address. Choose the SNMP option.
Figure 5. Elements of the Data_of_LiveAgent1 data point 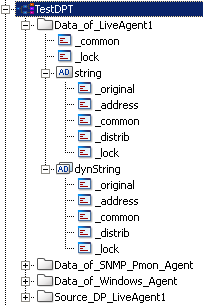
-
Configure the AgentID (corresponds to the number that was used when the SNMP agent was configured. Thus, in this case the number is 1).
-
Add the number 1 to the end of the OID. The number one is the data point index of the Source_DP_LiveAgent1.string data point in the SNMP Live Agent configuration panel.
Figure 6. Address config with configuration 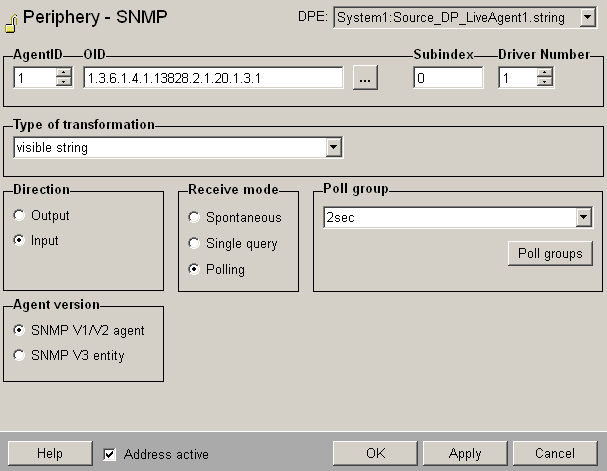
-
Select the data point element whose value should be mapped to this data point, via the MIB browser.
Figure 7. MIB browser 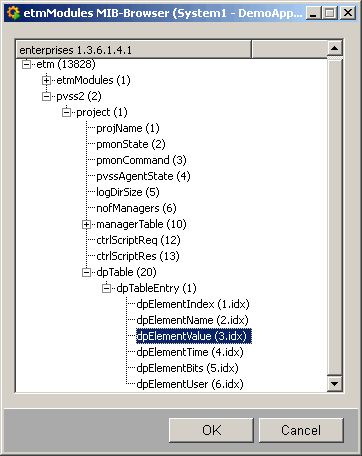
The sub index is 0 and means that the actual value is accessed.
The driver number is the number of the SNMP manager, which should collect the configured data.
Since we want to display a string value, the transformation type is "visible string". Since the value is shown in WinCC OA and do not have to be available to external managers, the direction is "Input". The receive mode is "Polling".
-
Create a poll group 2sec via the Poll groups... button and configure it.
Figure 8. Poll group configuration 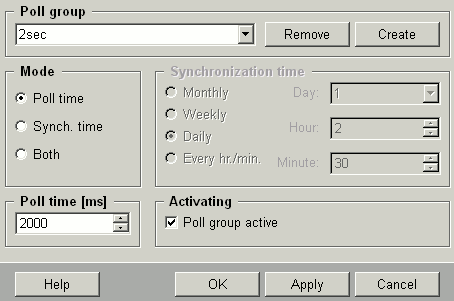
-
Apply the settings via the Apply button.
Set the same settings for the dynString element but add the letter 'B' to the end of the OID. B means that all elements of the chosen data point are mapped and shown.
Figure 9. Address config with configuration 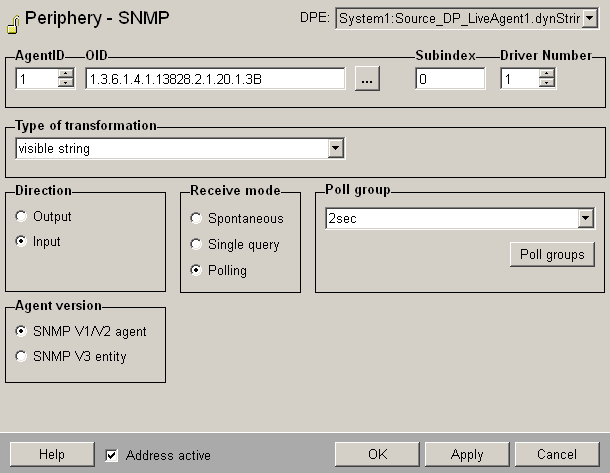
-
Add a SNMP manager with the number 3 and a SNMP LiveAgent with the number 1 to the console. Start the manager and the agent.
Figure 10. Console with the SNMP manager and SNMP Live Agent 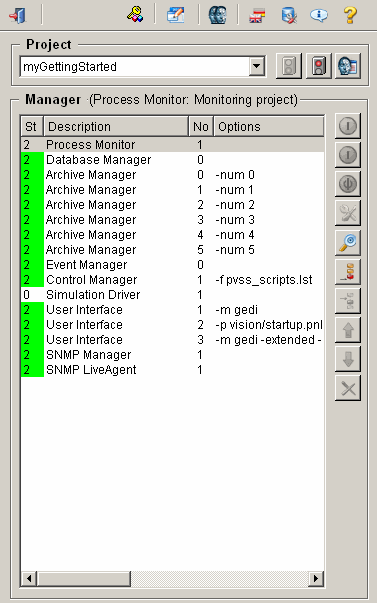
-
Set values on the source data points.
Figure 11. Set a value on a source data point 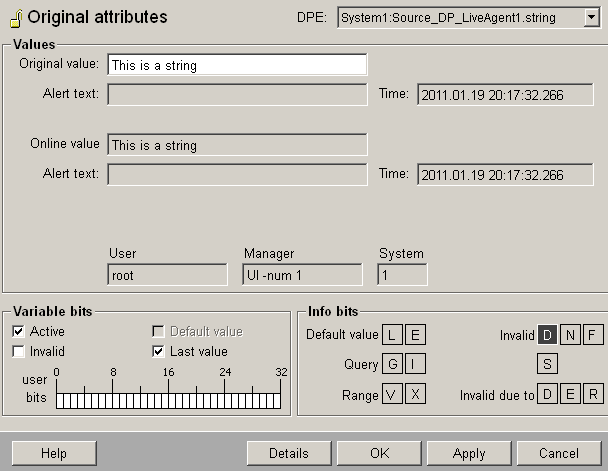
-
Set several values on a DynString element.
Figure 12. Set several values on a DynString element 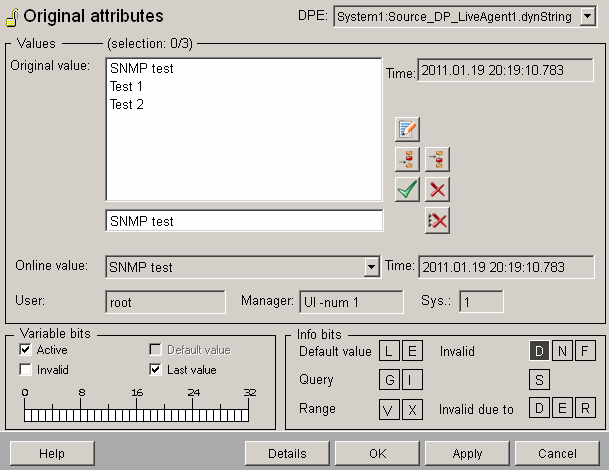
-
Check the values on the target data points.
Figure 13. Value on the target data point "Data_of_LiveAgent1" (string element) 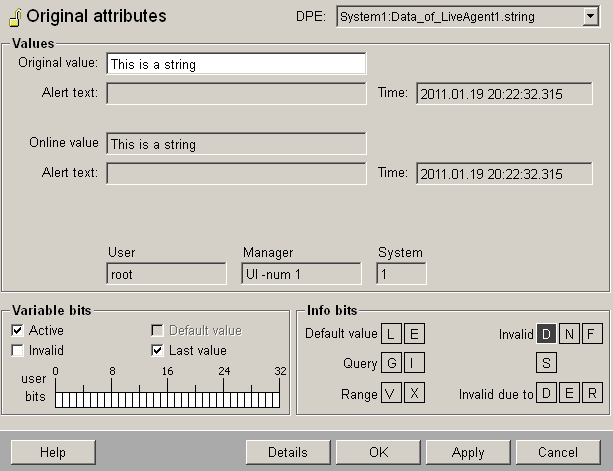
Figure 14. Several values on the target data point "Data_of_LiveAgent1" (DynString element) 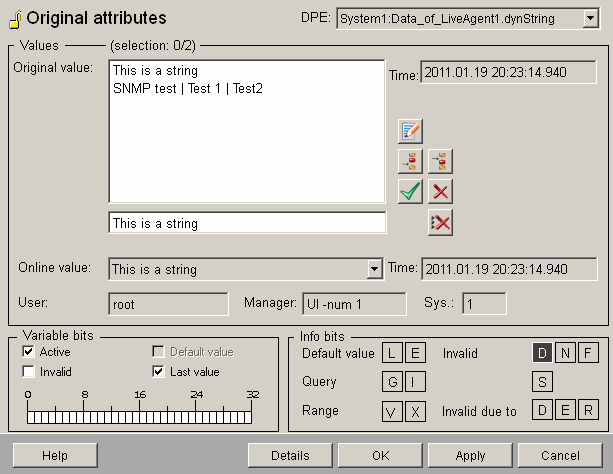
Windows computer as an SNMP agent
If an SNMP service is running under Windows, this Windows computer also is an SNMP agent. This means you can simply configure an agent with the IP address of the computer and port 161 like in the figure below (Windows SNMP agent configuration). The address example is the OID of IP forwarding (see figure: address example). For details on the possible OID entries see RFC 1213. Thereby, Windows supports the MIB II.