SIMATIC Information Server - How to display WinCC OA data-based reports
This chapter describes the how to display WinCC OA data-based reports via the SIMATIC Information server. Proceed as follows:
Add a WinCC OA Data Source to the SIMATIC Information Server
With SIMATIC Information Server 2014 SP2, a new feature has been added. You can now add a WinCC OA Data source within the Information Server itself.
-
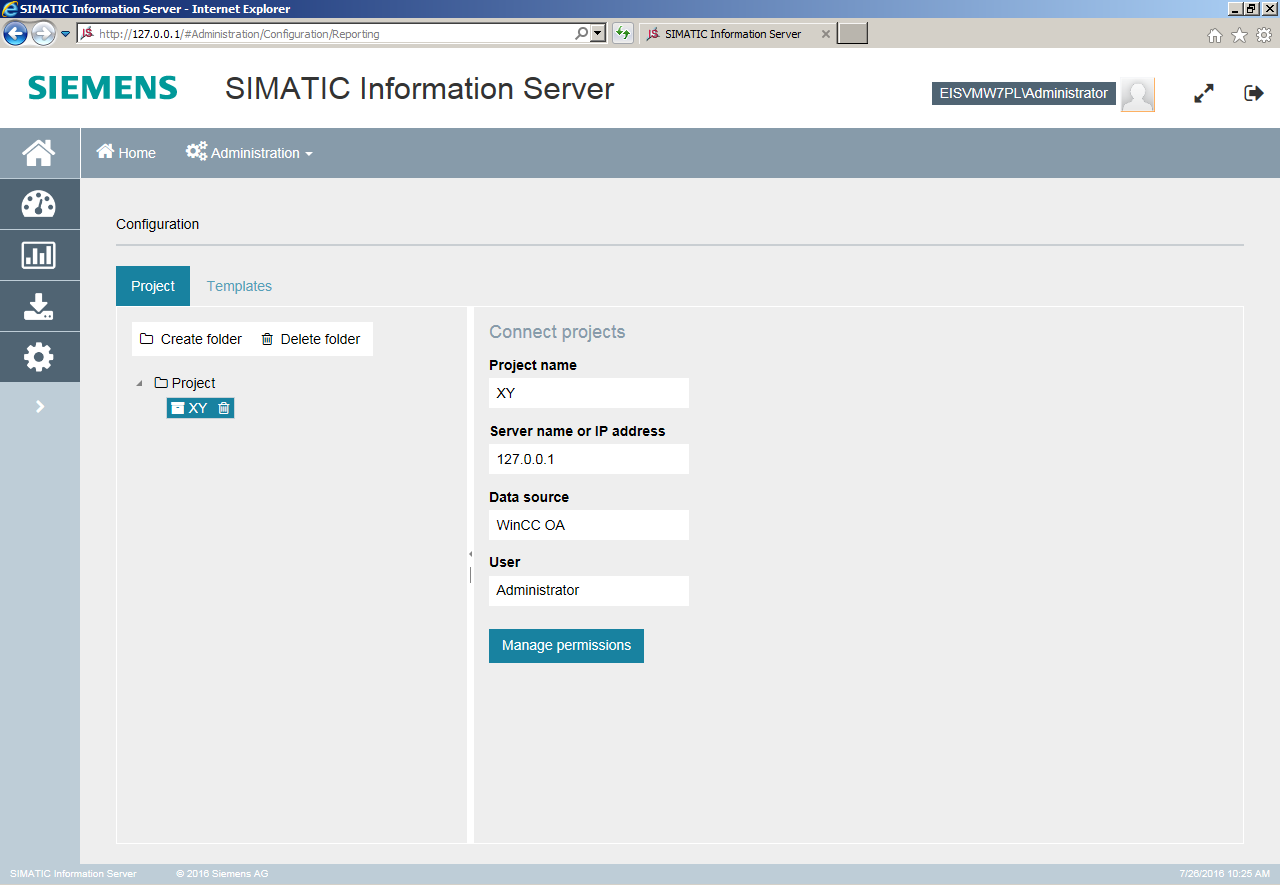
In order to add a new WinCC OA Datasource. Open the “Configuration” via “Administration” -> Configuration -> Reporting. Enter the host name of your WinCC OA server or the IP address where the reporting manager is running. Select the third option “WinCC OA” and specify further connection Details. Note that the HTTP port must correspond to the HTTP port specified in the WinCC OA config file.
Note:HTTPS is not supported!
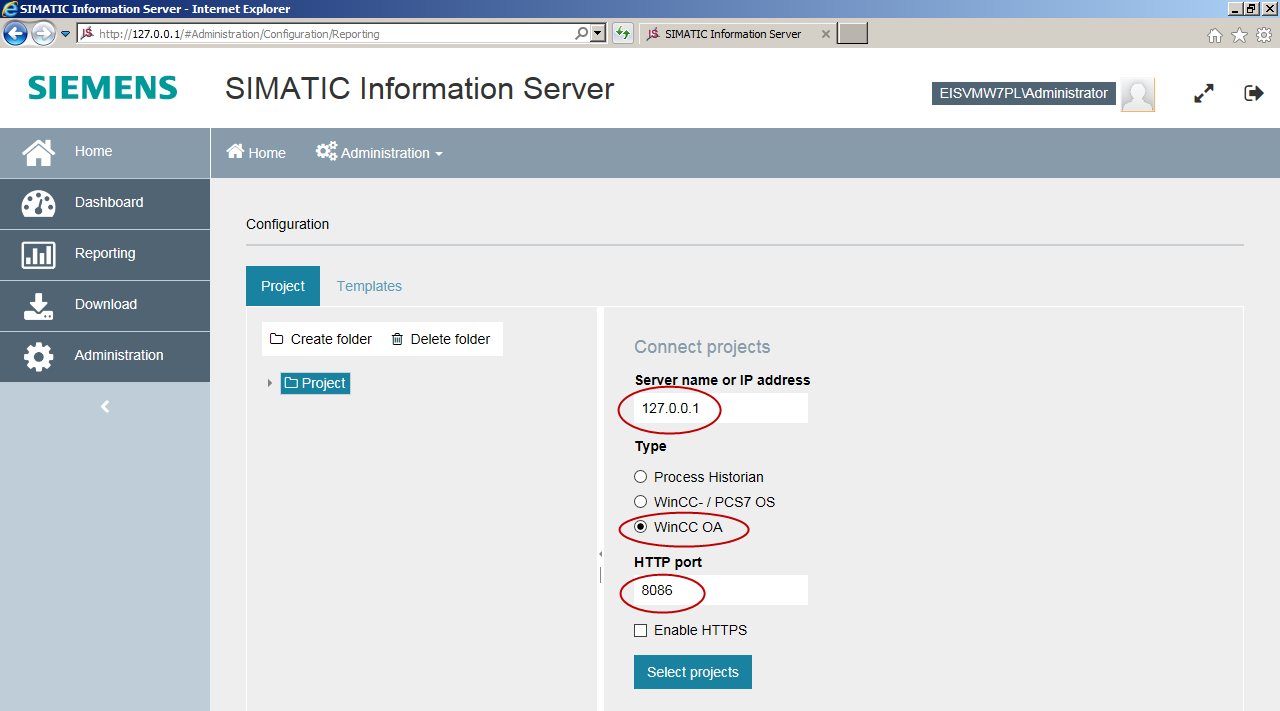
You can only specify a single WinCC OA Datasource connection.
How to upload custom Reporting Service RDL files to SIMATIC Information Server
-
Open the administration menu and click on the icon with the “Reporting” label. Select the “Templates” tab to open the template manager (see the second figure below).
Figure 3. SIMATIC Information Server: Configuration: Reporting 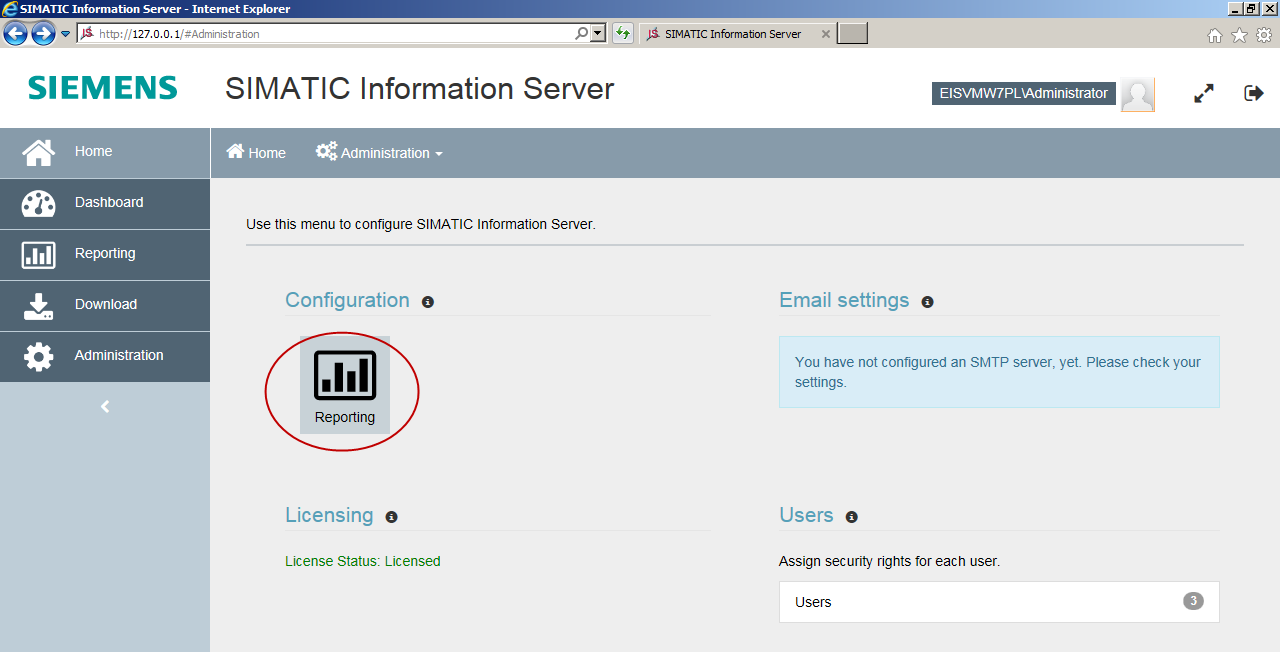
-
Expand the folders on the left-hand side to select a location you wish to upload the RDL file to. You can also create a new folder to upload it to.
-
Click on the “Upload” button and select the RDL file you wish to upload. Confirm the dialog. After the upload is finished, the template is available in the Reporting app in the previously specified folder.
Figure 4. SIMATIC Information Server: Administration: Configuration: Templates 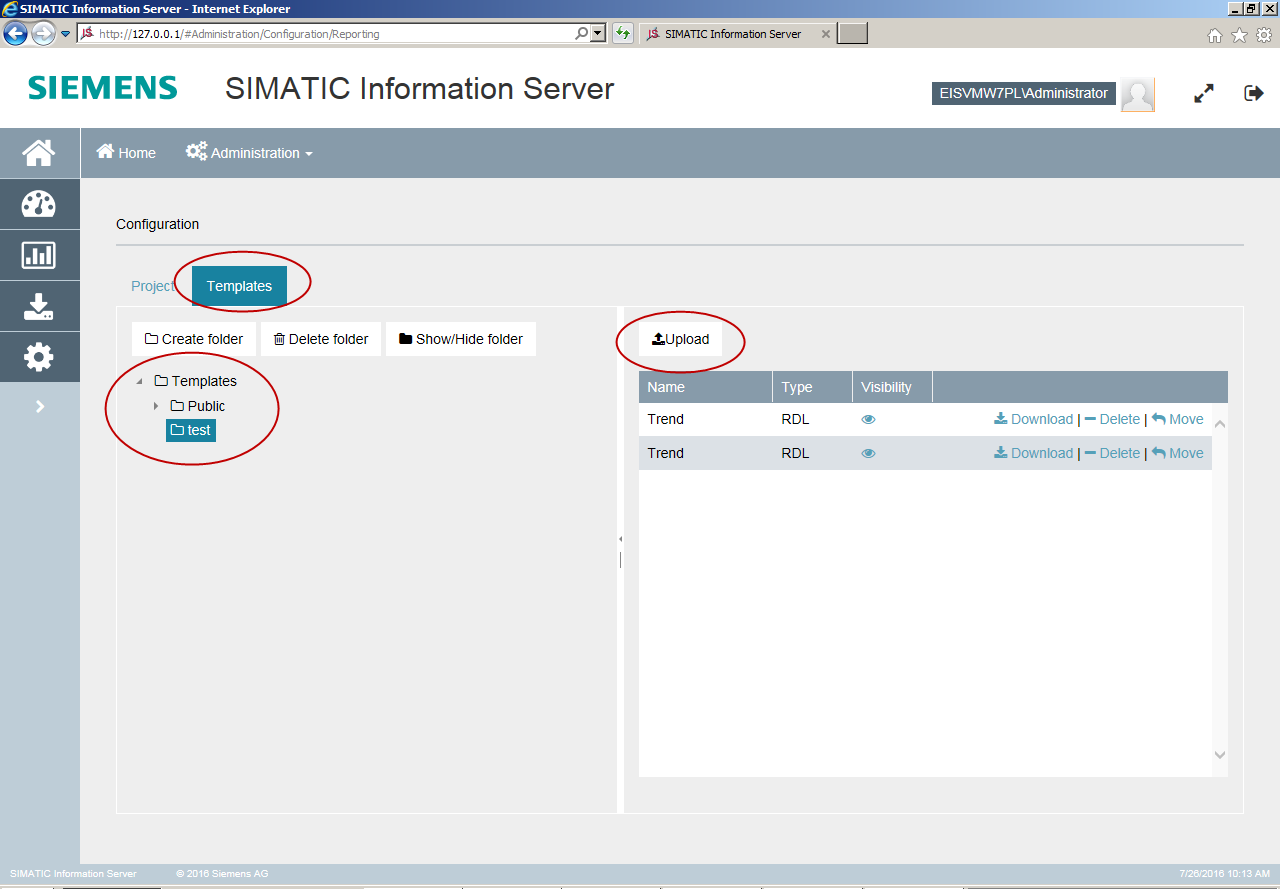
-
On the left-hand side of the window select the template you want to. Note that all templates are named "Trend". Click the "Create report" button.
Figure 5. SIMATIC Information Server: Select a template 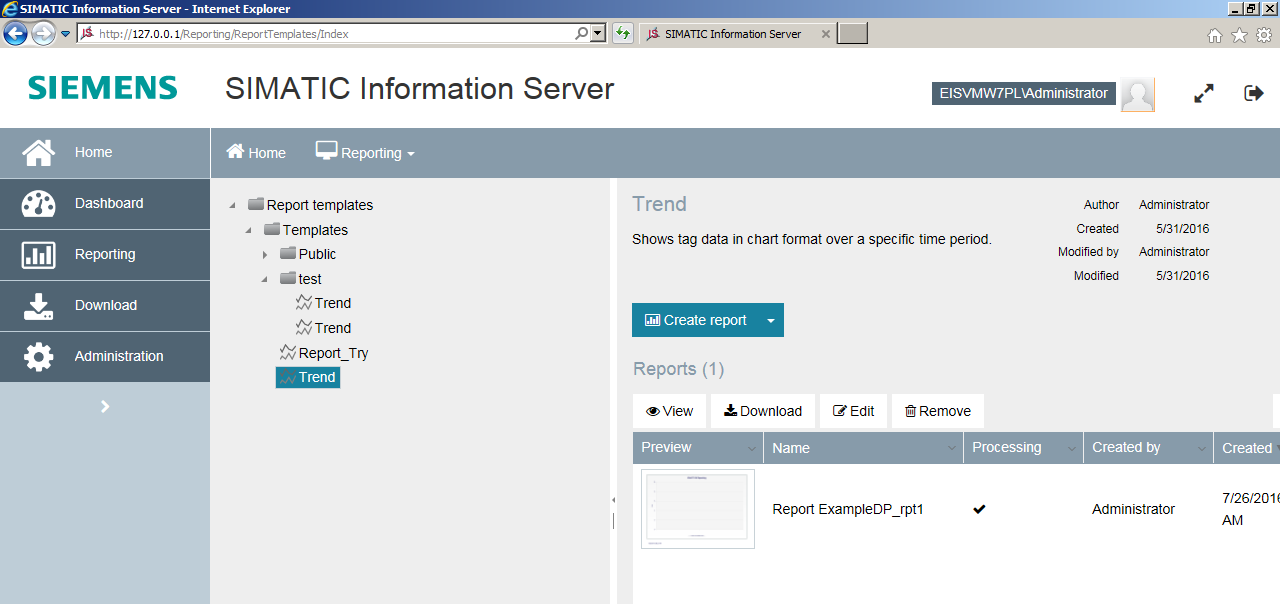
-
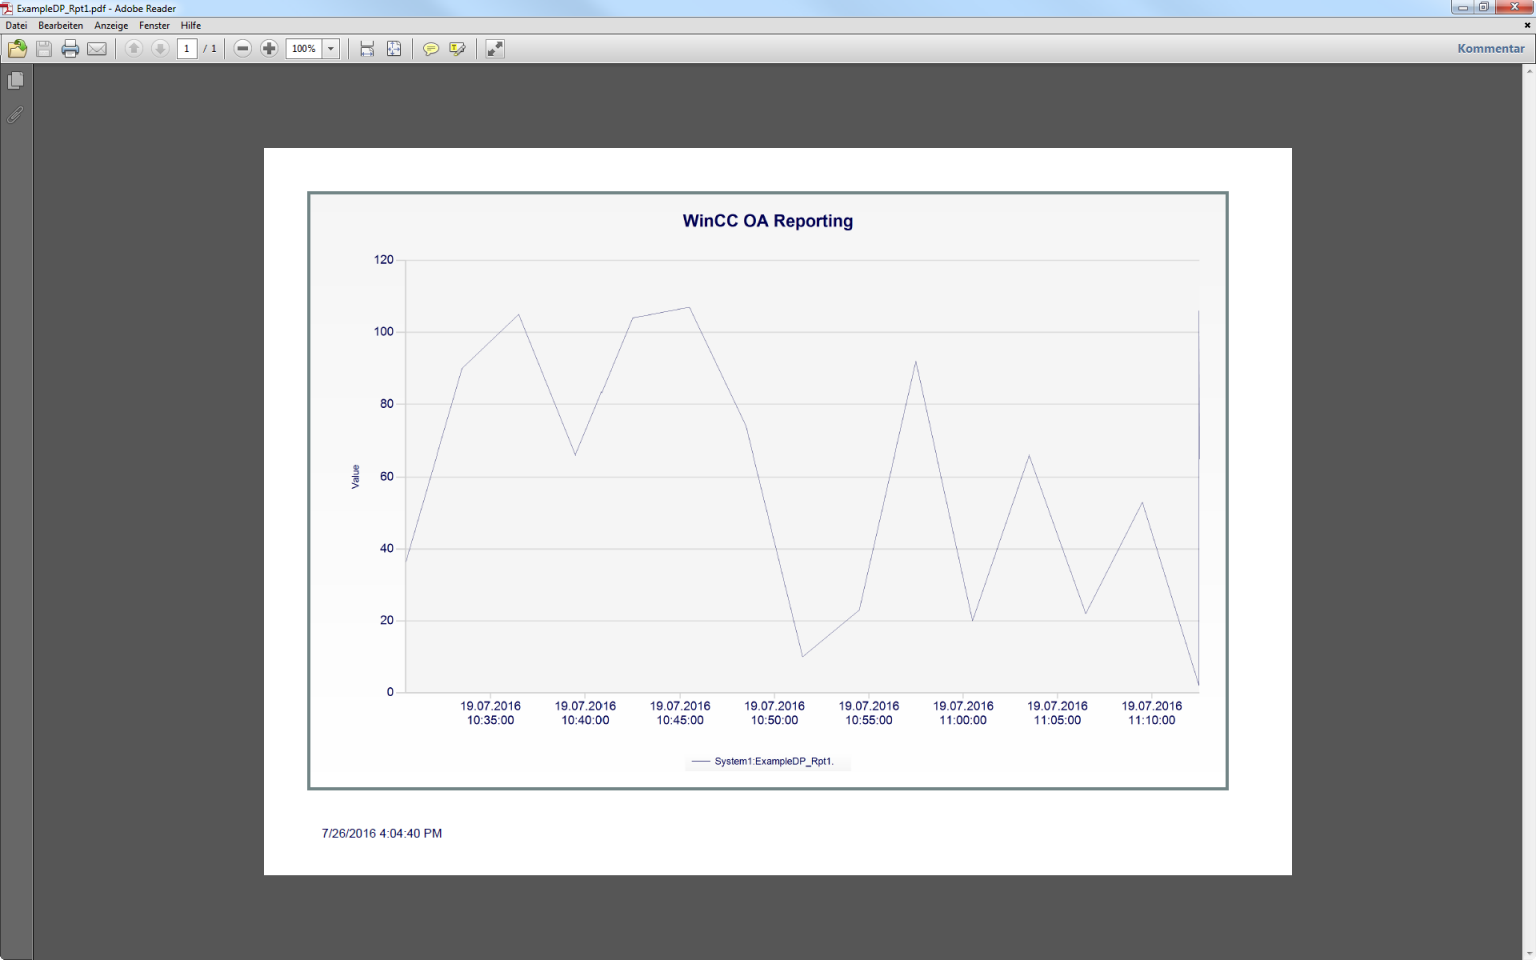
Select the data point from the combo box and enter the time frame for the report. Click the "Show preview" button. The report is shown on the right-hand side of the window.
Figure 6. SIMATIC Information Server: Show preview 
The specific data points are shown (see figure below) since the data point type was restricted to ExampleDP_Float in the data set (in the query). This data set is used for the parameter "DataPointName" (see second figure below). The global parameter "DataPointName" is used for the local parameter "alertAttribute" of the data set "DataSet1" and for the query "alertGetPeriod" of the data set "DataSet1" (see the third figure below).
Figure 7. The data point type was restricted to ExampleDP_Float in the data set (in the query) 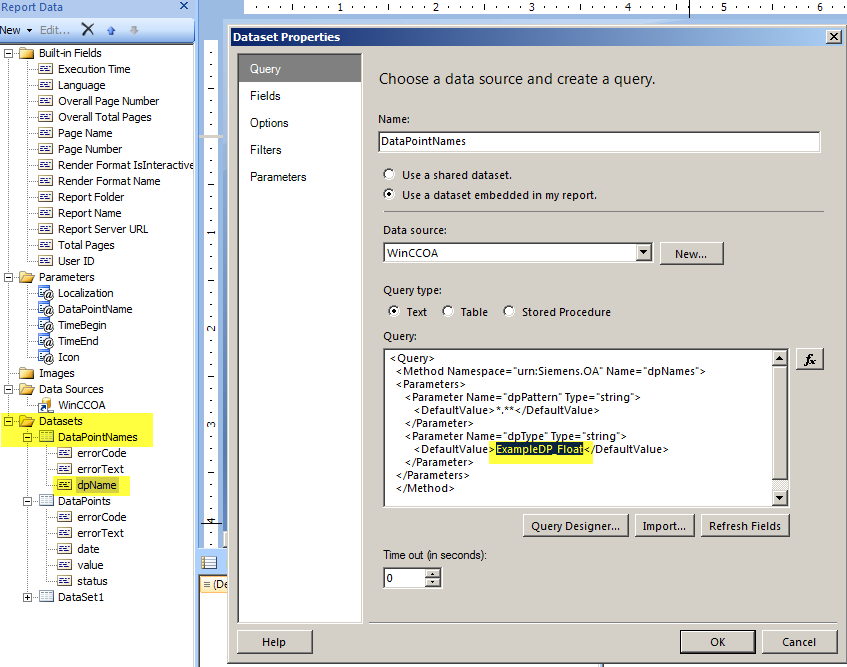
Figure 8. This data set is used for the parameter "DataPointName" 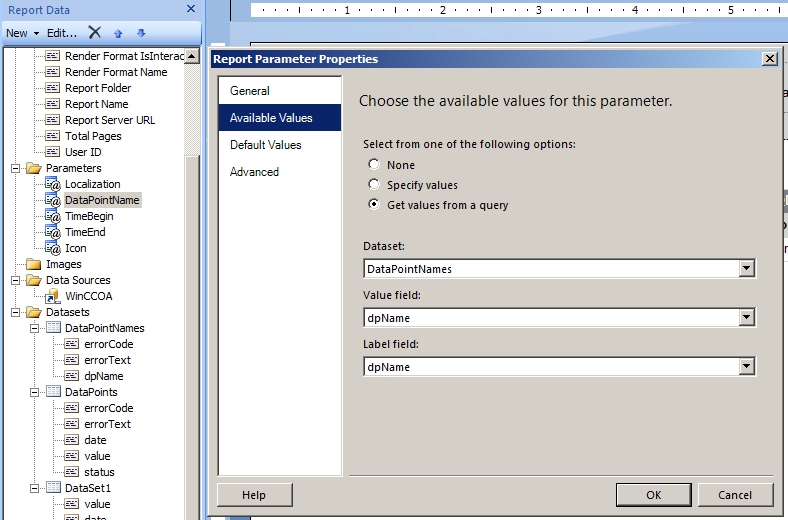
Figure 9. The global parameter "DataPointName" is used for the local parameter "alertAttribute" of the data set "DataSet1" and for the query "alertGetPeriod" 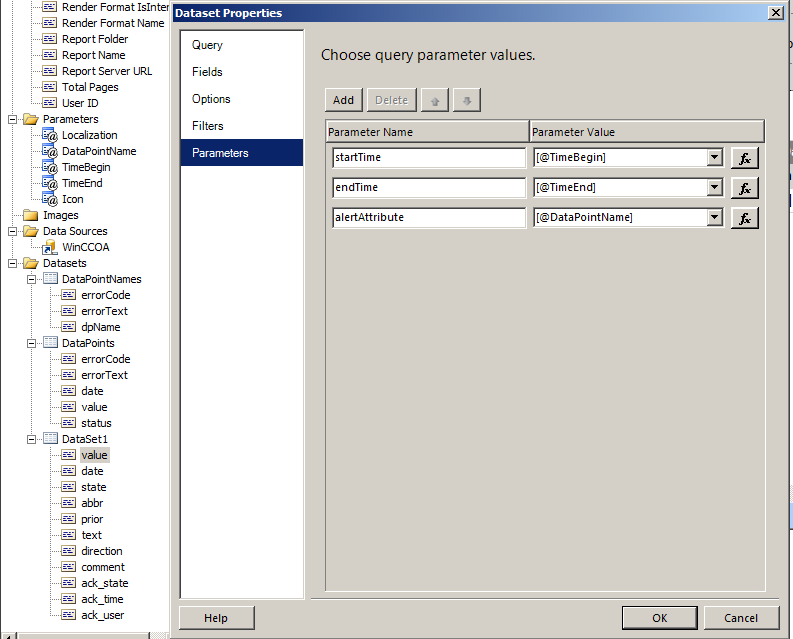
-
You can now create a report by clicking the "Create report" button. A window is opened. Select the report format from the combo box and enter a name and a description.
Figure 10. SIMATIC Information Server: Create Report 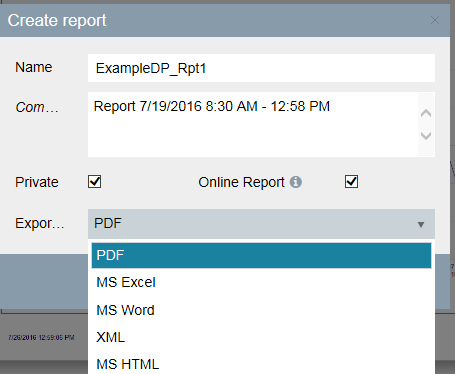
Figure 11. PDF Report