Implementation of SVN
Before you can use the SVN functionality you have to setup the GEDI and your WinCC OA project. The following paragraphs describe the required preparations.
Setting up the repository
In order to use the SVN functionality in an WinCC OA project, the project must be checked into a SVN repository.
The following instruction describes step by step how to create a repository and how to import a WinCC OA project into the repository.
 HOW TO setup your SVN repository
-
Change to the directory where the repository shall be located. Create a folder which shall contain the repository
-
Right-click the directory and select TortoiseSVN -> Create Repository.
-
TortoiseSVN needs a number of directories to exist inside the repository in order to ensure a correct functionality. Therefore, after the creation of the repository, click on Create folder structure in the following dialog window.
Figure 1. Repository is created 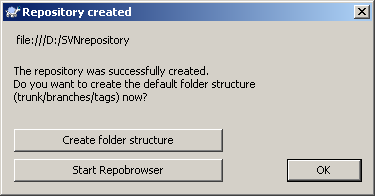
-
When you click on Start Repobrowser the repository should look like this:
Figure 2. SVN Repository - Repobrowser 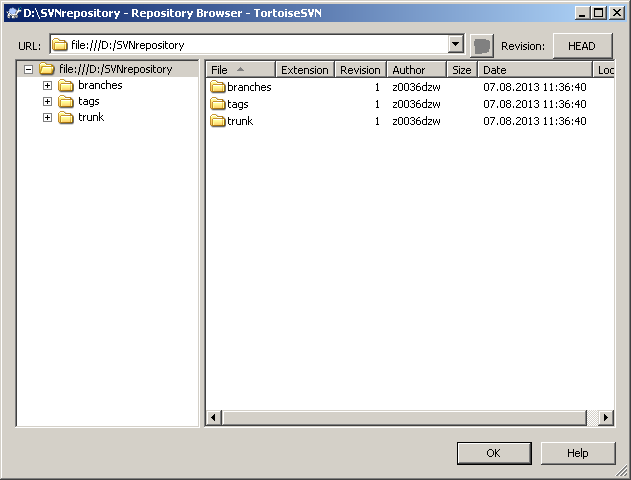
-
The folder will display the following icon in the explorer when the creation and configuration of the repository is finished:
Figure 3. Repository icon 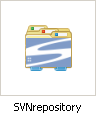
Setting up the WinCC OA project
The WinCC OA project must be imported into the repository in order to manage it with SVN. Proceed as described below.
![]() HOW TO SETUP YOUR
WinCC OA PROJECT
HOW TO SETUP YOUR
WinCC OA PROJECT
-
Make a backup of your project folder. This is important because if some steps are not done properly, the project may be destroyed.
-
Remove all files of the /log folder of the WinCC OA project. The folder shall remain.
-
Optional step! Remove the history from the Value Archives. Only do this step if you truly understand what data is in there and it is OK to remove it.
-
Open the repository browser by a right-click on any folder and select TortoiseSVN -> Repobrowser.
-
A popup window occurs in which you have to enter the URL of the repository. Confirm the link with the OK button.
Figure 4. Specify the repository URL 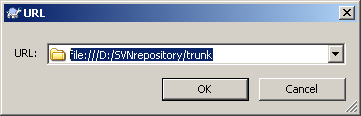
-
Create a project folder inside the trunk folder by right-clicking on the trunk folder and selecting Create Folder. If you want to manage multiple projects, be sure to use a descriptive folder name.
Figure 5. Repobrowser - create project folder 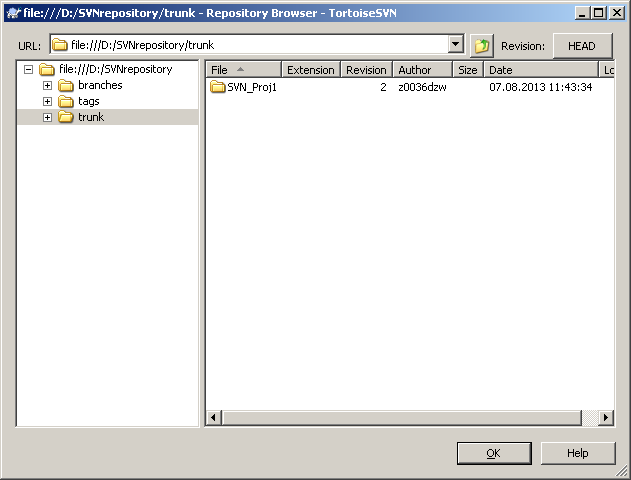
-
Right-click on the WinCC OA project folder in the OS file explorer and select SVN Checkout...
-
In the following window, select the previously created project folder as "URL of repository" and the WinCC OA project folder as "Checkout directory". Click on OK to confirm and click on Yes when a warning that the folder is not empty is displayed.
Figure 6. Checkout 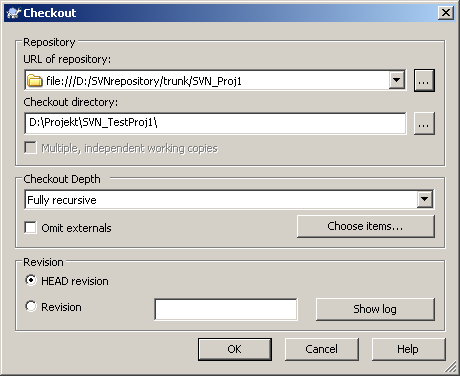
-
Now all of your WinCC OA project folders should be displayed with question marks on them. Right-click on the folders that need to be added to the repository and select TortoiseSVN -> Add. Add the following folders to your repository:
-
/panels
-
/scripts
-
/msg
-
/pictures
-
/colorDB
-
Optional: /config
-
Optional: /data
-
Optional: /dplist
-
Optional: /help
-
Optional: /images
-
Optional: /source
-
-
For all other folders that you do not want to manage with the version control, select TortoiseSVN -> Add to Ignore List in the context menu.
-
/bin
-
/db
-
/log
-
/printers
-
-
The folders will be displayed as in the following picture.
Figure 7. project directory - added folders 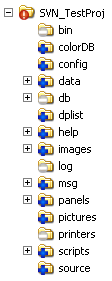
-
Now you have to commit the folders to the repository. Therefore, right-click on the WinCC OA project folder and select SVN Commit...
-
After completing all these steps, the folders will be displayed like in the picture below and your project is now managed by SVN.
Figure 8. project directory after the commit 
SVN functionality in the GEDI
To activate the SVN functionality in the GEDI and to insert the SVN functions into the context menu of the project view, you have to add some entries to the [ui] section in the config file.
[ui]
versionControl = "SVN"
defaultPanelFormat ="XML"
numPanelBakFiles = 0
versionControlDiff = "<TortoiseSVN Pfad>/bin/TortoiseUDiff.exe"
The config entry [ui]versionControl is used in gedi/projectView.ctl to check if it contains "SVN" to activate this version control system. If other VCS shall be used, it's possible to create separate scripts for each VCS. The name must be exactly the name defined as value of the config entry. E.g. versionControl = "XYZ" means that there must be the script XYZ.ctl. This script must be located in thescripts/gedifolder (e.g.:scripts/gedi/xyz.ctl).
Changing the panel format to XML enables functions like merge and diff. However, you have to be careful since merging may make some panels unusable.


