RDB
Synchronization of historical Values in the Database
For the description of the synchronization process see Synchronization Process.
The following panel displays a list of all time ranges in which there was an interruption in the connection between:
- PSS and SSS
- PSS and PSS Oracle® Database
- SSS and SSS Oracle® Database
As well as the times given in the table, users can also define their own time ranges, in which the historical database values are synchronized.
- The synchronization of the historical data is only triggered in this panel. The synchronization itself is carried out by an Oracle® process, which runs in a specific time interval in the database. The synchronization of the historical data only works if the databases of the PSS and SSS equal, i.e. they have the same archive groups.
- Duplicate alerts may occur after synchronization of historical values.
Historical synchronization
In the table, the times for a loss of connection and the establishing of a connection respectively are displayed, and the current synchronization status (see Status of the Synchronization).
The current synchronization status is additionally displayed via the colour of the row of a time interval:
- Green: Synchronization was successfully carried out.
- Yellow: Synchronization is running.
- Red: Synchronization has failed.
- White: Time ranges that have not yet been selected by the user.
The buttons have the following meaning:
-
 - deletes the highlighted time ranges from the table.
 -
 - starts a historical database synchronization for the selected time range.
 -
 - opens the window for the free definition of a time range (see below).
 -
 - updates the table.
 -
 - opens the system configuration, where the system names and numbers of the PSS and SSS are mapped to each other for the
synchronization of historical values. For further information see below.
- opens the system configuration, where the system names and numbers of the PSS and SSS are mapped to each other for the
synchronization of historical values. For further information see below. -
 - opens this chapter of the WinCC OA online help.
 -
 - closes the panel for the historical database synchronization.
Freely definable time range
Via this panel, it is possible to set a freely definable time range and then insert it into the table for historical database synchronization.
The synchronization of historical data with freely definable time ranges must be manually activated by the user.
Click on the ![]() button in order to define a start time or end time for the time range. This opens the WinCC OA
calendar panel, with the help of which the desired dates and times can be selected.
button in order to define a start time or end time for the time range. This opens the WinCC OA
calendar panel, with the help of which the desired dates and times can be selected.
The system configuration
In the system configuration the system names/numbers of the PSS and the SSS are mapped with each other. The mapping already takes place during the setup
via the parameters system_first and system_second (see Entries for 2x2 Redundancy (Disaster
Recovery System) and/or Historical Synchronization). Here this configuration can be changed or another PSS/SSS pairs can be added.
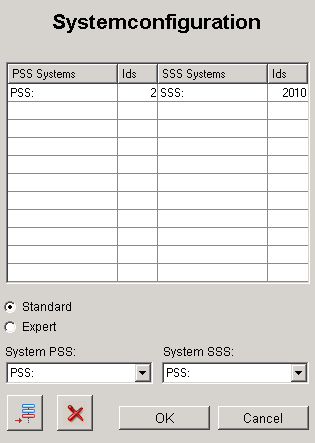
Columns PSS Systems and Ids: system name and system number of the first or local system to match the first system number of the second or distant system.
Columns SSS Systems and Ids: system name and system number of the second or distant system to match the first system number of the first or local system.
The mapping data are written to the MAP_SYSTEMS table of the Oracle® database.
To synchronize the historical values between additional PSS/SSS systems, these can be added to the system configuration. This is either possible via the standard configuration or the expert configuration.
Standard configuration
Select the appropriate system names from the combo boxes System PSS and System SSS and add them to the table by clicking on the ![]() button. The system numbers are determined automatically.
button. The system numbers are determined automatically.
Expert configuration
Select the Expert radio box to open the expert configuration.
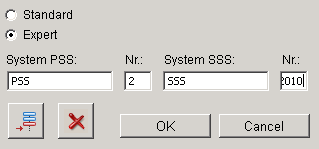
With the aid of the expert configuration additional PSS/SSS pairs can be added to the table. Enter the appropriate system names with their system numbers and add them to the table by
clicking on the ![]() button.
button.
Also corrections, if during the setup the wrong system numbers were entered, are possible in this way.
Also take corrective action if the setup inadvertently the wrong system numbers were entered, are possible in this way.
To delete a PSS/SSS pair from the table, highlight the corresponding line in the table and click on the ![]() button.
button.


