Example of the Authorization Check Plug-in
This example comprises a windpark example with two views Windpark1 and Windpark2 and four different nodes Turbine1, Turbine2, Turbine3 and Turbine4. Before working through this example, configure the project for the use of the authorization check plug-in.
This example comprises the following parts:
- Create data point types and data points in PARA
- Create two views and nodes of views via the plant model editor as well as assign data points
- Create user groups, set user bits, create users, assign users via the user management panel.
- Create roles via the authorization check plug-in wizard
Create data point types and data points in PARA
- Create the necessary data point types and data points in the PARA module as follows: the data point type "Windpark1" with an int
element "speed".
Figure 1. PARA Module -> Data point type "Windpark1" 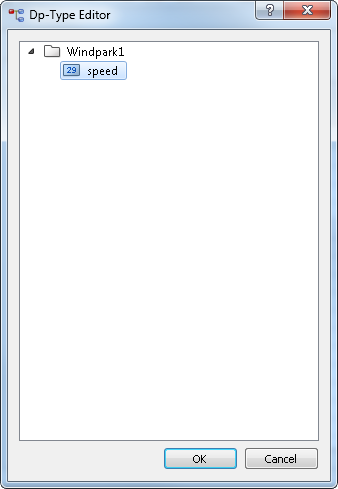
- The data point type Windpark2 with three different elements inOperation (Bool). speed (int), current (int).
Figure 2. PARA Module -> Data point type "Windpark2" 
-
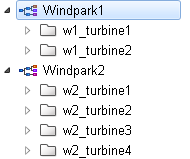
Create the following data points: w1_turbine1, w1_turbine2, w2_turbine1, w2_turbine2, w2_turbine3 and w2_turbine4
Create two views and nodes of views via the plant model editor as well as assign data points
-
Create two views "Windpark1" and "Windpark2" in the plant model editor. The view Windpark1 contains the node "Turbine1".
Figure 3. Plant model editor - View "Windpark1" 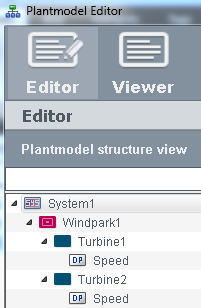
-
Assign the data point "w1_turbine1.speed" to the node "Turbine1"
Figure 4. Node "Turbine1" and data point " w1_turbine1.speed" 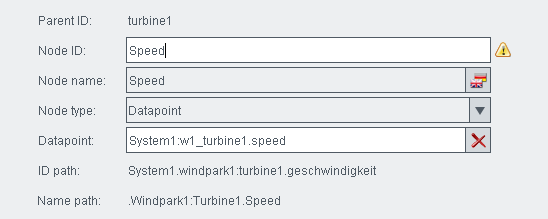
-
Assign the data point "w1_turbine2.speed" to the node "Turbine2".
-
The view Windpark2 contains the nodes "Turbine1", "Turbine2", "Turbine3" and "Turbine4". Assign the appropriate data points to the nodes, e.g. the data point "w2_turbine1.inOperation" to the node "Turbine1". Assign the rest of the data points to the nodes of the views. See figure below.
Figure 5. Plantmodel Editor - View "Windpark2" 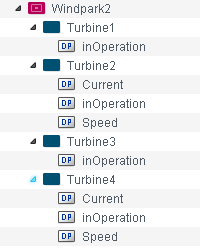
Figure 6. Node "Turbine1" and Data point " w2_turbine1.inOperation" 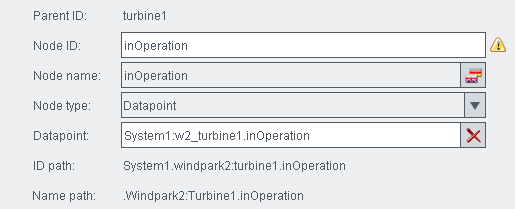
Create user groups, set user bits, create users, assign users via the user management panel
- Create three user groups via the System Management-Panel -> Permission -> User Administration: Operator_Windpark, IT_Administrator, SCADA_Dev
-
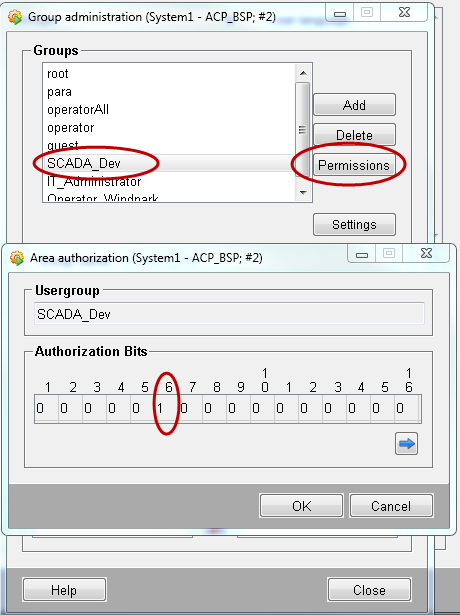
Open the panel group administration via the user administration -> "Administrate" button under "Groups". Add the groups Operator_Windpark, IT_Administrator and SCADA_Dev
Figure 7. Group administration - Create groups 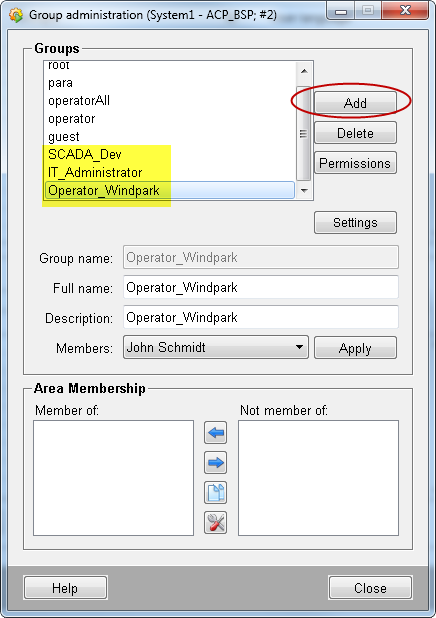
-
Set the user bits via the "Permissions" button or via a double click on the group name. Set the bit 6 for the group "SCADA_Dev", the bit 7 for the group "IT_Administrator" and the bit 8 for the group "Operator_Windpark".
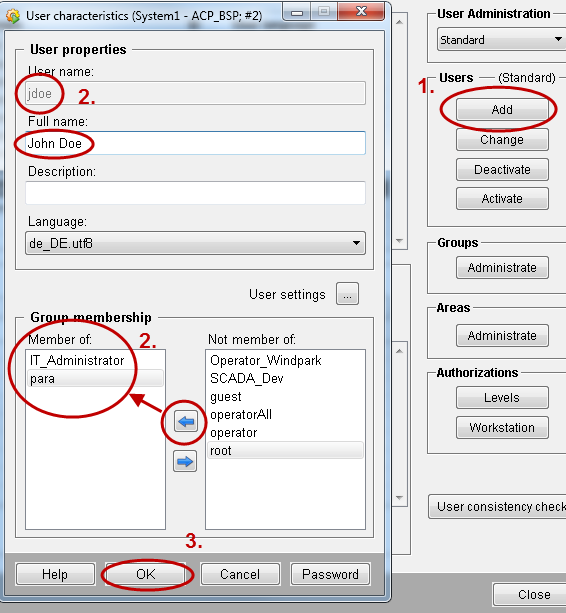
- Create three users for the groups: jdoe, mmuster, jschmidt.
- All users belong to the group "para". Additionally the user John Doe belongs to the group "IT_Administrator" . The user Max Mustermann belongs to the group "SCADA_Dev" and jschmidt to the group "Operator_Windpark".
- Via the group membership the users have the first 5 bits (Group: para).
- The user mmuster has additionally the bit 6 from the group SCADA_Dev.
- The user jdoe additionally has the bit 7 from the group "IT_Administrator" and
- The user jschmidt has the bit 8 from the group "Operator_Windpark".
Create roles via the authorization check plug-in wizard
-
Log in as the user "para" (UI-Manageroption: -m para -server https://localhost:443 -ssa).
- Open the Authorization Check Plug-in Wizard via the
- In the Authorization Check Plug-in Wizard create 3 roles:
- SCADA_Dev
- IT_Admin
- Operator_windpark
- For the Windpark1 for the role SCADA_Dev set the bit 6 to 1 and the bits 7 and 8 to 0.
- For the role IT_Admin set the bit 7 to 1 and the bits 6 and 8 to 0.
- For the role Operator_Windpark set the bit 8 to 1 and the bits 6 and 7 to 0.
- For the role SCADA_Dev for the Winpark1 set the rights to "Write" since this is a developer role.
Figure 8. Role "SCADA_Dev" as well as the necessary authorization levels and access rights for Windpark1 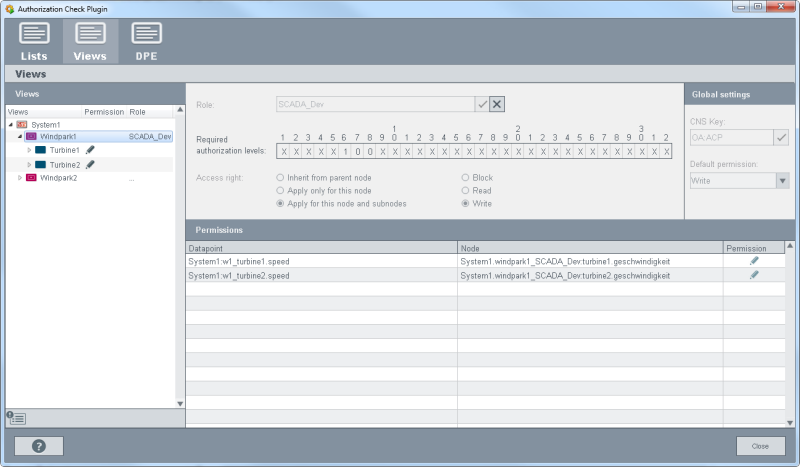
- For IT_Admin that is also a developer role, set the Turbine1 and Turbine2 of the Windpark1 to blocked since this role is not
responsible for the Windpark1.
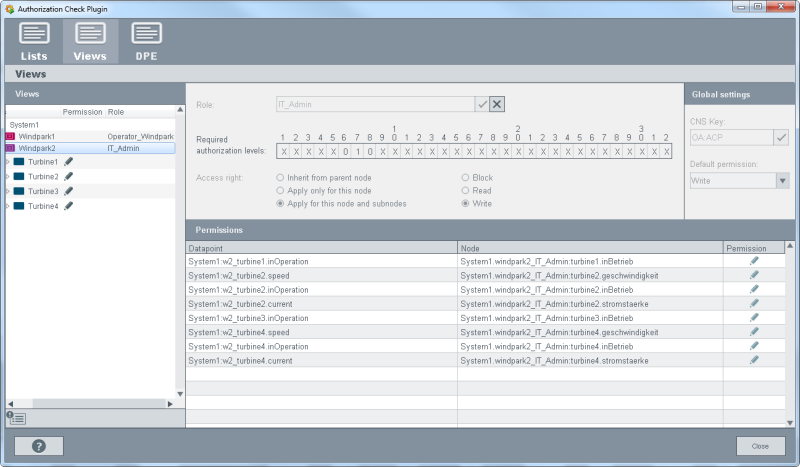
Figure 9. Role "IT_Admin" as well as the necessary authorization levels and access rights for Windpark1 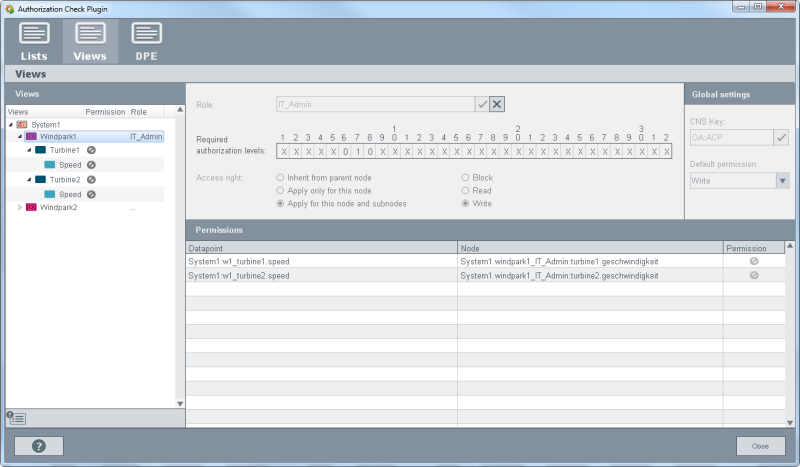
- The role Operator_Windpark has write permission for the Turbine1 and read permission for the Turbine2 of the Windpark1.
Figure 10. Role "Operator_Windpark" as well as the necessary authorization levels and access rights for Windpark1 - Windpark2 is still being developed and is not in operation yet. Therefore, the operator does not have access rights. For the role
Operator_Windpark all turbines are blocked for the Windpark2
Figure 11. Role "Operator_Windpark" as well as the necessary authorization levels and access rights for Windpark2 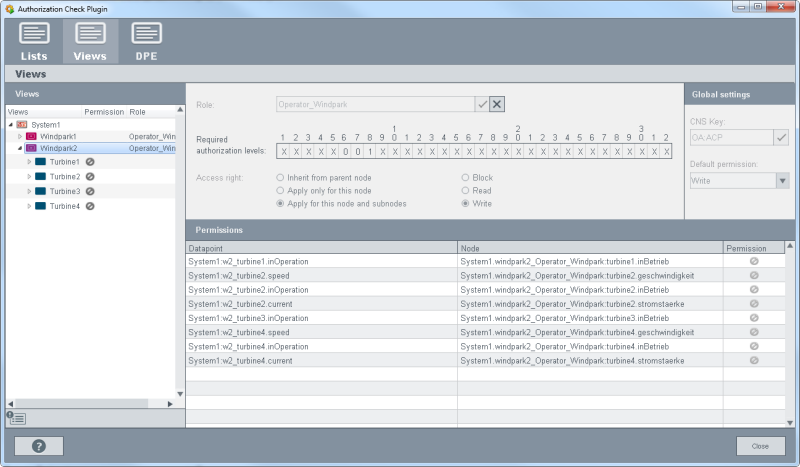
- The roles SCADA_Dev and IT_Admin possess write permission for all turbines since these are developer roles.