Editor
The Editor is meant for creating views and nodes which can be used within the WinCC OA project. This chapter describes the structure and functions of the Editor.
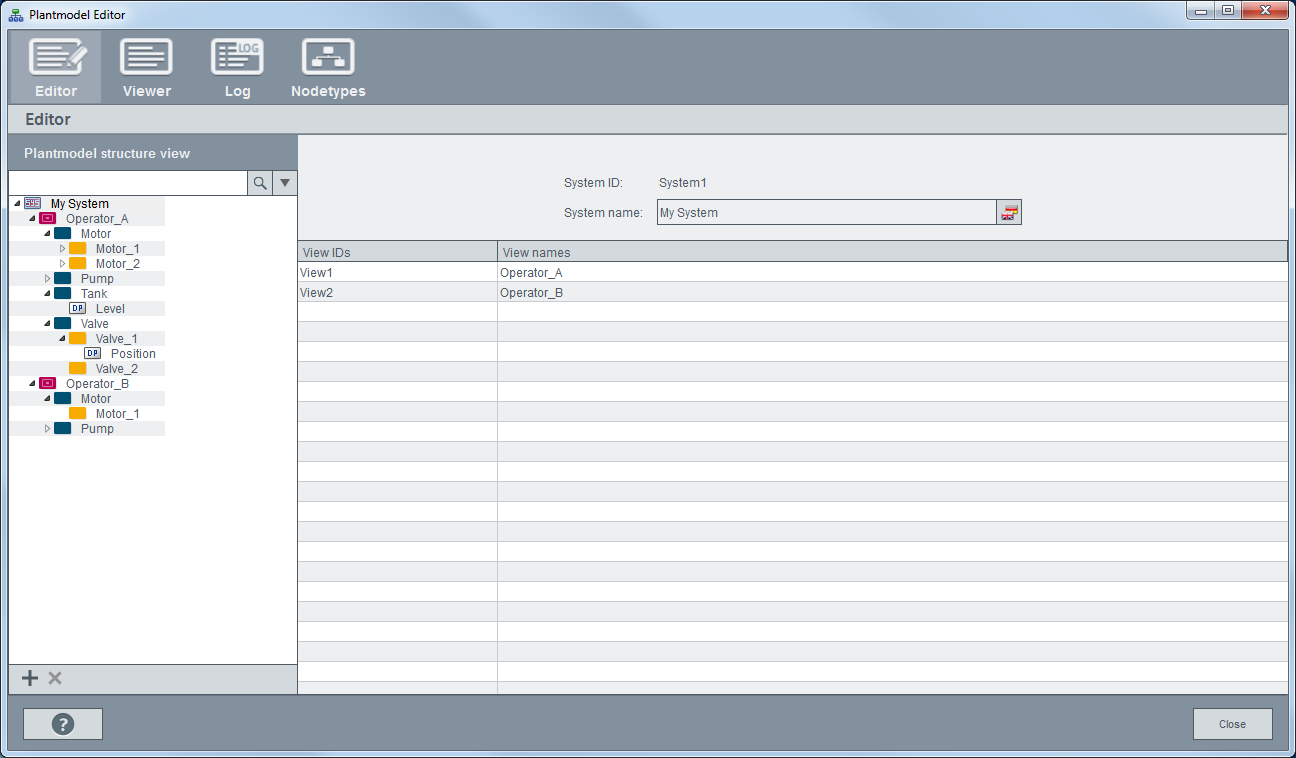
Structure view
System 
The system is the top node for the Common Name Service. This node cannot be changed and is the starting point for all views and trees.
View 
A view is a container for an arbitrary number of nodes which are used for the structure mapping.
Node 
Nodes are used for mapping data points or data point elements in a CNS structure. There is no limit to the number of nodes and they can be interconnected in any tree structure.
Create new view / node 
Depending on the selected element in the tree, either a View or a Node is created. Moreover it is possible to drag a data point of the DP selection to the tree and depending on which element it is dropped, a sub-node is created.
Remove view / node 
Removes the selected element as well as all sub-elements of the tree.
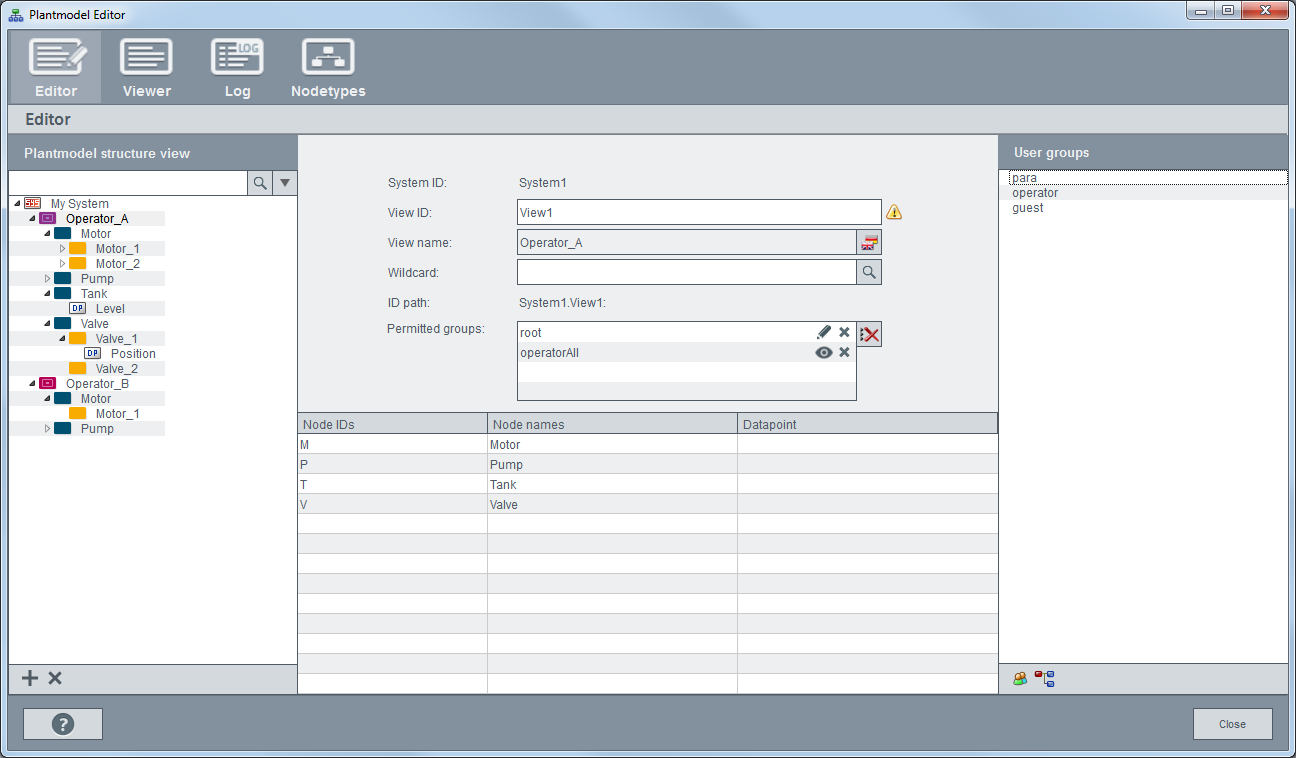
System ID
The ID of the system to which the view is assigned.
View ID
The unique internal name of the view. With this ID the view can be addressed for editing. Changes to the ID will not be applied to a script automatically. Therefore, all scripts where the View ID is used must be edited in case of changes to the ID.
View name
Display name that is used within the user interface. This name can be defined in multiple languages.
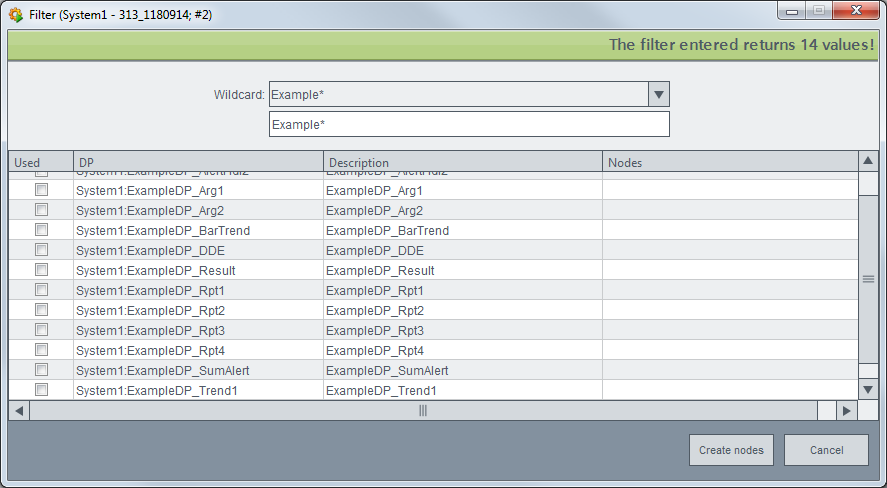
Wildcard
If you define a wildcard, the following panel is opened and shows a list of all matching data points. You can select the data points and add them to the view by clicking on Create Nodes.
The wildcards * and ? can be used. One asterisk * returns all levels. The question sign ? returns one character.
ID path
The view can be addressed with this unique path.
Permitted groups
Defines the permission of each user group. It is possible to set read or write rights
for a group. A group can be added to the field per drag & drop. With a left
mouse click the write ( ) and reading rights (
 ) can be set.
Node overview
Shows all nodes which are directly connected to the view. It is possible to add data points of the DP view as new nodes by using drag & drop. With a right mouse click a context menu is opened which allows to delete the selected nodes.
Node

Parent ID
The ID of the superior node (parent node) of the selected node.
Node ID
The internal name of the node. Changes to the ID will not be applied to a script automatically. Therefore, all scripts where the Node ID is used must be edited in case of changes.
Node name
Node name that is used within the user interface. This name can be defined in multiple languages.
Node type
Type of the selected node. The node type is used for a further distinction of nodes (e.g. custom icons can be used for each node type). It is possible to create node types by using the Nodetype panel. The types Data point and Structure are available by default.
Data point
Data points or data point elements can be assigned to each node which means that it is possible to access elements and values of a data point via the node. Therefore, it is possible to create custom structures regardless of the actual data point structure in the PARA. The appropriate data point from the DP view can be added to the data point text field per Drag & Drop.
ID path
Unique path which shows the position of a node. The node can be addressed in scripts via this path. Starting point of the path is the system node.
Name path
The name path shows the node path within the view.
Node icon
Sets the icon which is used for this node. The icon of the node type is used by default. Select a picture and draw it to the Drop node icon here area.


