Diagnostic Tool
The Diagnostic Tool allows you to create a report package containing all relevant project data (with optional attached files), project and setup information only with a few mouse clicks and to send these by e-mail using the integrated SMTP client.
Creating a report package is recommended:
- If you want to compare project data (e.g. config files) of two or more projects with each other, for example, to detect differences quickly.
- If your own analysis of the project data did not solve the problem and you want to contact the ETM support (support.automation@siemens.com). By sending the report package to our support team the problem can be solved more easily and the reaction time can be shortened, as all relevant data that is necessary for the analysis is included in the report package or can be added easily.
- If you want to send relevant project and version information to third parties by e-mail using the SMTP client integrated in the Diagnostic Tool.
- If you want to perform a versioning of relevant project data or other files in any time intervals.
This chapter describes the following subjects / functionalities of the Diagnostic Tool:
- Contents of the report package
- Using the Diagnostic Tool
- Customer Support Contact Details
- Attaching files
- Setup information
Contents of the report package
A report is a package (zip file) which by default includes the following data:
- config files (config, config.level, config.library, config.redu) from the version, project and subprojects
- progs files from the version, project and subprojects
- over-configured files (scripts, libraries, panels, etc.) from the version, project and subprojects
- hardware code information (hw.txt)
-
License information (CodeMeterReport.txt). The CodeMeterReport.txt
contains the information about the container that is being used as well as the
license options being used, for example the license option "Event Manager":
Event Manager (9921) Free: 1 Used: 0 Expiration: 2020.05.31 02:00:00.000 Quantity: 1 Version: 317000 Minium Version upgrade from: 309000 Maintenance Period: 2019.11.01 01:00:00.000 - 2019.11.30 01:00:00.000 Demo Period [Hours]: 720 -
Report (report.txt) with the following information (these are also partly
displayed in the Diagnostic Tool panel before/after the creation of the report -
see Setup information):
- # PVR version - version of the Diagnostic Tool
- # Date - Date and time when the report was created (e.g. 04.11.2010 14:56:05)
- # Description - subject entered by the user in the Diagnostic Tool
- # Operating System - operating system on which the report was created (e.g. Microsoft Windows XP Professional)
- # Operating System Version - version of the operating system (e.g. 5.1.2600)
- # Operating System Service Pack Level - Service Pack installed on the operating system e.g. Service Pack 3)
- # WinCC OA Version - installed WinCC OA version
- # WinCC OA Installation Path - path to the WinCC OA installation directory
- # Available WinCC OA Disk (MBytes) - available space on the disk of the WinCC OA installation in MB
- # Patch files - patch files
- # Project Disk - path to the WinCC OA project
- # Available Project Disk (MBytes) - available space on the disk of the WinCC OA project in MB
- # Additional files - paths to the attached files
- # Comments - description entered by the user in the Diagnostic Tool
- # Subprojects Path - paths to the subprojects included into the project
- # Over-configured Files - paths to the over-configured files
- # Listing of the bin dir of the WinCC OA Version - listing of the files that are stored in the /bin directory of the WinCC OA installation directory with size in KB, changing date and time
In addition to the files that are included by default in the report package, additional files can be attached. It is recommended to attach, for example, log files or screenshots of errors. For more information see Attaching files.
Using the Diagnostic Tool
A project does not have to run in order for use the Diagnostic Tool to create a report package. I.e. the Diagnostic Tool can be used independent of the PMON.
How to start the Diagnostic Tool
The Diagnostic Tool can be started either via
or
- a User Interface manager with the options
in the Console of the WinCC OA project whose report should be generated.-p projAdmin/pvr/pvr.pnl
The following instruction describes the first variant:
- Open the project administration and right-click on the project name whose report should be created.
- Click on Diagnostic Tool.
- This opens the following window:
Figure 1. Diagnostic Tool 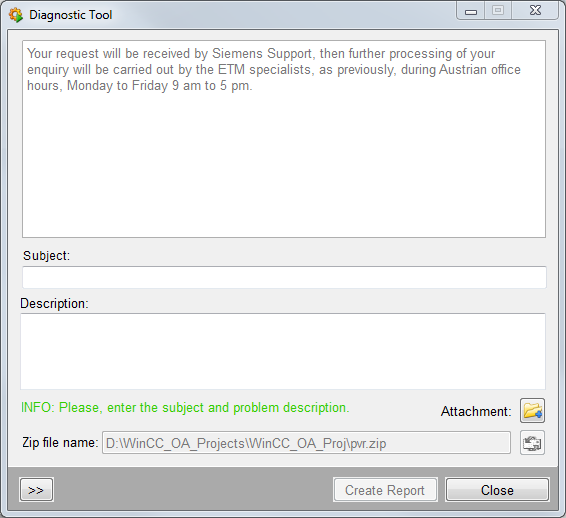
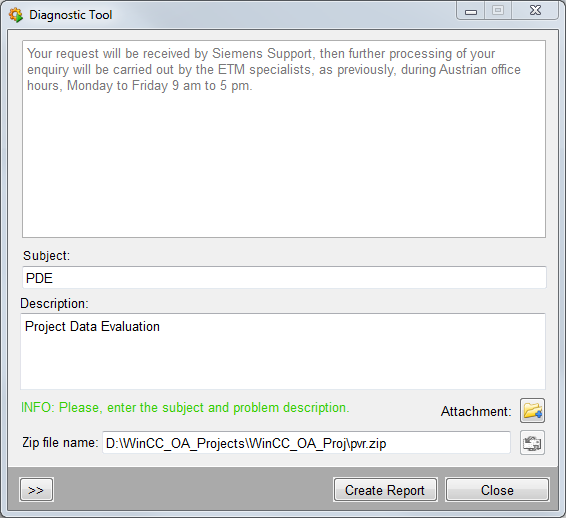
How to create a report
- Once the necessary data was fetched, you are requested to enter a subject
for the report via the INFO text. Optionally, you can enter a description
for the report in the Description text box. The description can be, for
example, an error message or information intended to the recipient of the report
package.
- Optionally, you can change the path or name of the report package in the Zip
file name text field.
Note:If ZIP is not installed on the Linux computer, first prompt "zypper install zip" as root.
- Click on Create Report.
- The report package was stored under the specified path.
Customer Support Contact Details

If you send the report package via e-mail. The report package is sent as a text file by default. This means that the receiver must save the text file and rename the file extension to *. zip to be able to extract the report package and thus see its contents. The report package is not sent automatically with the extension *.zip because this is blocked by many virus scanners.
Attaching files
In addition to the files that by default are included in the report package (see Contents of the report package), other files may be attached. It is recommended to attach e.g. Log files / screenshots of occurring error messages or any misconduct in WinCC OA for the recipient of the report package.
How to attach files
- Start the Diagnostic Tool (see how to start the diagnostics tool).
- Enter a subject and a description for the report.
- Click on the
 button. This opens the window Add Files.
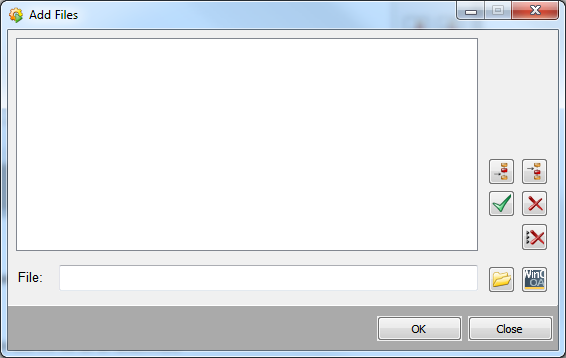
- Click on
 and
choose the file that should be attached. A file of any file type can be
attached.
and
choose the file that should be attached. A file of any file type can be
attached. - Click on
 to
add the file as an attachment
to
add the file as an attachment
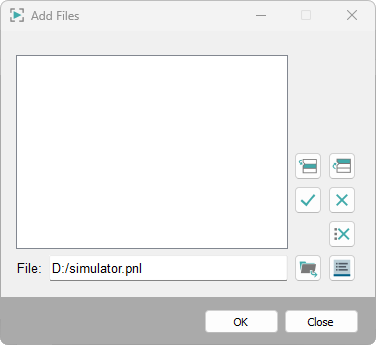
- Repeat the steps 4 and 5 for any additional files.
- With
 a file
can be added before the selected one to the attachments.
a file
can be added before the selected one to the attachments. - With
 the
selected file from the attachment can be replaced by the one entered in the
File input field.
the
selected file from the attachment can be replaced by the one entered in the
File input field. - Use the
 button
to remove the selected file from the attachments or the
button
to remove the selected file from the attachments or the  button to remove all
attachments.
button to remove all
attachments. - Click OK to attach the listed filed and to close the window.
- Click Close if no files should be attached and to close the window.
- Click Create Report to create the report.
Note:
 is used to attach Log-Files.
Setup information
Click on ![]() in the
Diagnostic Tool window to show the setup information. The information
displayed here will later be summarized in the actual report file
(report.txt, see Contents of the report package).
in the
Diagnostic Tool window to show the setup information. The information
displayed here will later be summarized in the actual report file
(report.txt, see Contents of the report package).

The setup information area is divided into three sections:
- Information on the operating system (operating system, version, service pack).
-
WinCC OA setup information (version, path to the
installation, available space on the disk of the WinCC OA
installation in MB). Click on the
 button next to Patches
or Registered projects to open a pop-up window showing the list of installed patches
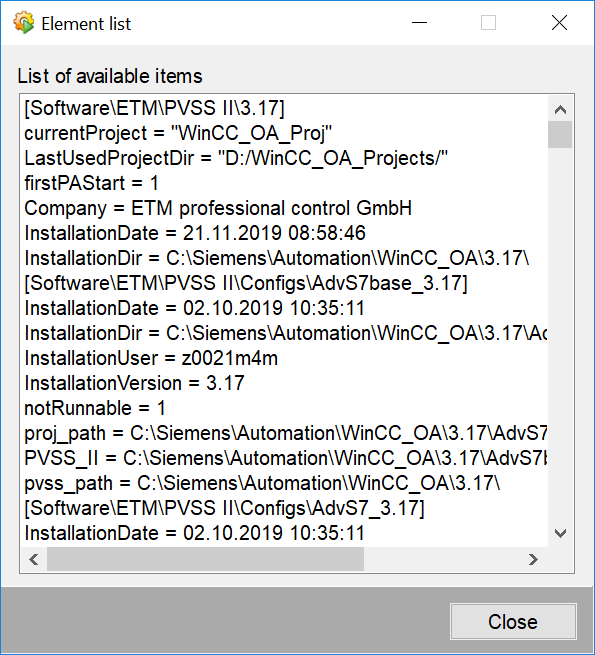
or all registered projects and add-ons. By
default the list of installed patches is included in the report
package (report.txt).
button next to Patches
or Registered projects to open a pop-up window showing the list of installed patches
or all registered projects and add-ons. By
default the list of installed patches is included in the report
package (report.txt).
- WinCC OA project information (project name, path to
the project, available space on the disk of the WinCC OA
project in MB). Click on the button next to Subprojects or
Over-configured files to open a pop-up window with the list of
subprojects or over-configured files of the project. By default the list of
subprojects (in report.txt) and the set of the over-configured files are
included in the report package.


