Delete project
A registered project can be deleted. In order to delete a project an entry in the pvssInst.conf file as well as an appropriate config file have to exist. You can either delete the chosen project only from the pvssInst.conf file or delete the complete project directory via the panel Delete project (click on the Delete project button in the project administrator panel).
If you want to correct a corrupted project you can do it by selecting the project from the project administrator panel, pressing the Delete project button and selecting the entry Correct corrupted projects from the Project combo box of the Delete project panel. This way you can correct a corrupted project not only when the project administration panel is opened (see chapter project administration panel) but also afterwards. The option Correct corrupted projects is shown in the figure Delete project - correct corrupted projects on this page.
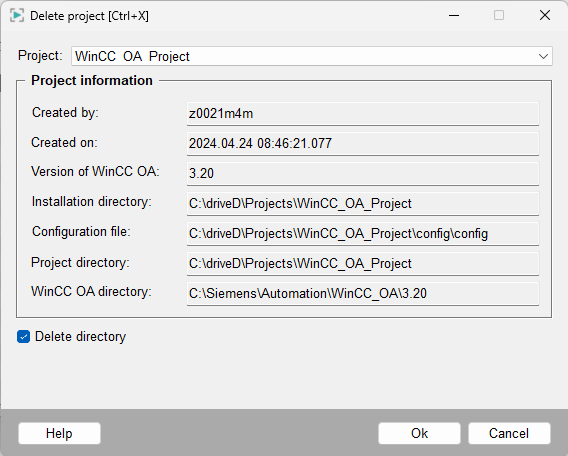
In this panel the most important information of the project (user, time when the project was created, WinCC OA version the project was created with (or was updated with), program and project directories, ...) is shown once more after a project was selected from the combo box at the top of the panel. The text fields that are grayed out are "read only". If also a directory should be deleted the check box Delete directory at the bottom of the panel should be enabled. Click OK to delete the project. A running project cannot be deleted (a warning is shown and the buttons in the panel are grayed out).
Consider that panel names and other project file names may not contain any special characters. If a project file name contains special characters, the file cannot be deleted by using the Delete project function.
A project that is a sub project of an existing project cannot be deleted. A pop-up with the name of the higher-level project is shown (if the project is used as a sub project in several existing projects the first higher-level project that was found is shown). In order to delete the specific project the integration as a sub project has to be removed (see also Change project properties).
The same panel as shown in the figure above is opened via a right click on a project in the list of the Project Administrator panel and by selecting the Info entry from the context menu. The only difference is that in this panel only information on the project is shown and a project cannot be deleted.
If corrupted projects exist, they may be removed by selecting the line "Correct corrupted projects" from the combo box!


