NTCIP Gateway Configuration
This chapter describes how to configure the NTCIP target DMS. The NTCIP Gateway provides a configuration panel which can be used to create and configure connections. Open the configuration panel via .
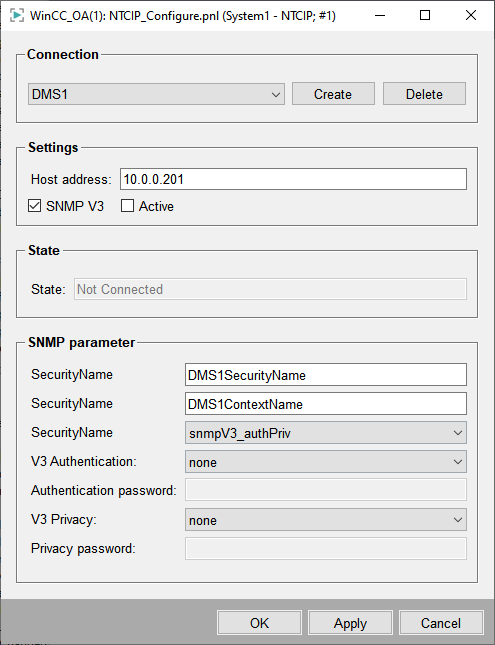
Connection
Before a configuration can be done, a corresponding data point must be created. This can be done vie the Create button. An existing and selected configuration is shown in the drop-down menu. Any configuration can be deleted via the Delete button.
Settings
First of all, the host address has to be entered. Additionally, the SNMP version can be defined. If the checkbox SNMP V3 is selected, the SNMP version V3 will be used. Otherwise, SNMP version V1 is the chosen one. With the checkbox Active the current connection can be established.
State
The text field State shows the current connection state between the DMS and the NTCIP gateway.
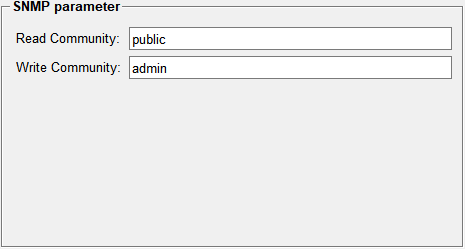
SNMP Parameter – SNMP v1
For SNMP v1 only the Host address as well as the Read Community and Write Community strings have to be filled out. In case the communication shall be started, the Activate Communication checkbox must be selected.
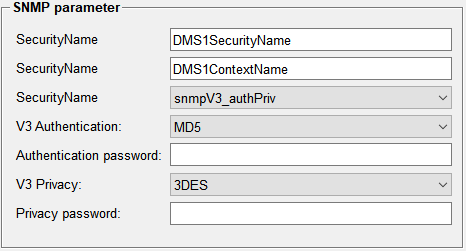
SNMP Parameter – SNMP v3
If an SNMP v3 DMS shall be connected, the corresponding checkbox must be selected. The Host address must be filled out as well as the V3 SecurityName and
V3 ContextName fields. The V3 SecurityMode can be either snmpV3_noAuthNoPriv, snmpV3_authNoPriv or
snmpV3_authPriv. When activated, the authentication and privacy parameters must be configured as well.