Branding - Example of use 2
Introduction
The WinCC OA branding package is available in the ETM portal exclusively for OEM customers with a corresponding contract.
This chapter describes how the features are added to the feature options of the WinCC OA setup. For a more detailed branding example, see the Branding Example of Use 1
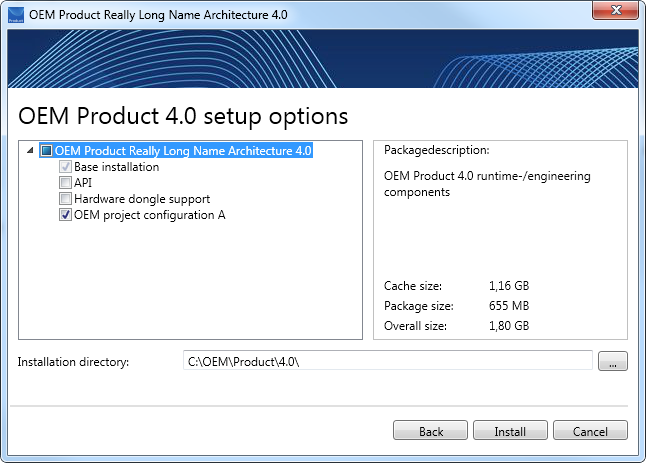
Summary of the Example
This example explains how to add new projects to the setup. In this example a project (ProjectA) is added to the setup. You will learn how to create a project package first and then how to add the project as a package to the setup.
Step by Step Guide
Proceed as follows:
-
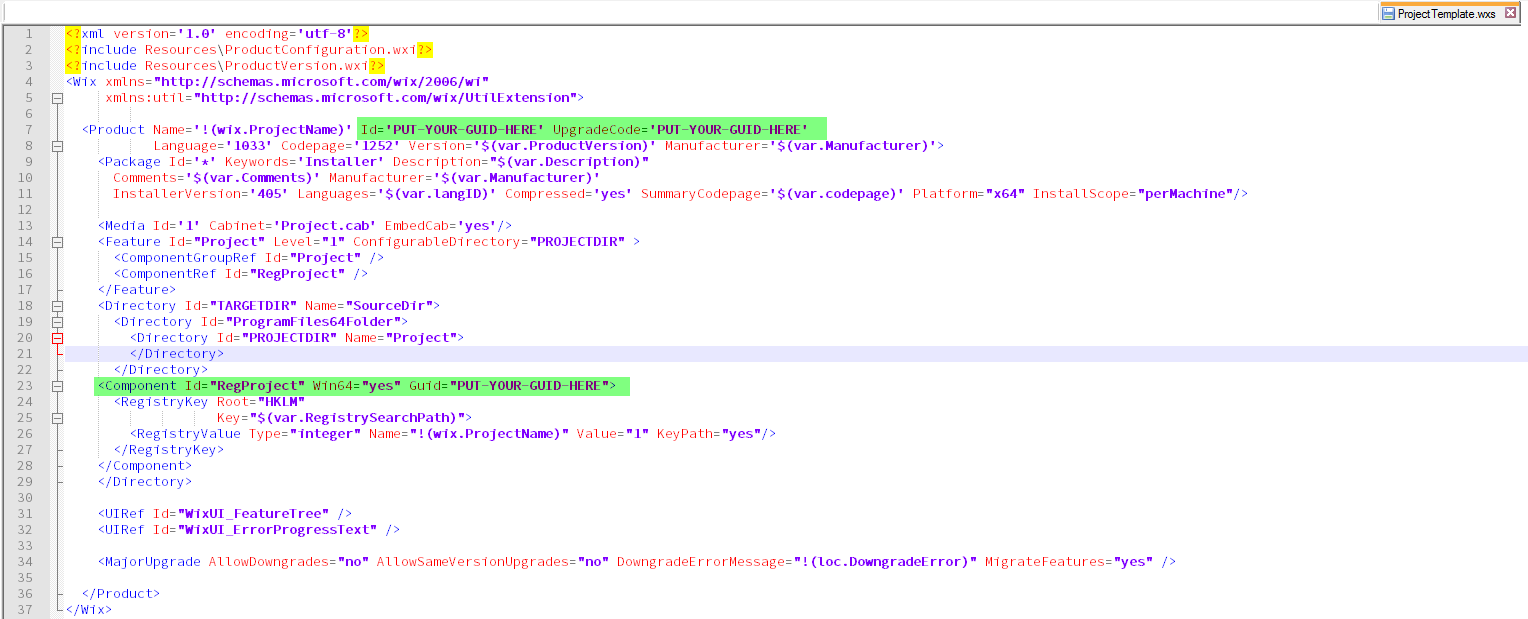
Copy the file /Branding/Resources/ProjectTemplate.wxs and rename the file as your project should be called. In our example the project should be called "ProjectA". In the file [ProjectName].wxs (here ProjectA.wxs) enter the Product ID, the upgrade code as well as the component ID (see the figure below). The product ID, the upgrade code as well as the component ID build a GUID (Globally Unique Identifier). Note that the UpgradeCode must not be changed if a project should be overwritten by a project update and the Product ID must be changed for each new (own) deployment. Thus, if an own project is changed, a new ID must be set in the [ProjectName].wxs file. In order to generate a GUID, use a generator such as guidgen.exe of Visual Studio.

Copy the GUID without the {} curly brackets.
You have to change the Product ID only for your own projects. The WinCC OA Branding package contains a Product ID.
Note that you have to add empty files to the empty directories of your project. Directories must not be empty.
Note in addition that a registry entry must exist for the project (feature) and it must be set to 1. The MSI name of the .wxs file is the registry entry! In this example the registry entry is "ProjectA".
-
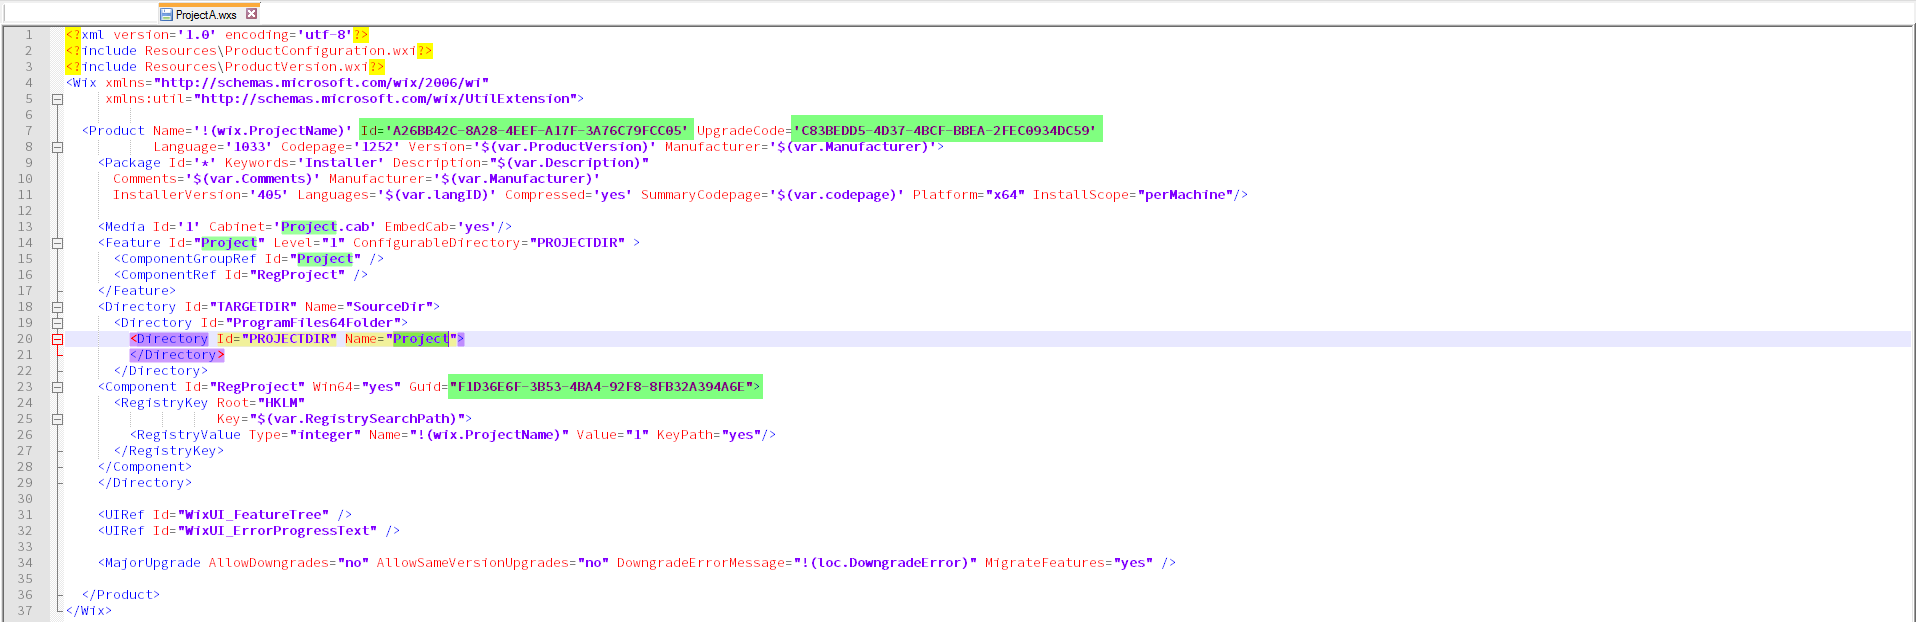
Set the GUID in the ProjectA.wxs file.
-
Create the project package by calling the build_project.bat:

Use -name to enter the feature name and -dir the directory where the feature is located (in this example the directory for the "ProjectA").
You can find the generated MSI package in the directory Branding/Output_msi.
-
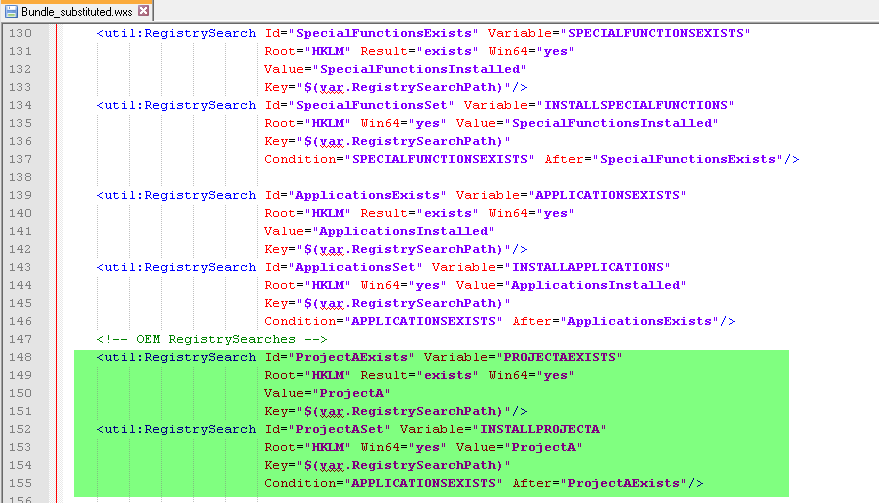
In order to add the project as a feature to the setup, add a variable to the Bundle_substituted.wxs file. In this example the variable is called "INSTALLPROJECTA".

-
Add the registry search to the Bundle_substituted.wxs file by copying the search from the file and adapting as shown in the figure below. Use the variable "INSTALLPROJECTA" that you added in the step 3. Note that the variable "After" has to correspond to the ID (see the figure below: "ProjectAExists").
-
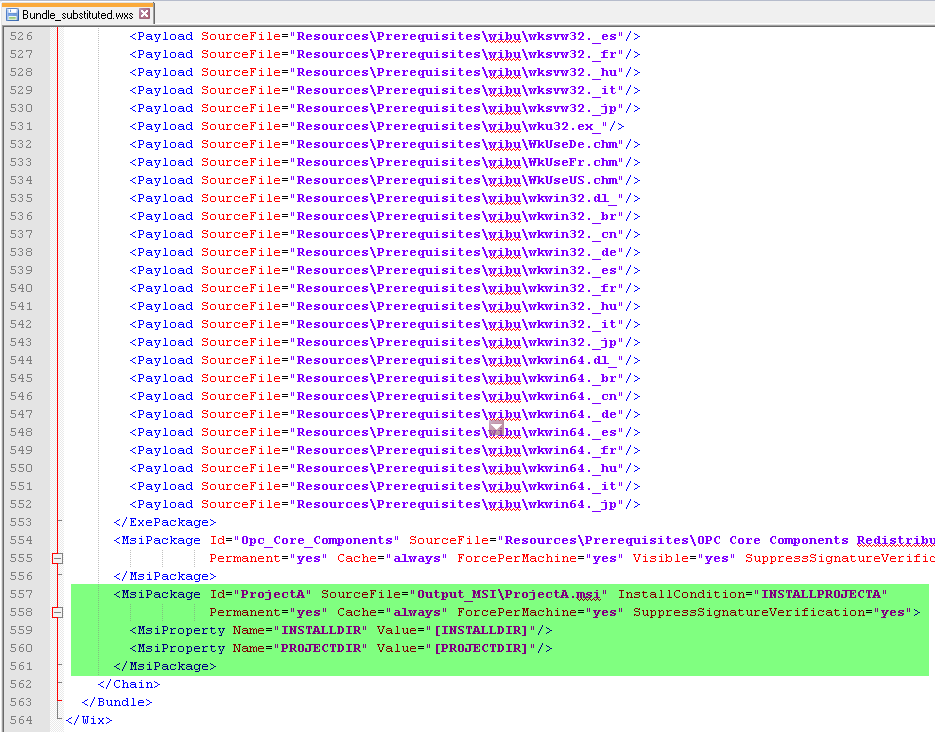
Add the MSI package "ProjectA" to the chain element of the Bundle_substituted.wxs file - see the following figure.
-
Add the project to the BundleFeatureStructure.xml file as BootstrapperPackage (see figure below).
The MSIPackage ID of the Bundle.wxs file has to correspond to the ID (Name) of theBundleFeatureStructure.xml file. The variable "InstallCondition" was set to Permanent = "no". This means that when the WinCC OA is uninstalled also the MSI package is uninstalled. The variable "Cache="always" means that the feature (project) can be installed afterwards. The ID is shown during the installation "Installing package ProjectA". MSIPropertyName "PROJECTDIR" specifies where the feature (ProjectA) should be installed ([PROJECTDIR] means in the project directory and INSTALLDIR in the Installation directory.
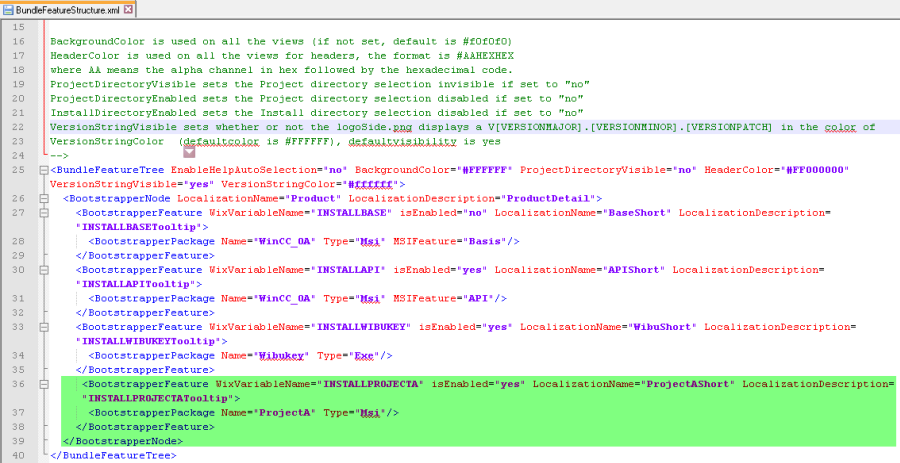
The variable "isEnabled = "yes" means that you can check the check box for the feature "ProjectA".
-
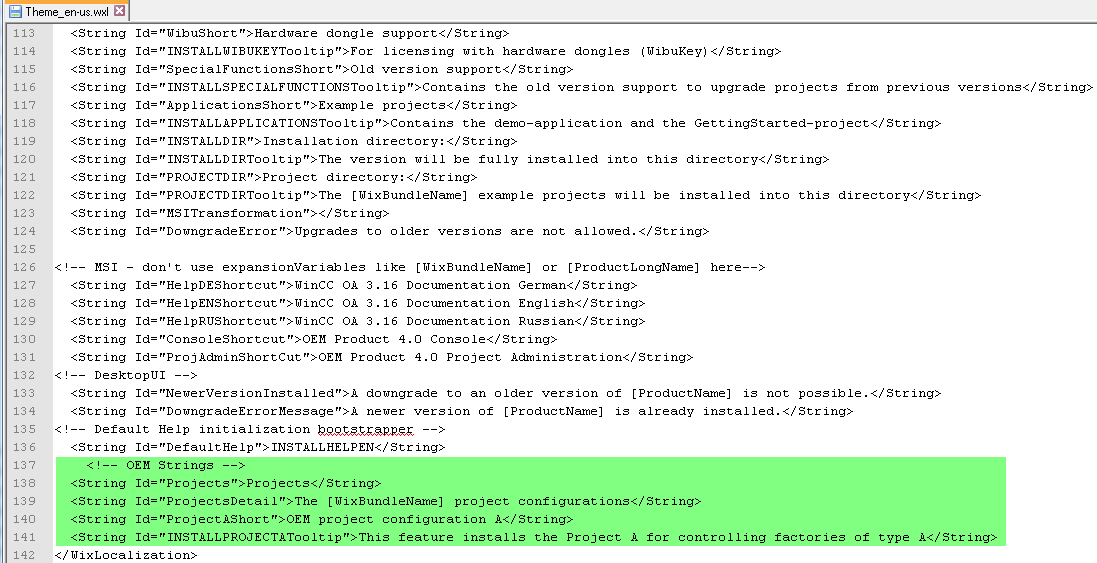
Add the texts "feature selection from the command line" (| INSTALLPROJECT A = 1 as well as PROJECTDIR=[path not containing blanks] defines the project directory) for the project to the Theme_en-us.wxl file.

-
Add the OEM strings to the Theme_en-us.wxl file
-
Generate the setup by using the build.bat -name [Productname.exe]
If the product should be digitally signed: build.bat -name [Productname.exe] -sign [Path_to_PFX] -pass [Password]:
build.bat -sign certificate_[certificateName].pfx -pass MyPassWord -name MyExeName.exe
You can find the setup in the Branding/Output directory.