Branding of the WinCC OA MSI Installation
This chapter gives you a brief overview of the possibilities of branding. You can find detailed examples of branding in the chapters Branding Example of Use 1 and 2.
You can adapt the texts and the layout of the WinCC OA setup to your wishes:
- Customize images of the WinCC OA installation (logo, background images, banners)
- Change the login panel image, splashscreen and the logo of the password dialog
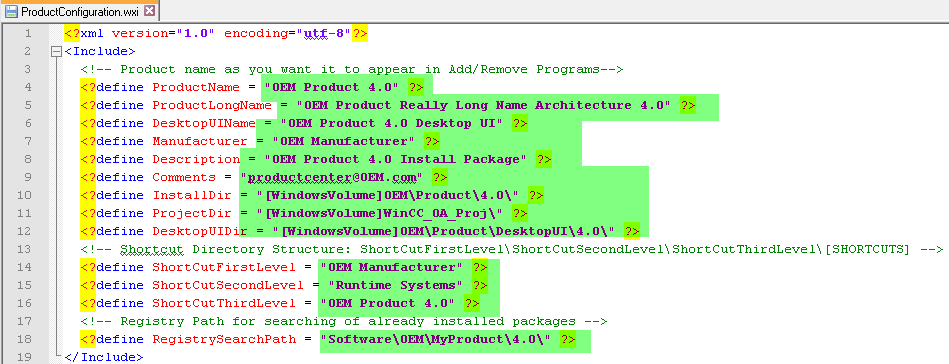
- Change the product name, the manufacturer, the default installation directory, the product directory as well as the start menu entries (ProductConfiguration.wxi)
- Change the version number (ProductVersion.wxi file), visibility of the version, the version text color and the color of the progress bar
- Change the setup texts (Theme_[language].wxl)
- Change the name of the components that are opened via shortcuts of the start menu (Theme_[language].wxl)
- Change the available features - delete features - see the branding example1 and 2
- The option for the default help (Theme_[language].wxl)
- Change of the EULA file (EULA license agreement (WinCC_OA_EULA.html file)
- Generate setup
Customize images of the WinCC OA installation (logo, background images, banners)
You can replace in the Branding\Resources directory the Product.ico (256x256px), console.ico (256x256px) and projAdmin.ico (256x256px) as well as the Banner logo.png (630x58px) and the logoSide.png (193x424).
Change the product name, the manufacturer, the default installation directory, the product directory as well as the start menu entries
-
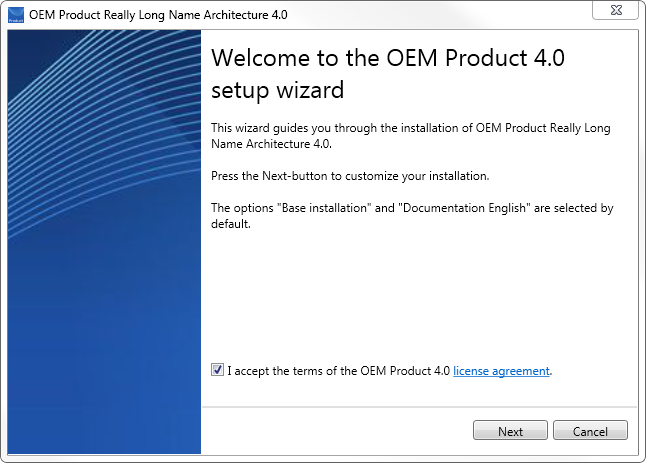
For the brand labeling automatism switch to the to the Branding/Resource folder. The ProductConfiguration.wxi file defines the name of the product, the manufacturer, the standard installation directory, the project directory as well as the start menu entry names. The product name, the product long name, the description and the installation and project directories are shown in the install wizard (see the Branding Example).
The manufacturer is shown in the control panel -> Programs and Features and the comments via right-click on the setup-exe file -> Properties. For the desktop UI option, see chapter Branding the Desktop UI Installation.
Change the version number, visibility of the version text and the version text color
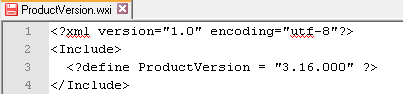
In the ProductVersion.wxi file you can change the version number - Note that a higher version number is required for each major upgrade and that leading zeros are cut from the version number.
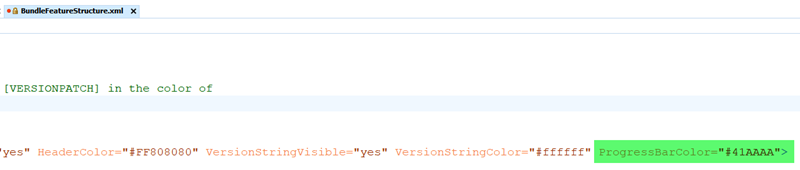
In the BundleFeatureStructure.xml file you can change the visibility of the version text and the version text color:
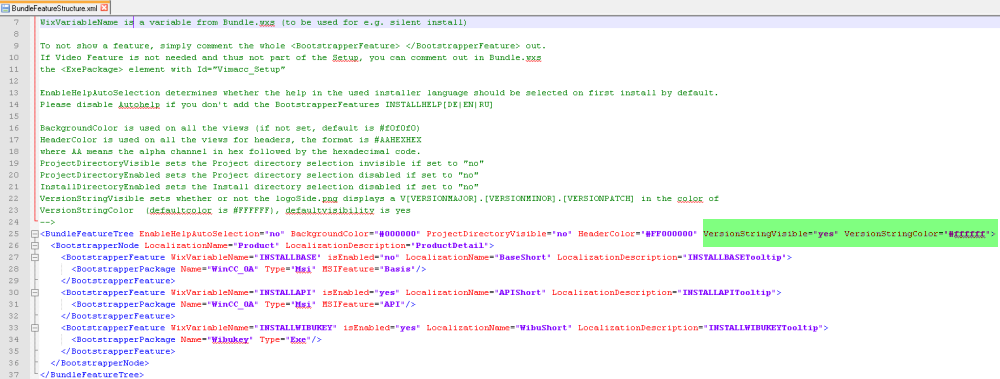
The version text is visible by default and the color is #FFFFFF (white).

The color of the progress bar can be changed in the BundleFeatureStructure.xml by changing the color of the "ProgressBarColor" - see figure below:
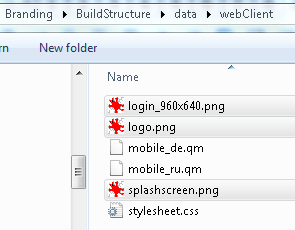
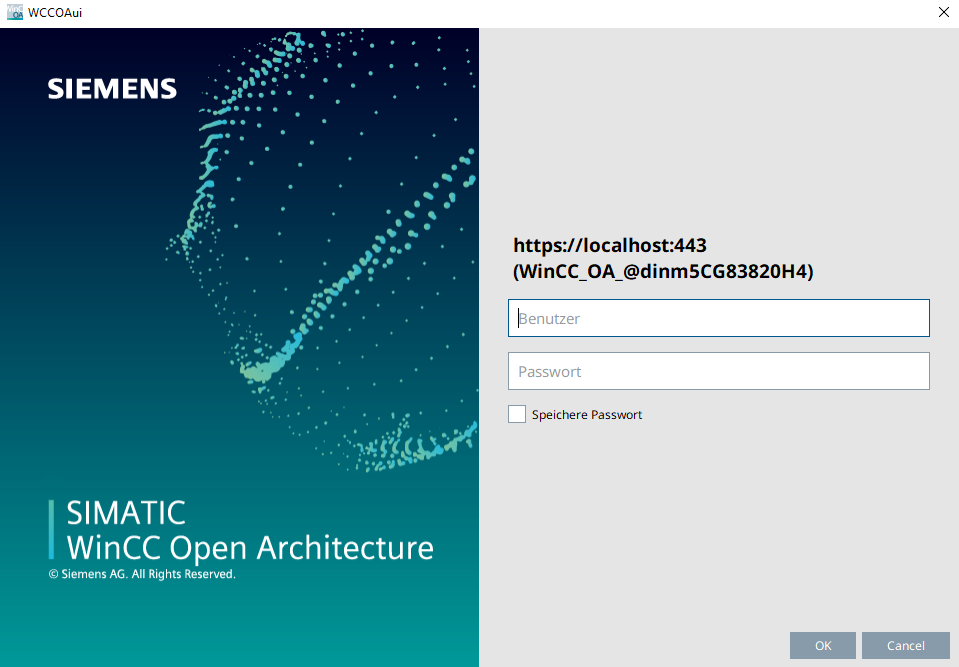
Change the login panel image, splashscreen and the logo of the password dialog
To brand WinCC OA login panel image, splash screen and the logo, these can be changed in the directory BuildStructure/data/webClient:
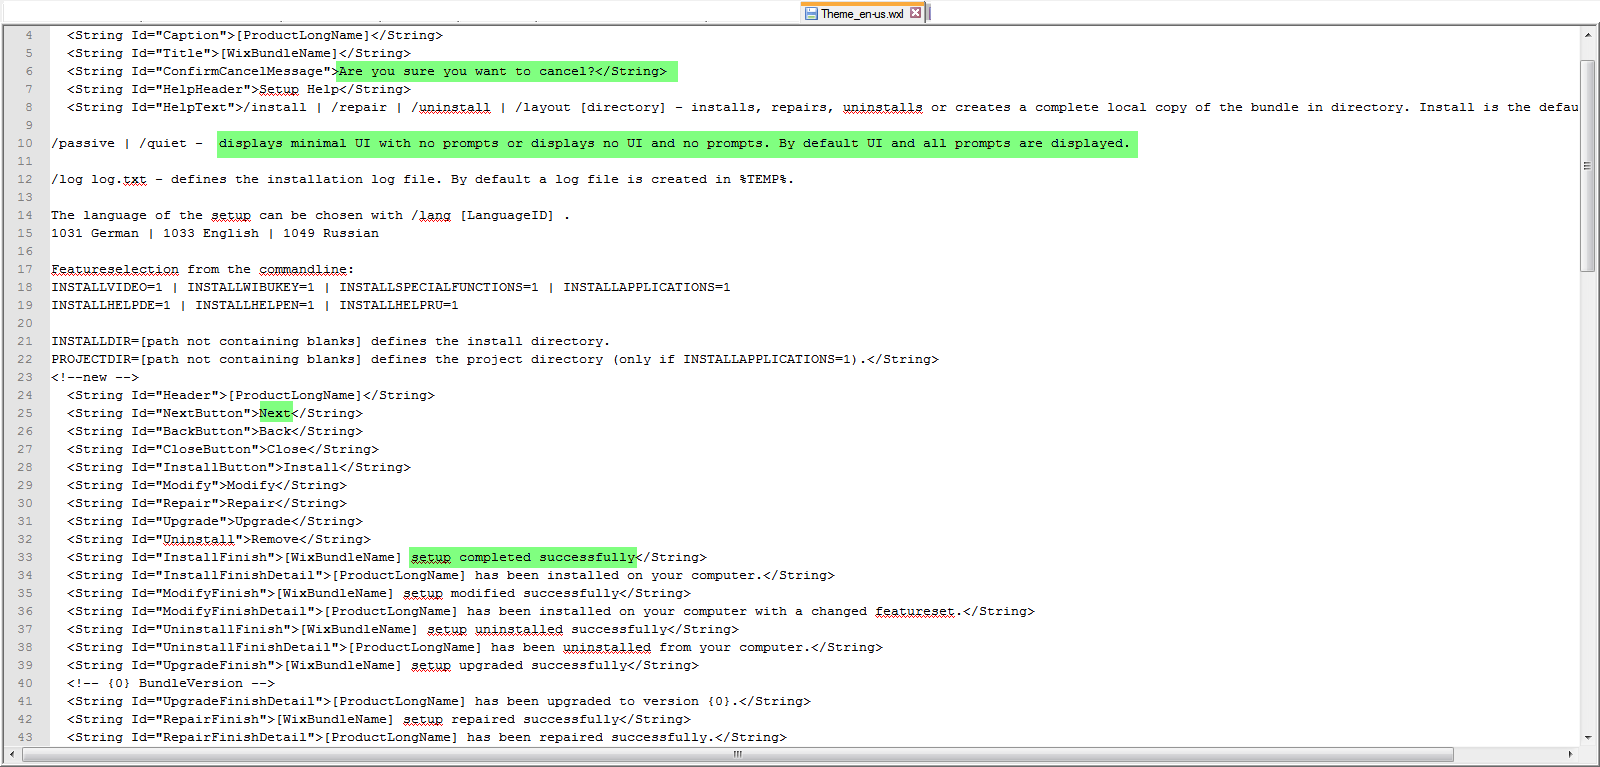
Change the setup texts
The Theme_[language].wxl file contains the setup texts, which can be adapted. Below you can find a figure of the Theme_en-us.wxl. You can change the texts <String Id="[Name]"> :
Change the names of the components that are opened via the shortcuts of the start menu
The lower part of the file contains the names of the components that are opened via the shortcuts of the start menu. These can be branded for your product (see the figure below).

The Option for the Default help
You do not have to change the option Default Help.
The Default Help option defines the default documentation option for the setup. For the Theme_en-us.wxl file the default option is the english documentation.

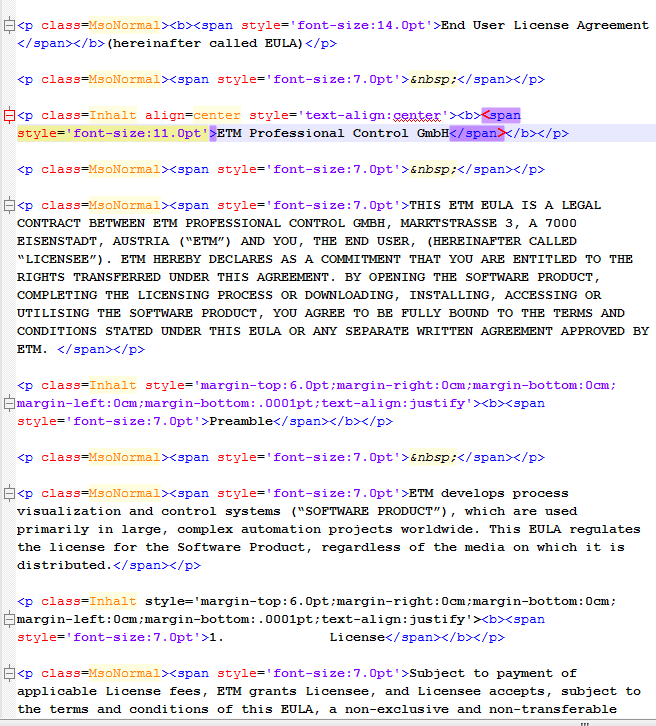
Change of the EULA file (EULA license agreement)
You can change the EULA license agreement in the file Branding/Resources/WinCC_OA_EULA.html file.
Generate Setup
In order to generate a brand labeled setup, open the command line and the branding directory. Call the build.bat with the following parameters:
- If the product should not be digitally signed: build.bat -name [Productname.exe]
-
If the product should be digitally signed: build.bat -name
[Productname.exe] -sign [Path_to_PFX] -pass [Password]:
build.bat -sign certificate_[certificateName].pfx -pass MyPassWord -name MyExeName.exe
The Deployment directory contains all other files that are necessary for the deployment of the Executable.
The brand labeled setup is saved in the Branding/Output directory. Open the .exe file.


