Open the License Information panel via the License
Information button in the Project Administration panel
or the WinCC OAconsole.
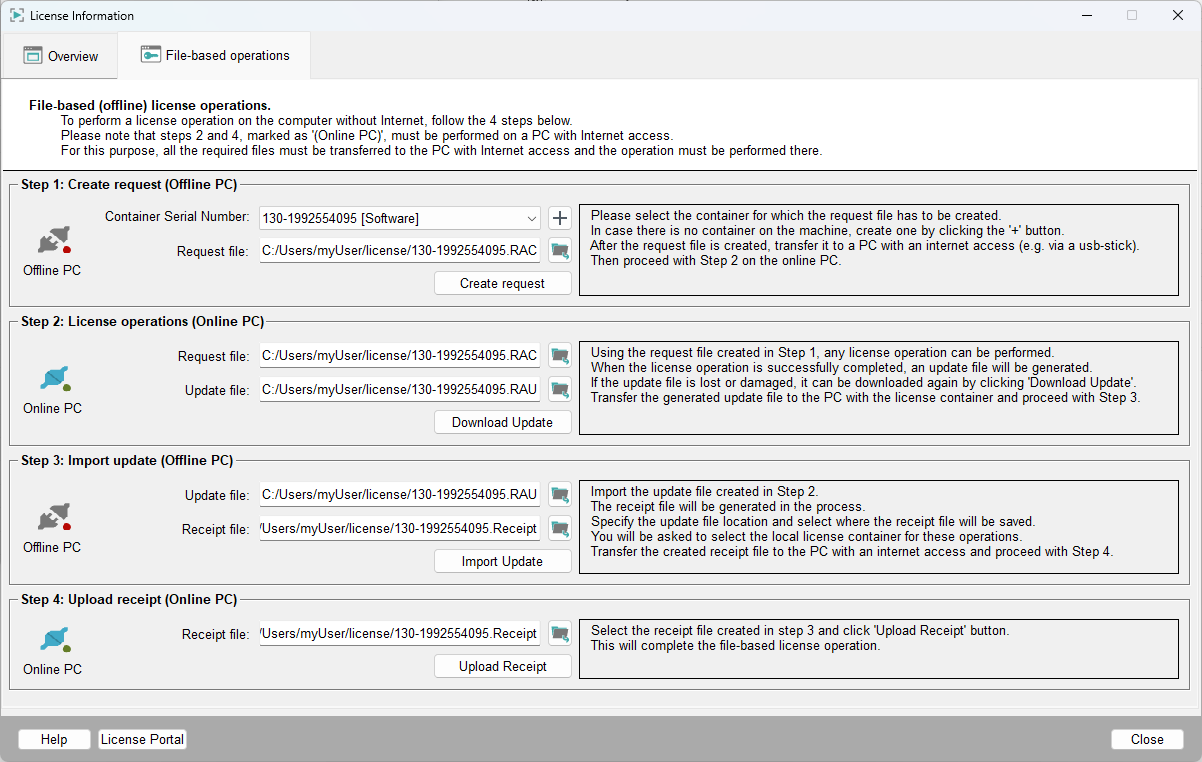
The filebased operations tab of the License Information
panel allows you to activate, deactivate or update a license filebased. The
steps below describe how to activate a license filebased. The same steps apply to all
license operations, meaning to deactivation and update.
Figure 1. License Information Panel - File-based Operations
Note:
Online/Offline PC of a step (see below) indicates where
the operation should be performed.
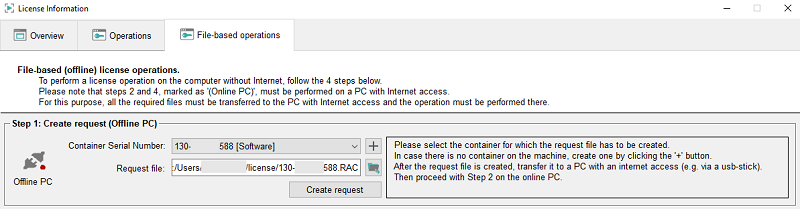
Step 1 - Create Request (Offline PC)
Select the container or create a new container by clicking the
+ button. Then create a request by clicking the
Create request button.
Save the request file (.RAC) to, for example, a USB stick and transfer the file to a
PC with Internet access. By default, the request file is saved in the directory
Windows: C:/Users/<userName>/license and Linux:
$HOME/license.
Note:
If you change the default directory, note that the
directory must be writable.
Figure 2. Step 1 - Create a Request (Offline PC)
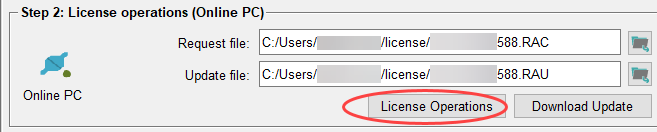
Step 2 - License Operations
Add the request file (.RAC) that has been created in the previous step and perform
your changes within the WinCC OA License Portal on
an Online PC. When ready, press the Download Update button
to download and save the update file (.RAU).
This file can be used in the next step to update the local license container on
the Offline PC.
Figure 3. License Operations
Step 3 - Import update and create a receipt (Offline PC)
Select the update file (.RAU) that has been copied to the Offline PC within the
Update file field.
Figure 4. Import the Update File (.RAU)
Select the directory the receipt file should be saved in. By default, the receipt
file is saved in the Windows: C:/Users/<userName>/license
and Linux: $HOME/license directory.
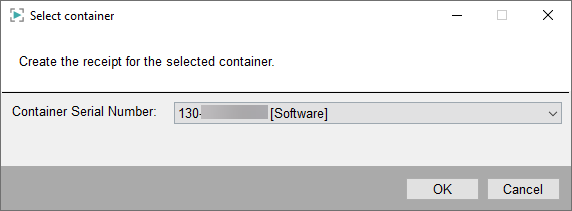
Click the Import Update button and select the same container
that you used earlier in Step 1 when
creating the request:
Figure 5. Select Container for the Receipt

 in the Project Administration panel
or the WinCC OAconsole.
in the Project Administration panel
or the WinCC OAconsole.