SMS Configuration
The configuration panel shown in the following figure is opened via the Receive SMS panel.
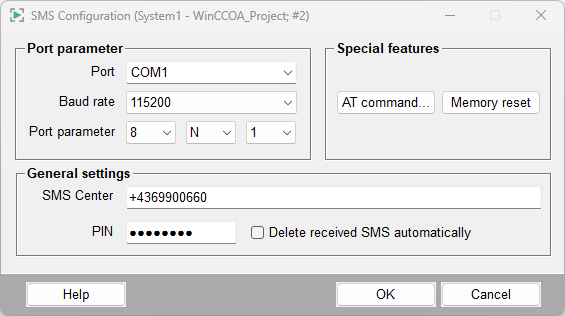
The SMS configuration panel consists of three areas:
Port parameters
Port parameters comprise the combo boxes:
-
Port: Choose the communication port you want to connect
your device to.
USB: You can choose between COM1...to COM4.. If you use the USB port in order to connect the modem, you must also configure the settings in the Control Panel -> Device Manager/Modems section in addition to the panel above. The COM ports in the same section must be configured as well.
In order to configure the modem via the USB port, a driver for the modem NT910G is needed. You can download the driver under https://www.rutronik24.com/product/telic_ag/06316001/24557855.html. After installing the driver, the NT910G is shown under modems in the device manager (see figure below). There you must also configure all other settings such as baud rate and COM port.CAUTION:See the example further below in this chapter.CAUTION: The settings such as COM port and baud rate of the WinCC OA SMS Configuration panel MUST correspond to the settings in the Control panel. - In case of a COM port allocation via the operating system (e.g. infrared
connection) you can also enter another COM port (e.g. COM5) manually
Figure 2. USB modem under Device Manager/Modems - the modem NT910G 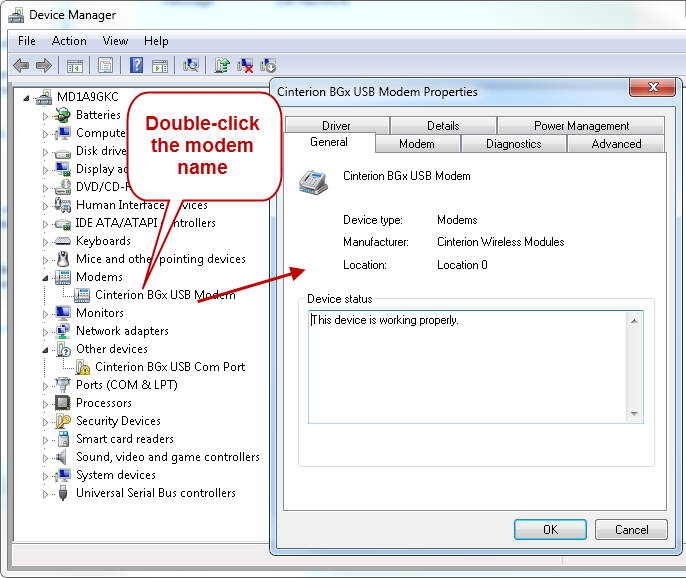 Note:If you want to use double-digit port numbers, specify the port like this: "\\.\COM10";
 - Baud rate: Choose the speed from the computer (serial interface) to the device (modem or cell phone). You can find the information on the speed settings in the user manual of your device.
- Port parameter: The first combo box defines the data bits, the second the parity (Even, Odd, Marking or None) and the last the stop bits (1, 1.5 or 2).
General settings
General settings comprise the settings for "SMS center">, PIN and Automatic deletion of received SMS:
-
SMS Center: Enter the number of the SMS center (which is
provided by the ServiceProvider). You can find the number in your cell phone or
on the homepage of your provider. Note that the number must be typed in the
format + country code, provider number e.g. +43676... for Austria.
Note:Enter the number of the SMS center in the format +Country code, Number (Provider Number, Number) e.g. +43xxxxx or Country code, Number e.g. 43xxxxx. Do not use leading zeros and do not forget the country code! This also applies to the numbers you send a message to.
- The PIN is a four-digit code made available by the provider. It is needed if it is not saved in the device. Once you have saved the PIN code, you do not have to type it again.
- The check box Automatic deletion of received SMS deletes the messages from the cell phone or modem automatically when WinCC OA has received the SMS message.
Special features
Special features comprises the buttons:
- Manual AT-command... Opens the SMS command
panel. In the panel you can execute AT commands. AT commands are
used to control and configure modems. AT commands are also used to establish
connections between modems. All commands begin with the letters "AT". There are
general AT commands and device (manufacturer) specific commands. In the AT
command panel, the AT commands are used to test if the connection to the modem
was established. You can find out e.g. the manufacturer ID of the connected
device by using the command +CGMI.
See the manual of your device for more information on the different commands. To execute the command, press Enter. The command is disposed to a holding stack and executed as soon as possible.
Figure 3. The SMS - AT Command Panel 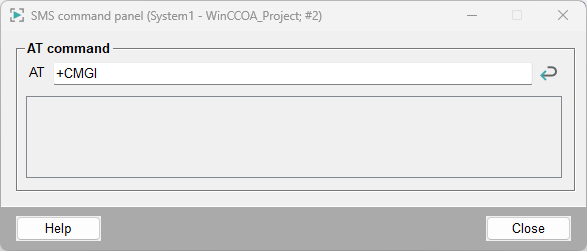
- Memory reset. Resets the memory of the device after a security check (The memory of the cells is set to unassigned). This prevents the overflow of the device memory (An overflow of memory could prevent the sending of SMS messages).
Example
This example shows you the necessary steps to send an SMS via a USB modem. The settings in the Control panel are only necessary for a USB modem.
In order to proceed as shown in this example, read the chapter Requirements and installation and configure the settings as described in that chapter.
- Open the SMS configuration panel and configure the settings as shown in the figure below. The settings were described further above in this chapter.
- In order to configure the modem via the USB port, a driver for the modem is needed. See the description of Port.
- Configure the settings in the Control panel as shown in the figure below. Take care that the settings of the SMS Configuration panel correspond to the settings in the Control panel.
- Confirm the settings. Now you can send an SMS, see step 5 below the figure.
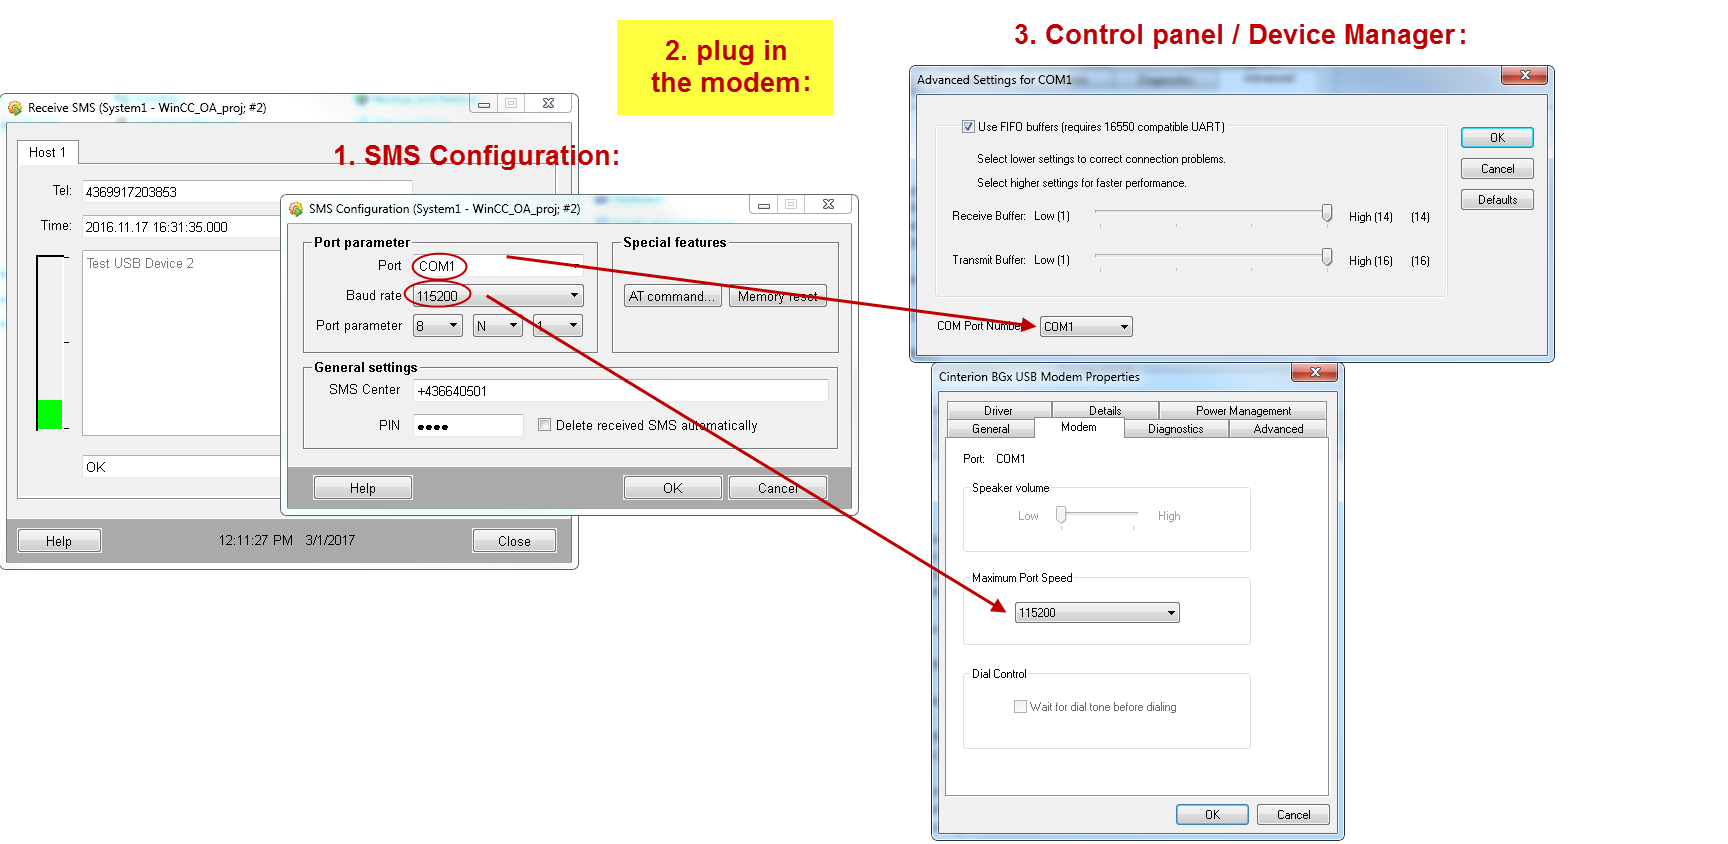
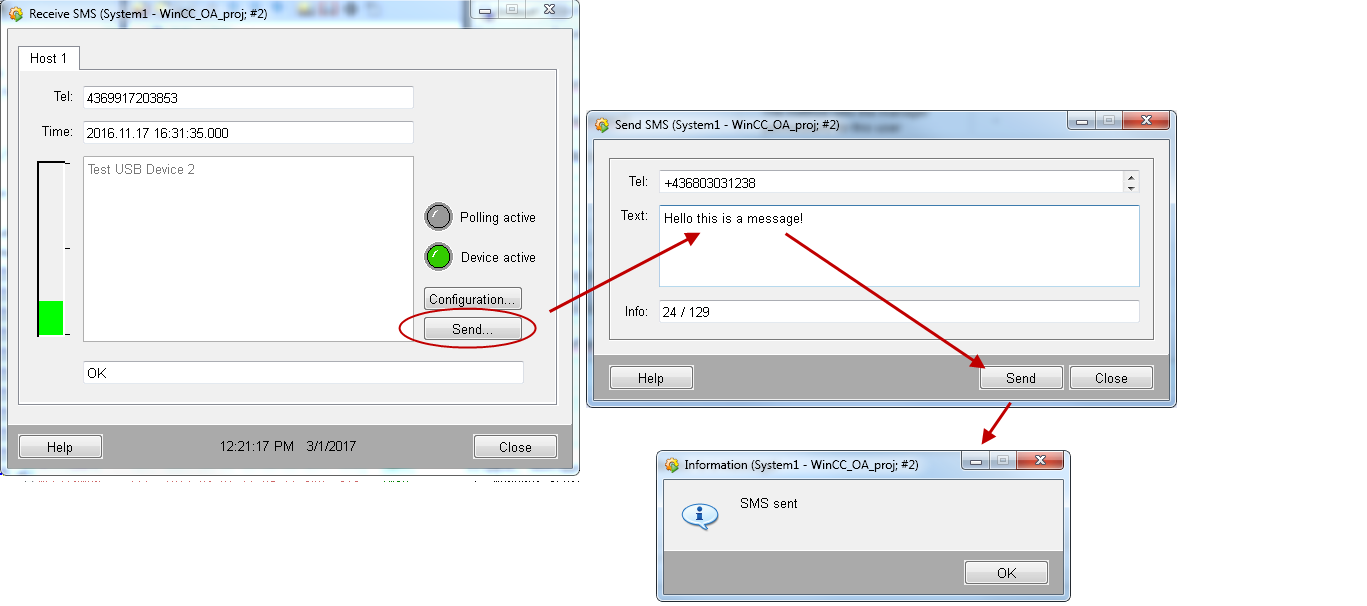
- Click on the Send... button in the Receive SMS panel (see figure below). Type the telephone number and the message into the Send SMS panel and click on Send (see figure below)
- The SMS is sent.