
Day schedule
A day schedule provides the possibility to define one specific event pattern for one or all days of the week. Every time the configured condition is fulfilled the defined actions are executed.
The day schedule configuration panel is arranged in five different fields, namely details, time condition, current state, special day mode, additional value condition and active times.
Details
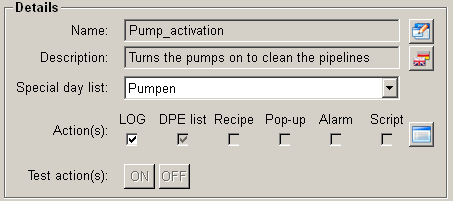
Name : Name of the opened schedule.
![]() Edit the schedule name.
Edit the schedule name.
Note that the name has to be given within a predefined set of characters (for details see function nameCheck()) and must not be longer than 64 characters.
Description : Description of the opened schedule.
![]() Edit the schedule
description.
Edit the schedule
description.
Special daylist: Contains the available special days lists. See the chapter special days for details.
Action(s) : Displays the actually chosen action set.
-
LOG : An entry is shown in the WinCC OA log viewer when an action is executed. This option can be chosen in combination with all other actions described below.
-
DPE list: You can define a list of datapoint elements that should be set on predefined values if the schedule condition is fulfilled.
-
Recipe : Allows to execute a user-defined recipe. Recipes are used for creating plant guidelines. Recipes offer significant benefits when you need to transmit a number of set points from the control system to the periphery. Fore more information on recipes, see the chapter Recipes.
-
Pop-up : Shows a pop-up message on defined user interfaces.
-
Alarm : Sends a reminder alarm that is displayed in the alert screen.
-
Script : Executes a user-defined script from the directory <proj_path>/scripts. Note that the script has to be programmed to stop after the desired process. It cannot be stopped via scheduler.
The scheduler does not have any influence on the script. It just triggers the start. The user has to take care of the reasonability of its creation.
![]() Configure your actions set.
Configure your actions set.
Test action(s) : This feature provides you with the possibility to test the defined action set not regarding the defined condition.
Current state
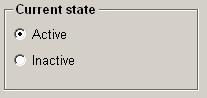
Displays the current schedule state. Do not forget to set the state to Active when you want the created action to be executed.
Special day mode
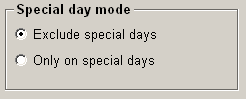
Can be chosen if you have selected a special day list. You can exclude the special days (from the list) or execute a schedule only on these special days. If no list is selected the actions will be triggered without regard to a special days list.
Time condition
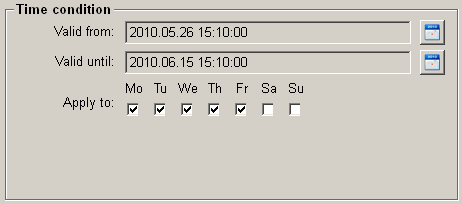
Valid from : Defines the starting date of the validity period.
Valid until : Defines the ending date of the validity period.
Note that the schedule does only work properly within the defined validity period.
![]() Pick a new date/time.
Pick a new date/time.
When the clock is changed from wintertime to summer time, do not set the time between 2 and 3 o'clock! Otherwise an hour is subtracted since the new summer time is already displayed.
When the clock is changed from summer time to wintertime the system cannot differentiate between 2 to 3 o'clock before the clock change and 2 to 3 o'clock after the clock change.
Apply to : You can set on which days of week the action should be triggered. The start- and end times are shown graphically on selected days in the week overview.
Additional value condition (AVC)
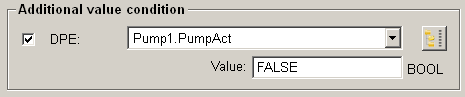
The AVC (additional value condition) in combination with the defined time condition represents the schedule condition. If the value of the selected datapoint element fulfills the configured relational condition the AVC will be TRUE.
The value of the datapoint element must match also the value condition at the moment of the time condition fulfill. If the value condition will be fulfilled at a later moment, the action of the time range will not be triggered afterwards.
For example:
A time range from 01:00 AM to 02:00 AM was defined and the value condition says that the value 1 must be set on the datapoint element "a" to trigger the action. Accordingly, the value of the datapoint element at 01:00 AM must be already to trigger the action for this time range. If the value is not 1 at 01:00 AM, the action will not be triggered when the value changes to 1 at 01:01 or later.
![]() Choose a datapoint
element.
Choose a datapoint
element.
A dependency (see chapter Using the scheduler) to another schedule can be defined by using the ".mode" datapoint element of the other schedule (datapoint type _Sc - see also Scheduler details) to which the dependency should be added in the "Additional value condition". The mode element contains the state (active or inactive) of a schedule. A dependency between two schedules means that a schedule which has a dependency with another schedule is executed first when the state of the other schedule (the dependency is created with) is equal to the value that was defined in the additional value condition. If a schedule called "pipelines" would e.g. have a dependency with a schedule called "times" and you would have defined that "times" has to be TRUE in order to execute "pipelines". The schedule "pipelines" would be executed first when the schedule "times" is active (=TRUE).
Active times
In this area the time periods are defined on which the day schedule should execute the defined actions. To add a time bar click on a day of week line and drag the bar to the right while the left mouse button is pressed. The hereby created time bar can be applied to the days of the week, which are selected in the "Time condition" area. After defining an active time, you can fine tune the time bar up to the second by utilizing the spin buttons in the From and To fields.
The buttons on the left side allow to delete either the actually selected time bar or all time bars within the week overview.
Note that the shortest time pattern you can set is one minute.
If you want to configure a night schedule extends past midnight, you can do this by configuring a day schedule where its output condition represents the night schedule (time periods may not extend beyond 00:00 o'clock). This takes place via time lists.
Alternatively the used datapoints can be configured with a Old/New comparison to prevent doubled values inside of the database if a new day occurs during a night schedule.
![]() Opens the day schedule overview
window.
Opens the day schedule overview
window.
The overview displays the available day schedules. Via a double click another schedule can be opened for editing.
![]() Applies the modifications you made
in the Scheduler configuration panel.
Applies the modifications you made
in the Scheduler configuration panel.
![]() Reloads the already stored values
into the Scheduler configuration panel. New modifications will be discarded.
Reloads the already stored values
into the Scheduler configuration panel. New modifications will be discarded.