
Creating multiple datapoints
There are various options for creating multiple datapoints:
- In PARA using the panel Create multiple datapoints.
- Using the ASCII Manager and a defined template (see Templates/DP lists, basics).
- Using Excel tools (see Excel tools, basics).
This page explains how to create multiple datapoints using the dedicated panel in PARA. This panel is opened by right-clicking on a datapoint type/master datapoint/datapoint in the PARA module and then selecting the option Create multiple datapoints from the context menu.
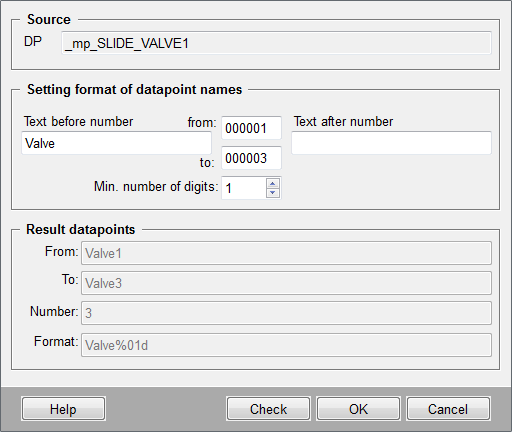
This panel has three sections:
Source
Displays the source for creating the datapoints (DPT text field). This field is grayed out and cannot be changed. If a master datapoint has been defined then this is taken as the source for the additional datapoints. If there is no master datapoint then the structure of the datapoint type is specified as source.
Setting format of datapoint names
The format of the datapoint names is defined here. Characters making up the names of the generated datapoints can be entered in the text field Text before number and Text after number. The fields from:/to: contain numerical values defining how many datapoints shall be created (for example, Pump_1 to Pump_50). The spin-button Min. number of digits can finally be set to specify the number of digits (default 1) for the numerical values (for example, min. number of digits = 3, format would be 001).
For the allowed characters for datapoint names, see function nameCheck().
Result datapoints
Displays the result datapoints as they will be created in the system. They are displayed as soon as the focus has moved from a text field (in the definition of the datapoint name), or by clicking on the OK button. The datapoints are adopted in WinCC OA after a prompt for confirmation (click on OK). The generation process is displayed in a progress bar.
The Check button allows to verify whether the defined datapoint name contains not allowed characters or is already used. If the name contains not allowed characters an error message is displayed. In case the name is already used the following warning with a list of all datapoints concerned is shown:
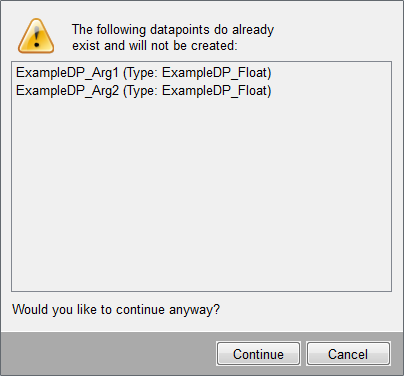
If you click on Continue all datapoints with unique names are created.
The Cancel button closes the panel without generating datapoints; Help opens this page of the Online Help.
You can interrupt generation of the datapoints at any time by clicking on the Close button in the progress bar window. The last action (creation of the datapoint that was being processed when Close was clicked) continues until complete, before the whole process is terminated.
Example
Before working through this example, you first need to create a datapoint type (for example, Valve - see also Creating a datapoint type in the PARA chapter) and a master datapoint of this type. The example involves creating 20 datapoints of the datapoint type Valve with the names Valve_01_test to Valve_20_test.
- Right-click on the datapoint type valve and select the option Create multiple datapoints.
-
Complete the fields in the panel with the relevant values for this example
(see also screenshot below).
Figure 2. Creating 20 datapoints of type "Valve" 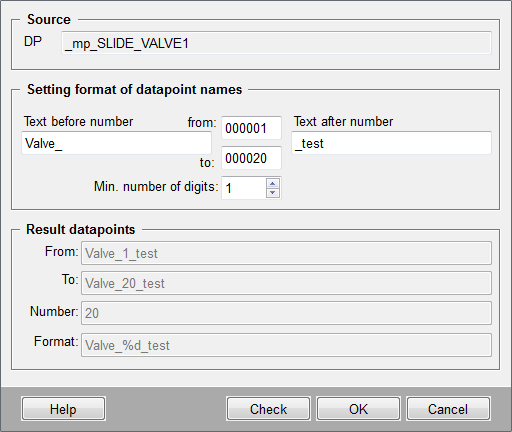
- Check the data you have entered by looking at the result datapoints section.
- Click on OK and confirm the prompt with Yes.
20 datapoints of type valve have been derived from the master datapoint. These datapoints are displayed in the tree structure of the PARA module.