Create, Convert and Import Multiplexing Proxy Certificates
This example describes how to create WinCC OA certificates for the Multiplexing Proxy via the WinCC OA panel, how to convert them into Windows Certificate Store format and how to import them into Windows Certificate Store
- Create a root and a host certificate of type "Certificate for WCCILproxy" via the Panel for SSL Certificates
In order to save and manage the WinCC OA certificates in the MMC, the certificates created via the WinCC OA Panel for SSL Certificates must be converted into the Windows certificate format PKCS12 first.
After creating certificates via Panel for SSL Certificates, use the following openSSL commands in order to create certificates.
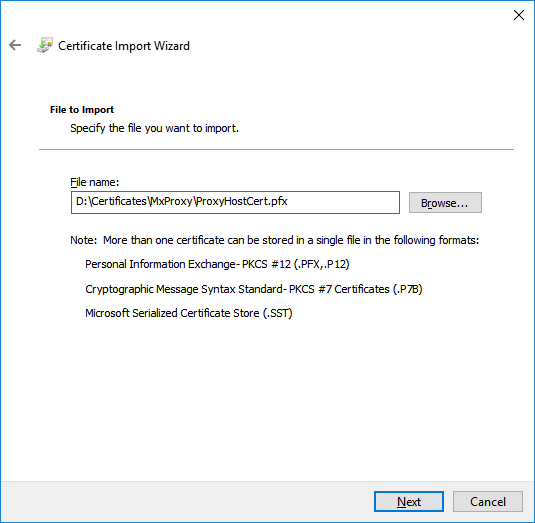
- For the HostCertificate execute the following command in the directory where you saved the certificates.
openssl pkcs12 -export -in host-cert.pem -inkey host-key.pem -out ProxyHostCert.pfx
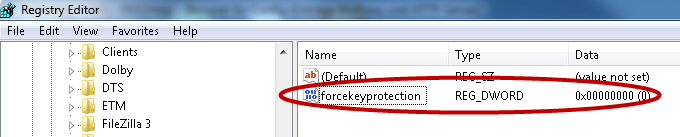
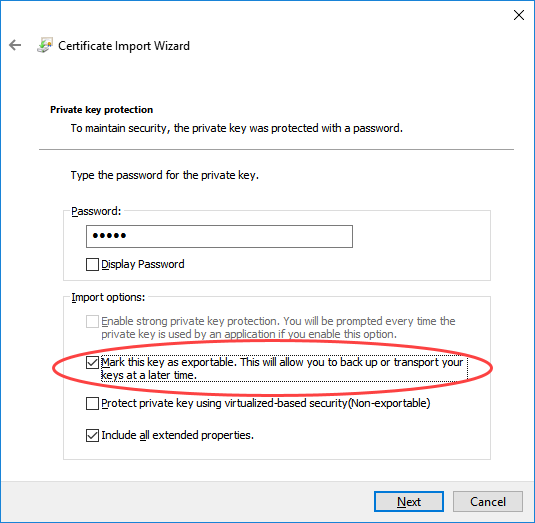
Note that the Windows registry entry HKEY_LOCAL_MACHINE\SOFTWARE\Policies\Microsoft\Cryptography\forcekeyprotection must be set to 0 so that the certificates for the Multiplexing Proxy can be used. Open the registry via the regedit command and add the entry or change the default value 2 to 0. Furthermore, note that certificates that were imported before the entry was set, must be reimported. The registry entry is by default 2 due to security reasons (key protection for keys that are saved on the computer).

- Open the Microsoft Management Console (MMC) as administrator in the command prompt by entering
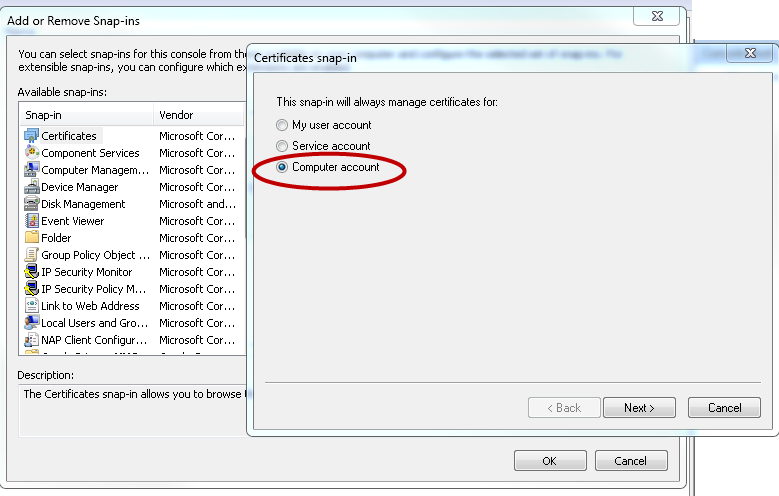
mmc. - In the "File menu" click on "Add or remove Snap-ins".
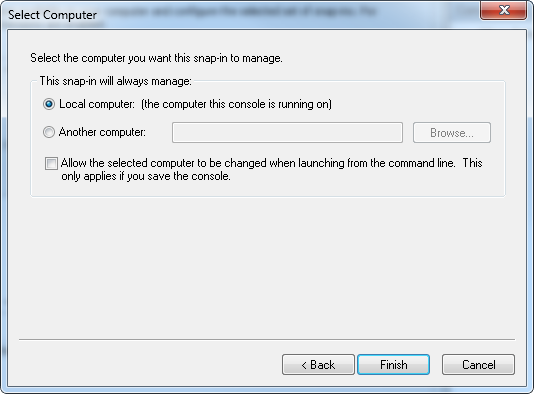
- Then select the certificates and the computer account.
Figure 2. Windows MMC - Select Certificates 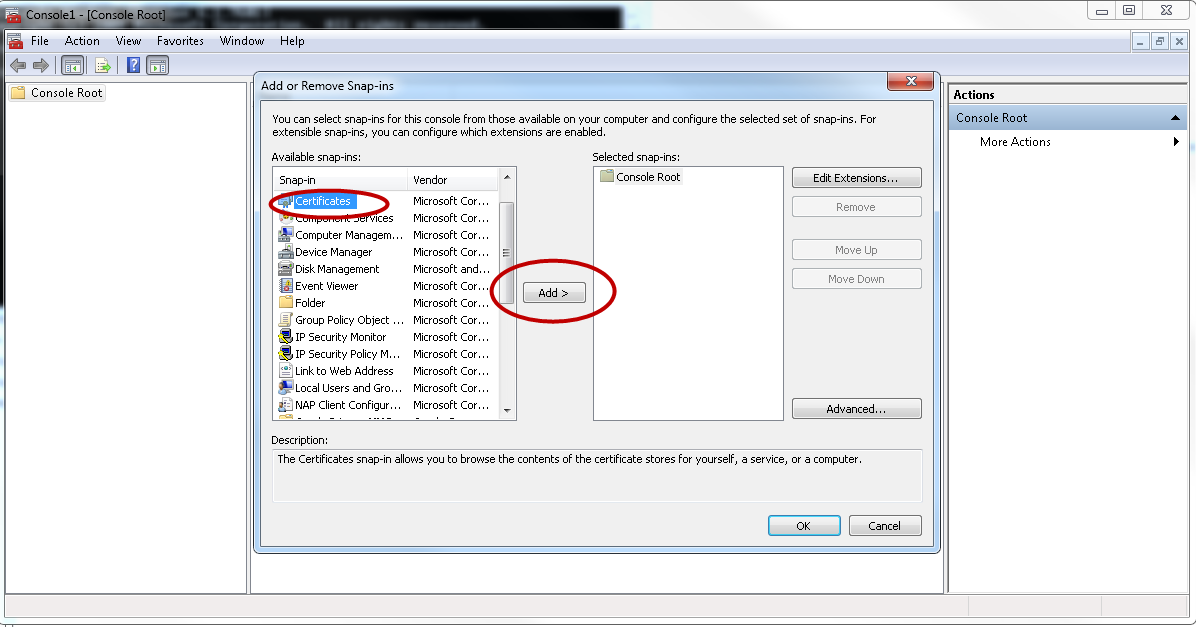
-
Click on "Finish" and OK.
-
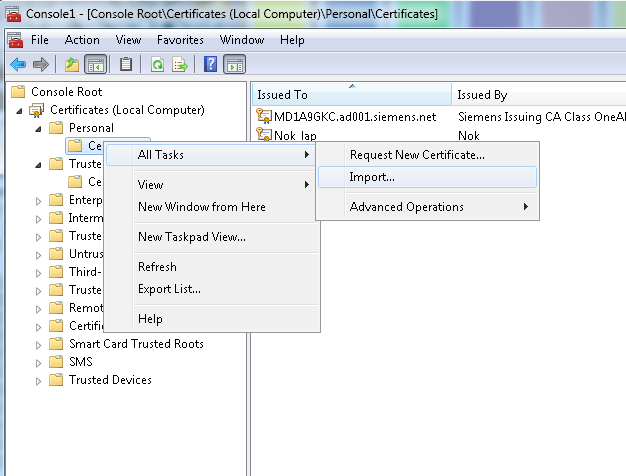
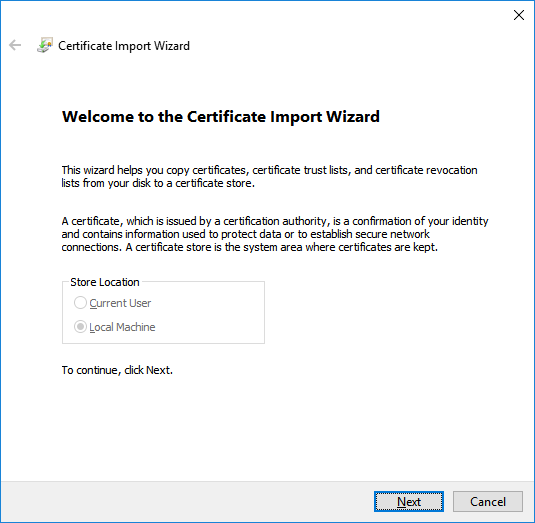
Import the certificates created in the first step as follows:
-
Select the Certificate Store "Personal" and finish the import.
Figure 9. Import of Certificates - Step 5 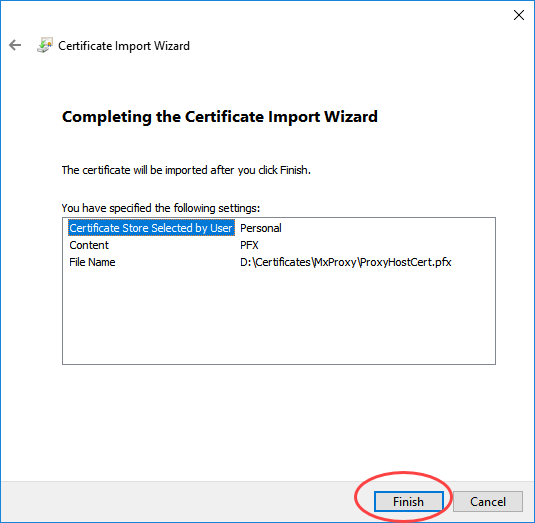

-
Since the certificate was stored in the computer account, the private key can no longer be read by a user by default.
This means that when a logged in user starts a WinCC OA project, the private key cannot be read.
Additional steps are required to resolve this issue:
- Right click on the certificate
- In the combo box, select All Tasks -> Manage Private Keys
- Assign read rights for the private key to the group the user belongs to.
-
Import .pem root certificate into the "Trusted Root Certification Authority"
Figure 11. Import of certificates - Import root Certificate 
-
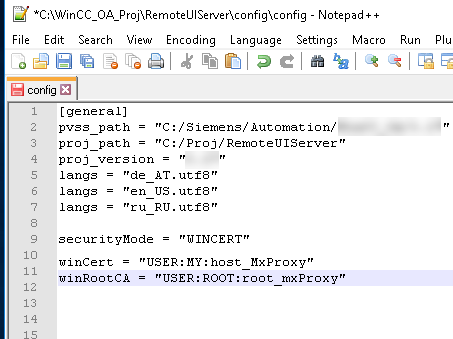
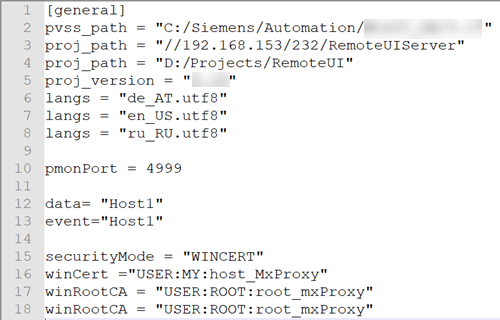
This example shows a Config file for a Single System Configuration:
The Proxy and the Server are deployed on the same host. The Client (on a separate host) communicates with the Server via the Proxy.
This is the USER store and the certificates can only be used by the one user. With MACHINE account, all users can use the certificates.
-
Set the config entries as follows: