
Web Interface
The web interface of the Remote Project Administration lets you upload, run, configure, and monitor WinCC OA projects in the browser.
Open the web interface with the Open Remote Project Administration button in the Welcome Panel. The Welcome Panel also shows the URL of the web interface, which you can open in any browser.
Navigation Menu
The navigation menu on the left provides access to the pages of the web interface. Use the arrow icon at the top of the menu to expand or collapse the menu labels.
 Project Administration – Main page. It displays the available projects, provides the option to upload new projects, and shows server performance indicators.
 Project Console – Opens the integrated version of
the WinCC OA Console. You can add managers and set debug flags.
 Logs – Access the project log files.
 Project Configuration – Direct access to the configuration of your projects, for example
ASCII import and export, certificates, and backups.
 System Configuration – Opens the system configuration page.
 WinCC OA Help – Opens the WinCC OA
documentation.
 Toggle theme – Switches between light and dark mode for the
interface.
Use the Language menu in the top right corner to change the language of the interface.
Login
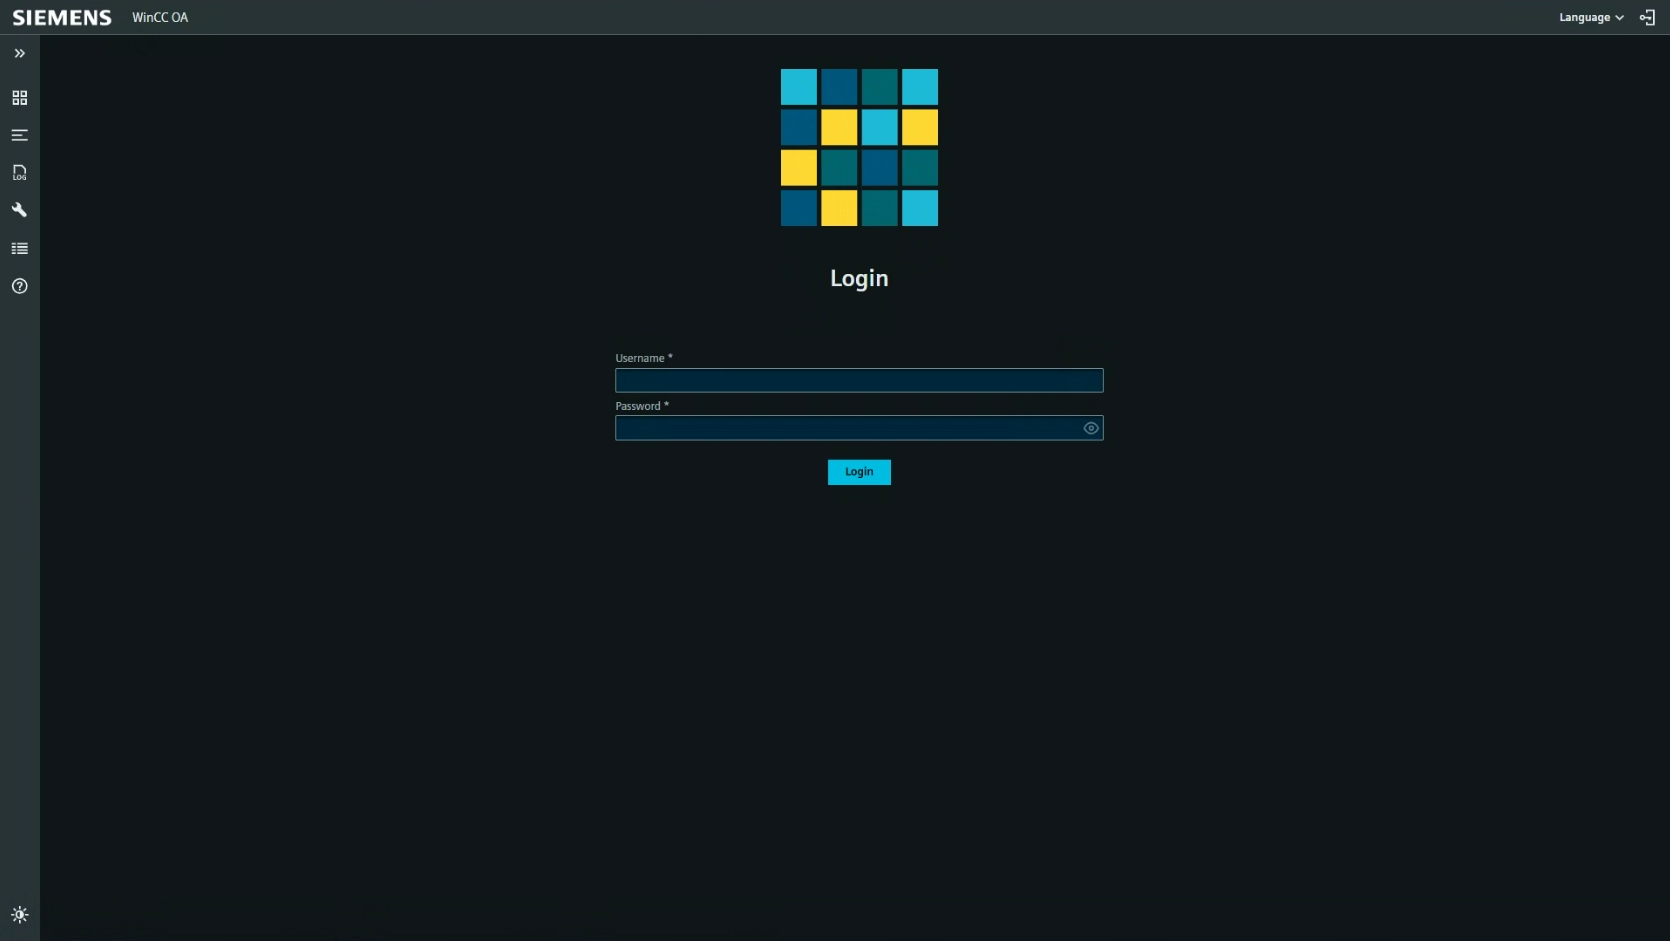
To access the WinCC OA Administration Interface, you must log in. By default, a predefined user account is available with both the username and password set to admin. After your first login, you are required to change the password for this default account to ensure secure access. To log in, enter your credentials in the Username and Password fields and click Login.
Projects
The project list on the Project Administration page shows the projects available on the device, including their status and the available actions.

- Name – Name of the project.
- Status – Current status of the project (e.g., stopped).
- Actions – Actions you can perform directly in the project row:
- Start Project
- Stop Project
- Go to Link – Opens the link that has been configured for the project, see Update Link below. By default, this opens the Dashboard of the project.
- Delete Project
Click the ⋮ icon at the end of the project row to open further actions for the project:
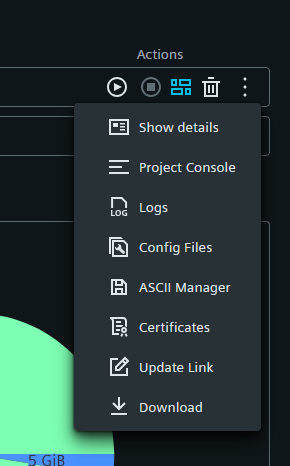
- Show details – Provides information about the starting time of the project and the overall runtime.
- Project Console – Opens the Console for the project, see also WinCC OA Console.
- Logs – Opens the log overview for the project, see also Logs.
- Config Files – Opens the configuration files of the project, see also Project Configuration.
- ASCII Manager – Opens the ASCII import and export of the project, see also Project Configuration.
- Certificates – Opens the certificate management of the project, see also Project Configuration.
- Update Link – Allows you to define a link for the project where additional information can be provided. By default, the link directs to the Dashboard view of the project.
- Download – Downloads the project. The download also contains all data that has been changed during online engineering. Use it, for example, to update the project offline and upload it again.
Project Upload
The upload row below the project list lets you upload a new project to the device. Supported file extensions are: .zip, .tar.gz, .tar, .gz, .tgz.

- Drag files here or click to upload... – Drag and drop your project files into the upload row, or click the row or the + icon to open a file dialog.
- ✓ – Starts the upload process.
- X – Clears the selected files.
- Demo Project – Uploads the WinCC OA demo project to the device.
- Forward your process data to a remote database if you need to archive it.
- Download the current version of your project and make major changes offline before uploading an updated version to the device.
Device Performance
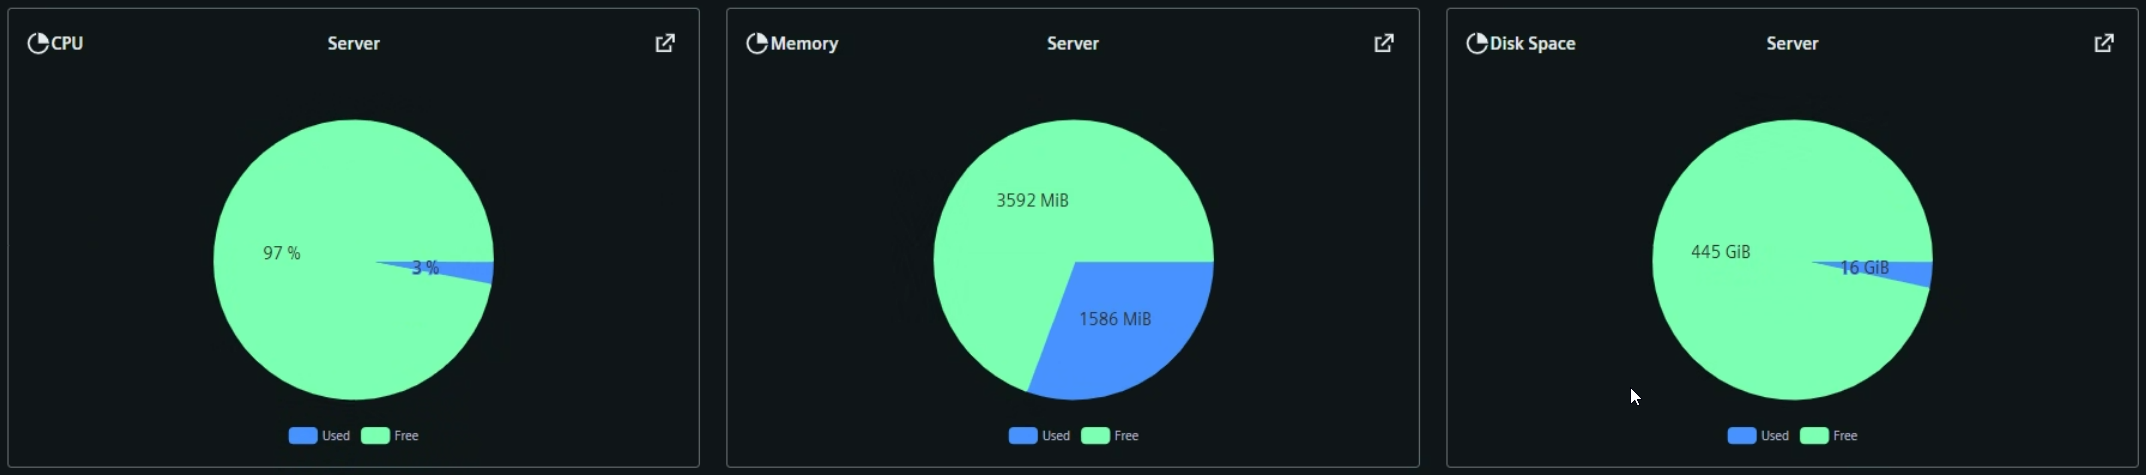
The device performance charts on the Project Administration page provide real-time indicators for CPU, memory, and disk space usage on the server. Each chart shows the available limit of the resource in its top right corner.
- CPU – CPU usage in percent over time.
- Memory – Used memory in MiB over time.
- Disk Space – Used and free disk space in GiB, displayed as a pie chart.
WinCC OA Console
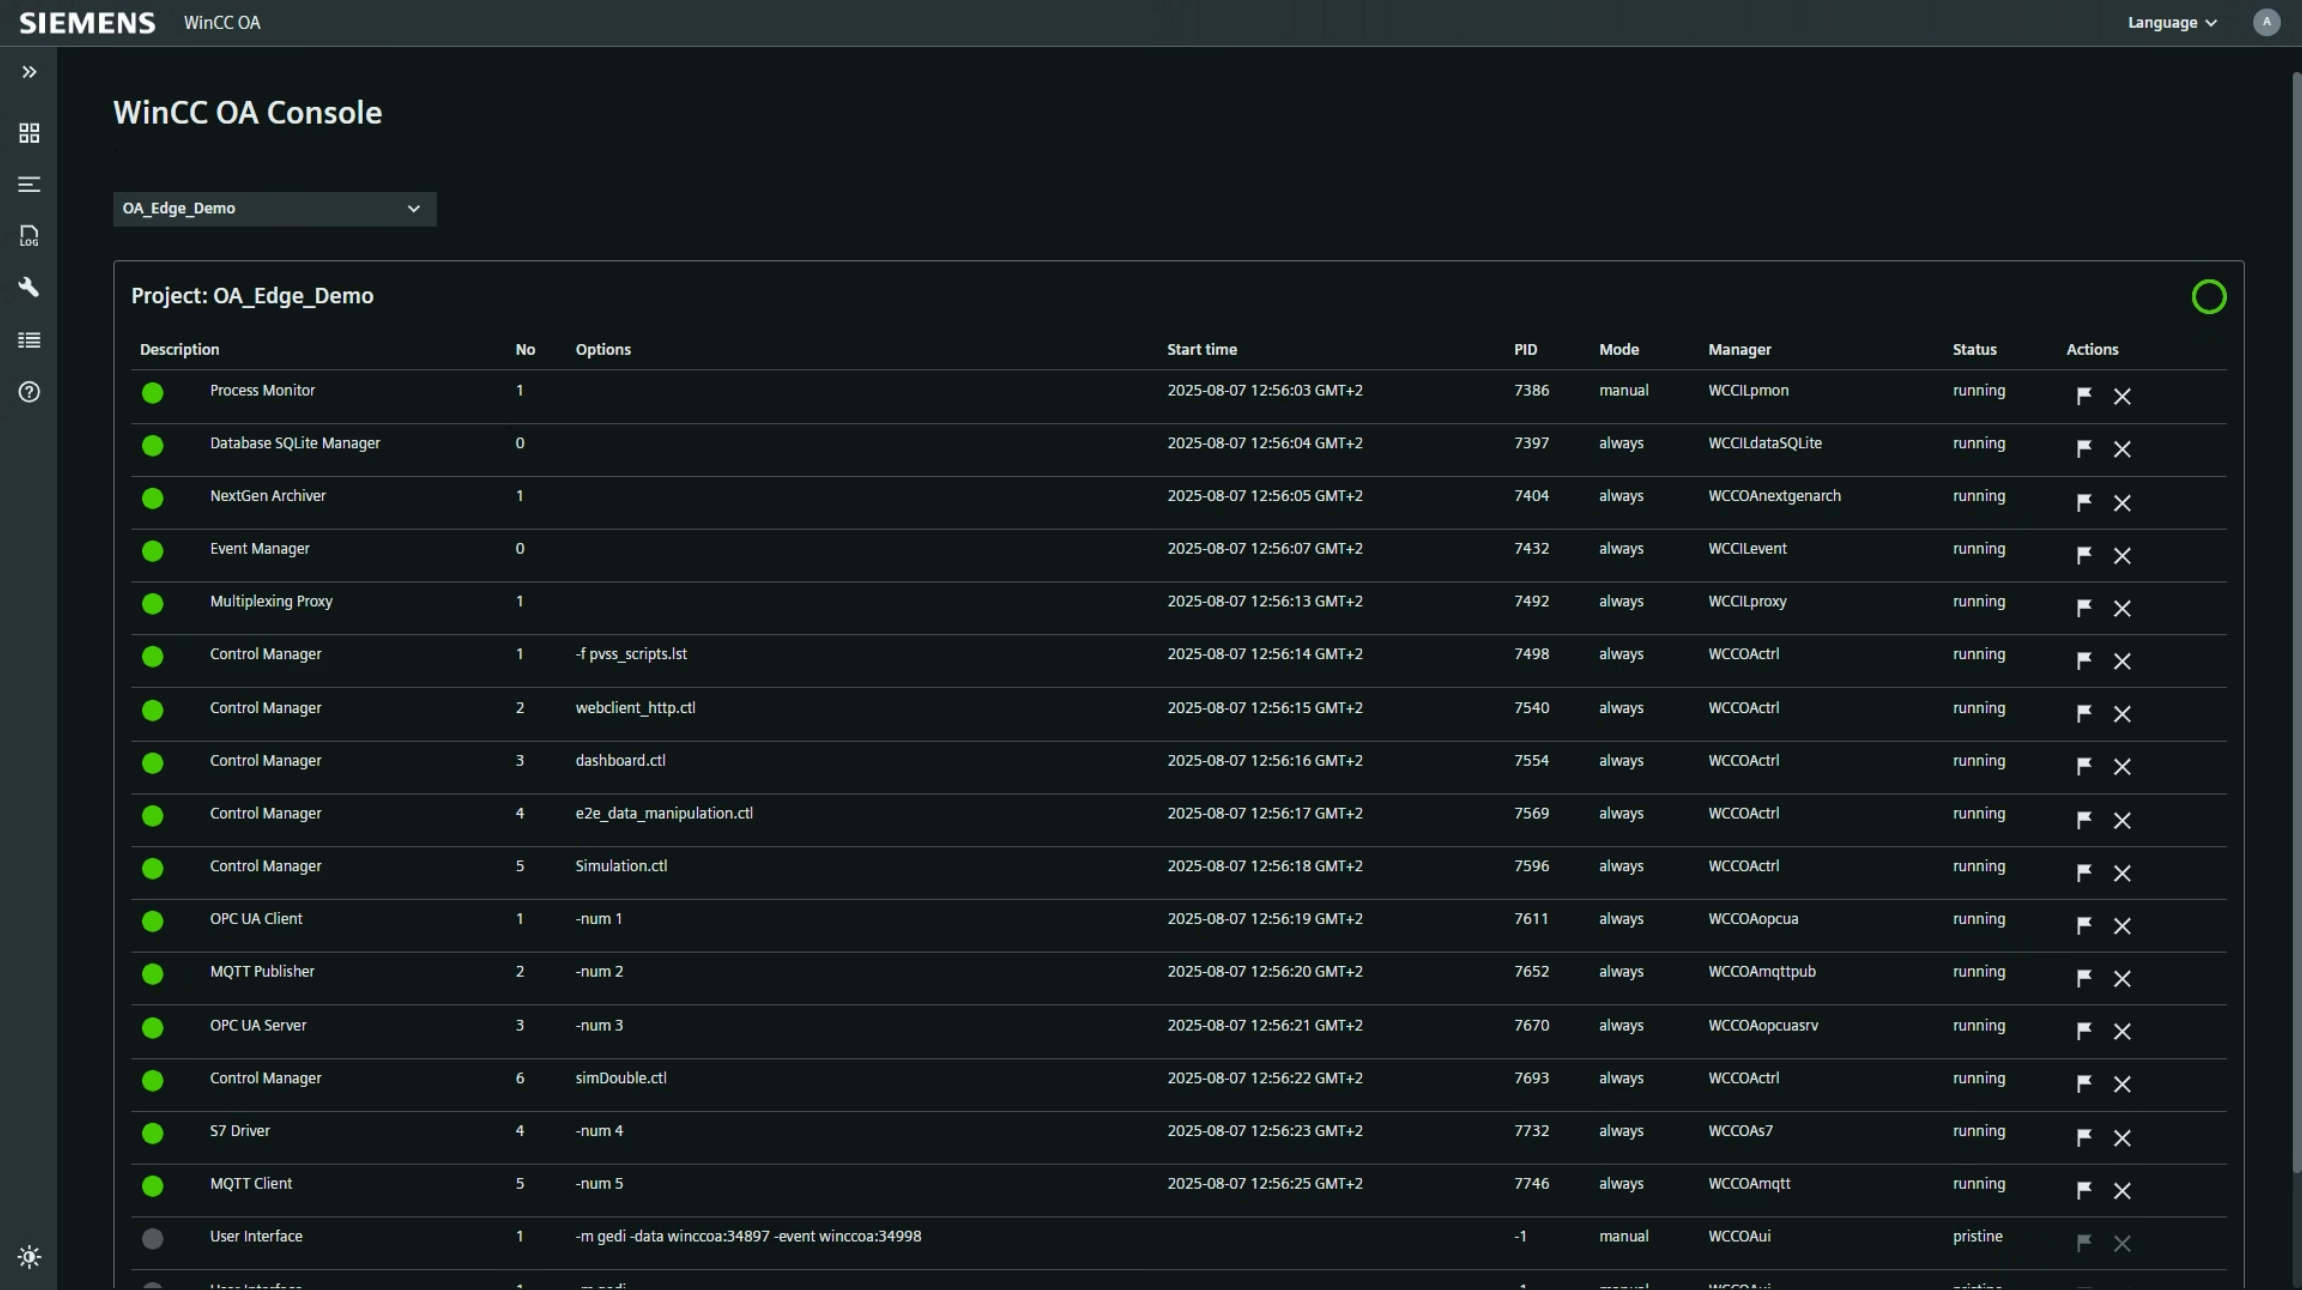
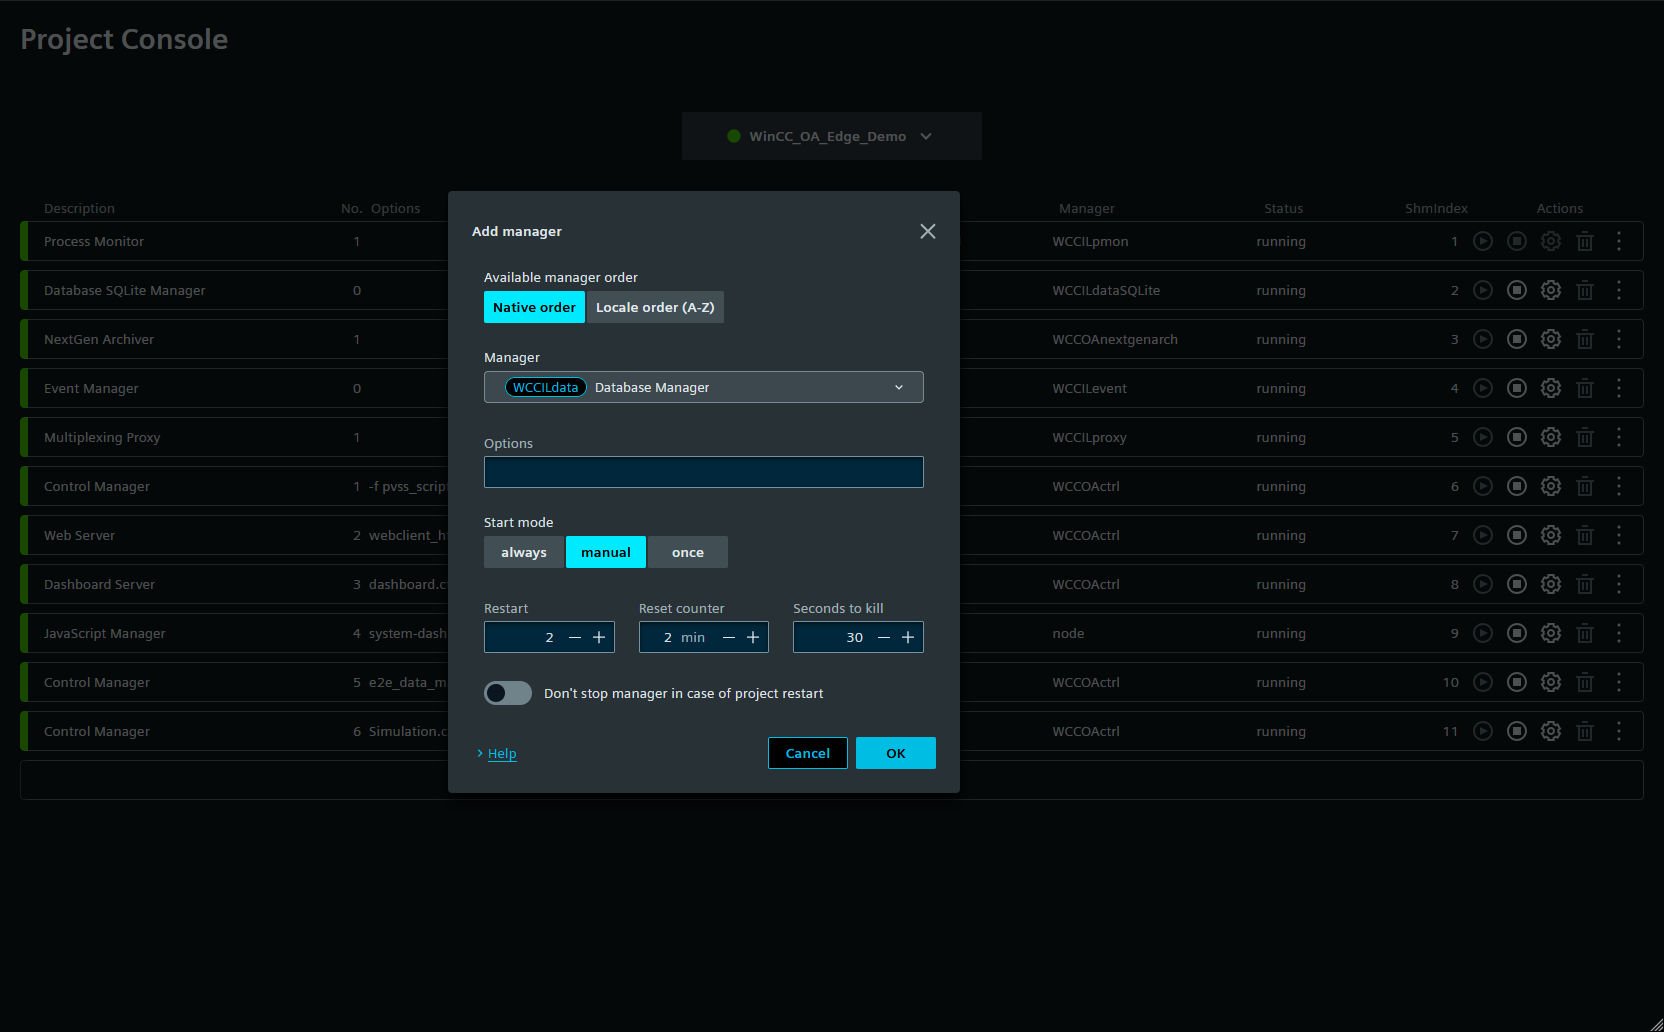
The Project Console page provides an overview of all managers of the project selected in the drop-down list at the top of the page. The colored bar at the beginning of each row and the LED in the project selection indicate the current state. The table includes:
- Description – Name or description of the manager.
- No. – Manager number.
- Options – Additional options or parameters for the manager.
- Start time (local) – The time the manager was started, displayed in local time.
- PID – Process ID.
- Mode – Start mode (manual, always, or once).
- Manager – Manager name.
- Status – Current status (e.g., running, pristine).
- ShmIndex – Index of the manager in the manager list.
- Actions – Start, stop, edit the settings of, or delete the manager. Further actions are available via the ⋮ icon, see Manager Actions and Debug Flags.
Add Manager
Click Add manager below the manager list to add a new manager to the project. In the dialog, you can define:
- Available manager order – Defines how the list of available managers is sorted: Native order lists the managers in the order defined by WinCC OA. Locale order (A-Z) sorts the managers alphabetically by their names in the current interface language.
- Manager – The manager to be added.
- Options – Command line options of the manager.
- Start mode – always, manual, or once.
- Restart, Reset counter, and Seconds to kill – Restart behavior of the manager.
- Don't stop manager in case of project restart – Keeps the manager running when the project is restarted.
For a description of these properties, see Add a new manager.
Manager Actions and Debug Flags
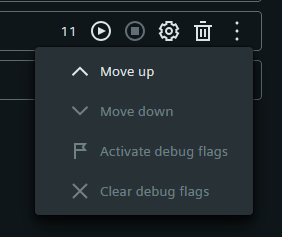
Click the ⋮ icon at the end of a manager row to open further actions for the manager:
- Move up / Move down – Changes the position of the manager in the start sequence.
- Activate debug flags – Sets debug flags for the manager. Use this to enable debugging output for troubleshooting.
- Clear debug flags – Removes the debug flags of the manager.
Logs
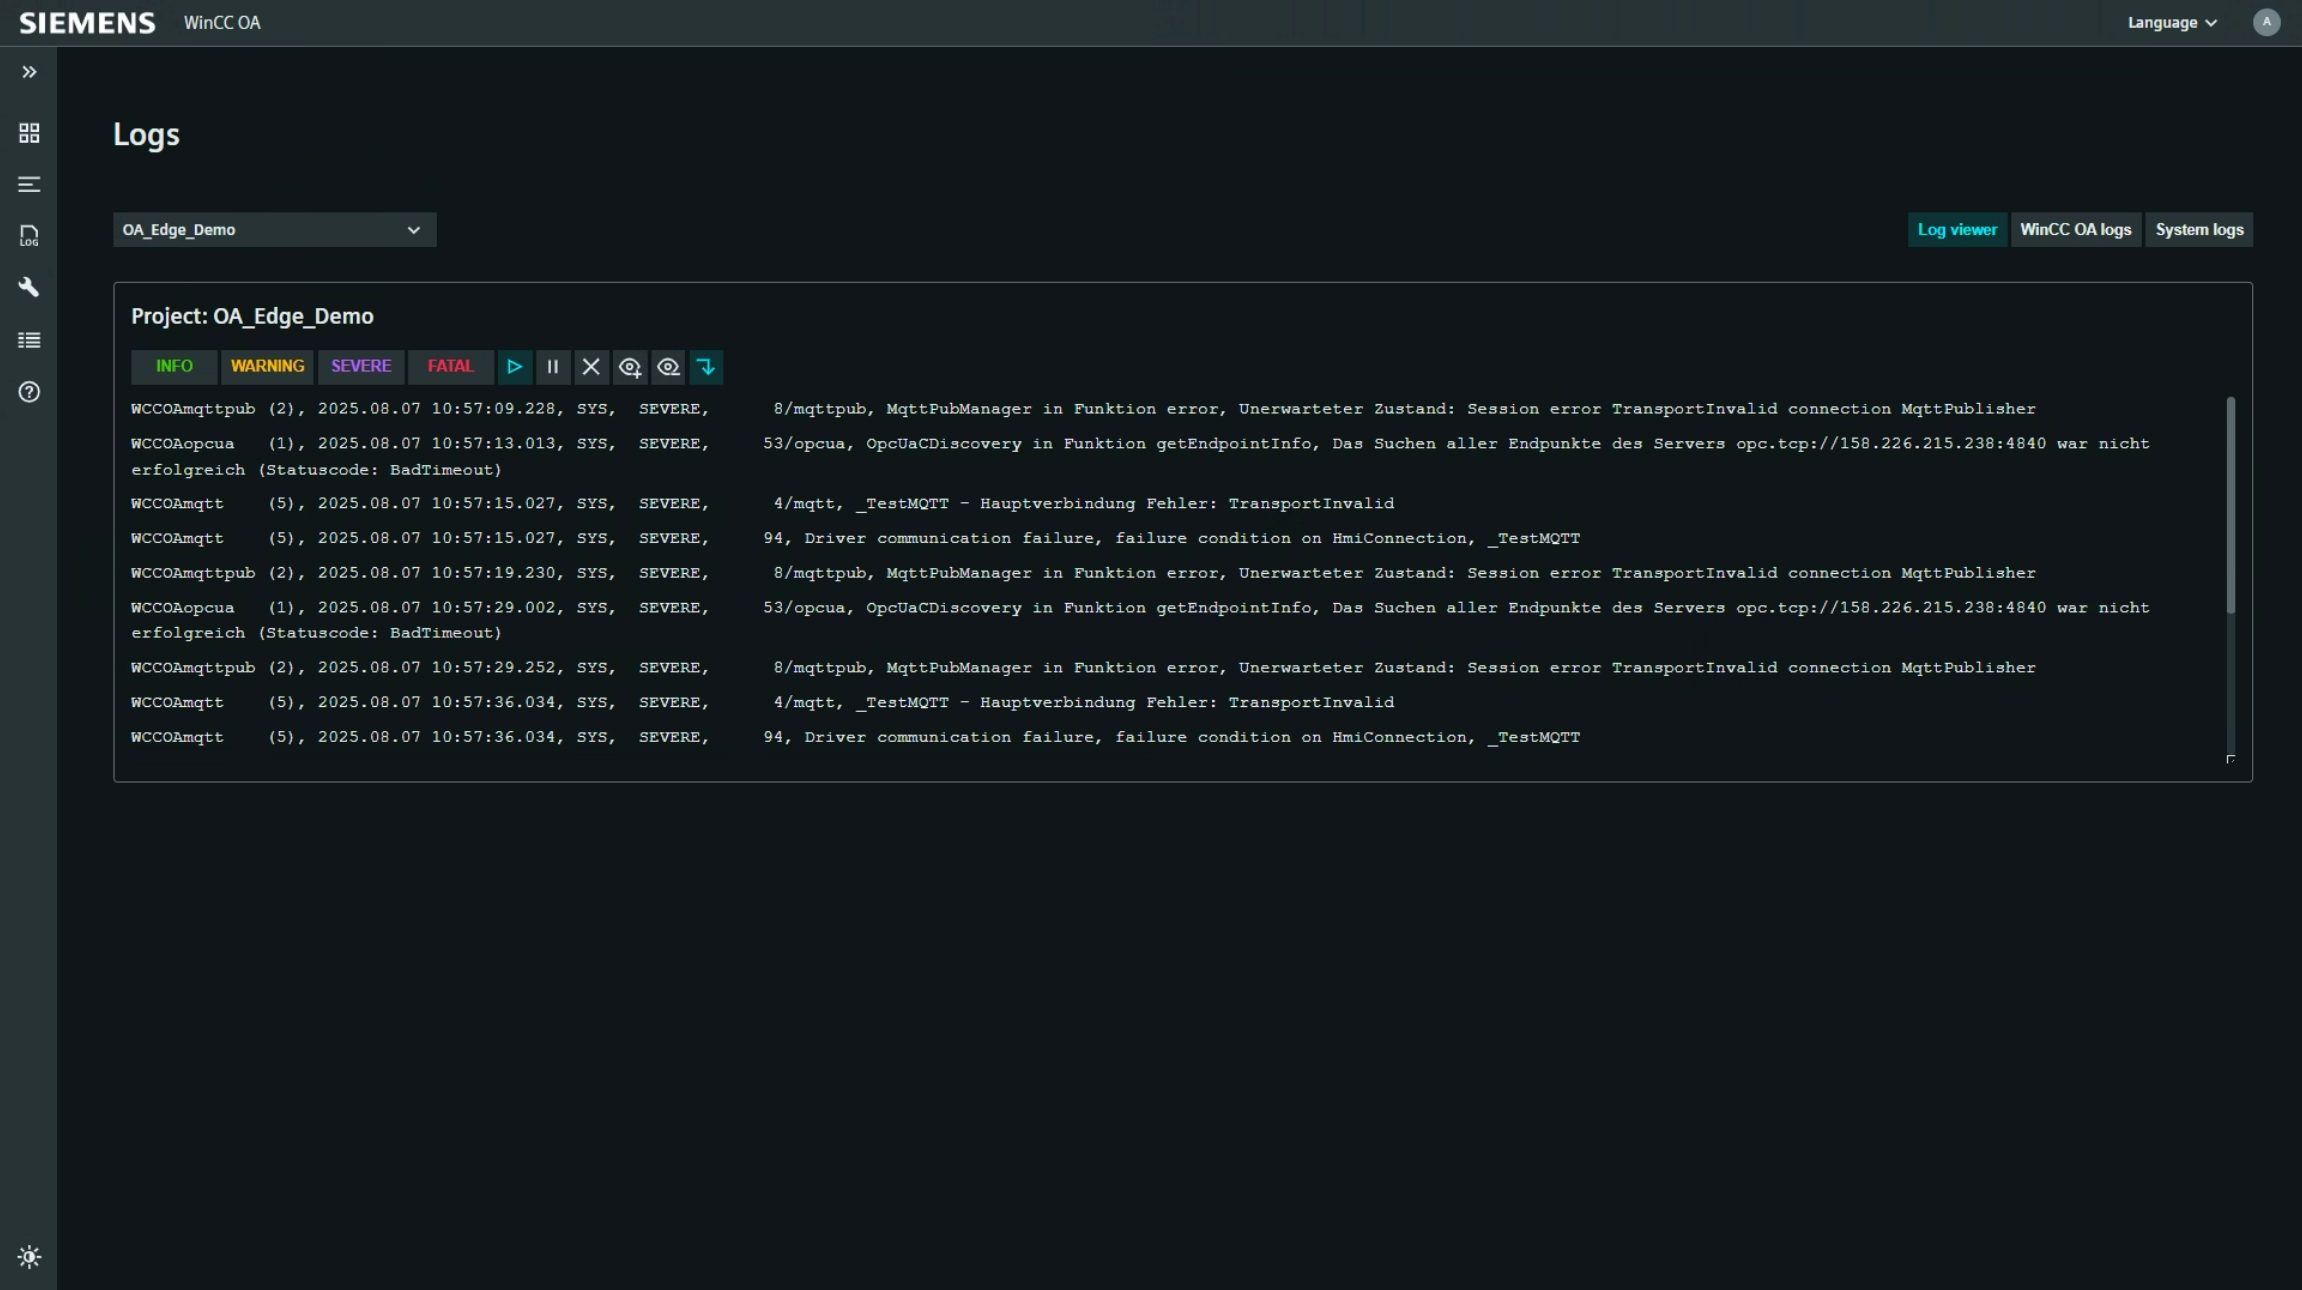
The Logs page provides access to the log files of the project selected in the drop-down list. The tabs below the project selection let you switch between Log viewer, WinCC OA logs, and System logs.
The Log viewer tab shows the log output of the project directly in the browser. Use the INFO, WARNING, SEVERE, and FATAL buttons to filter the messages by priority.
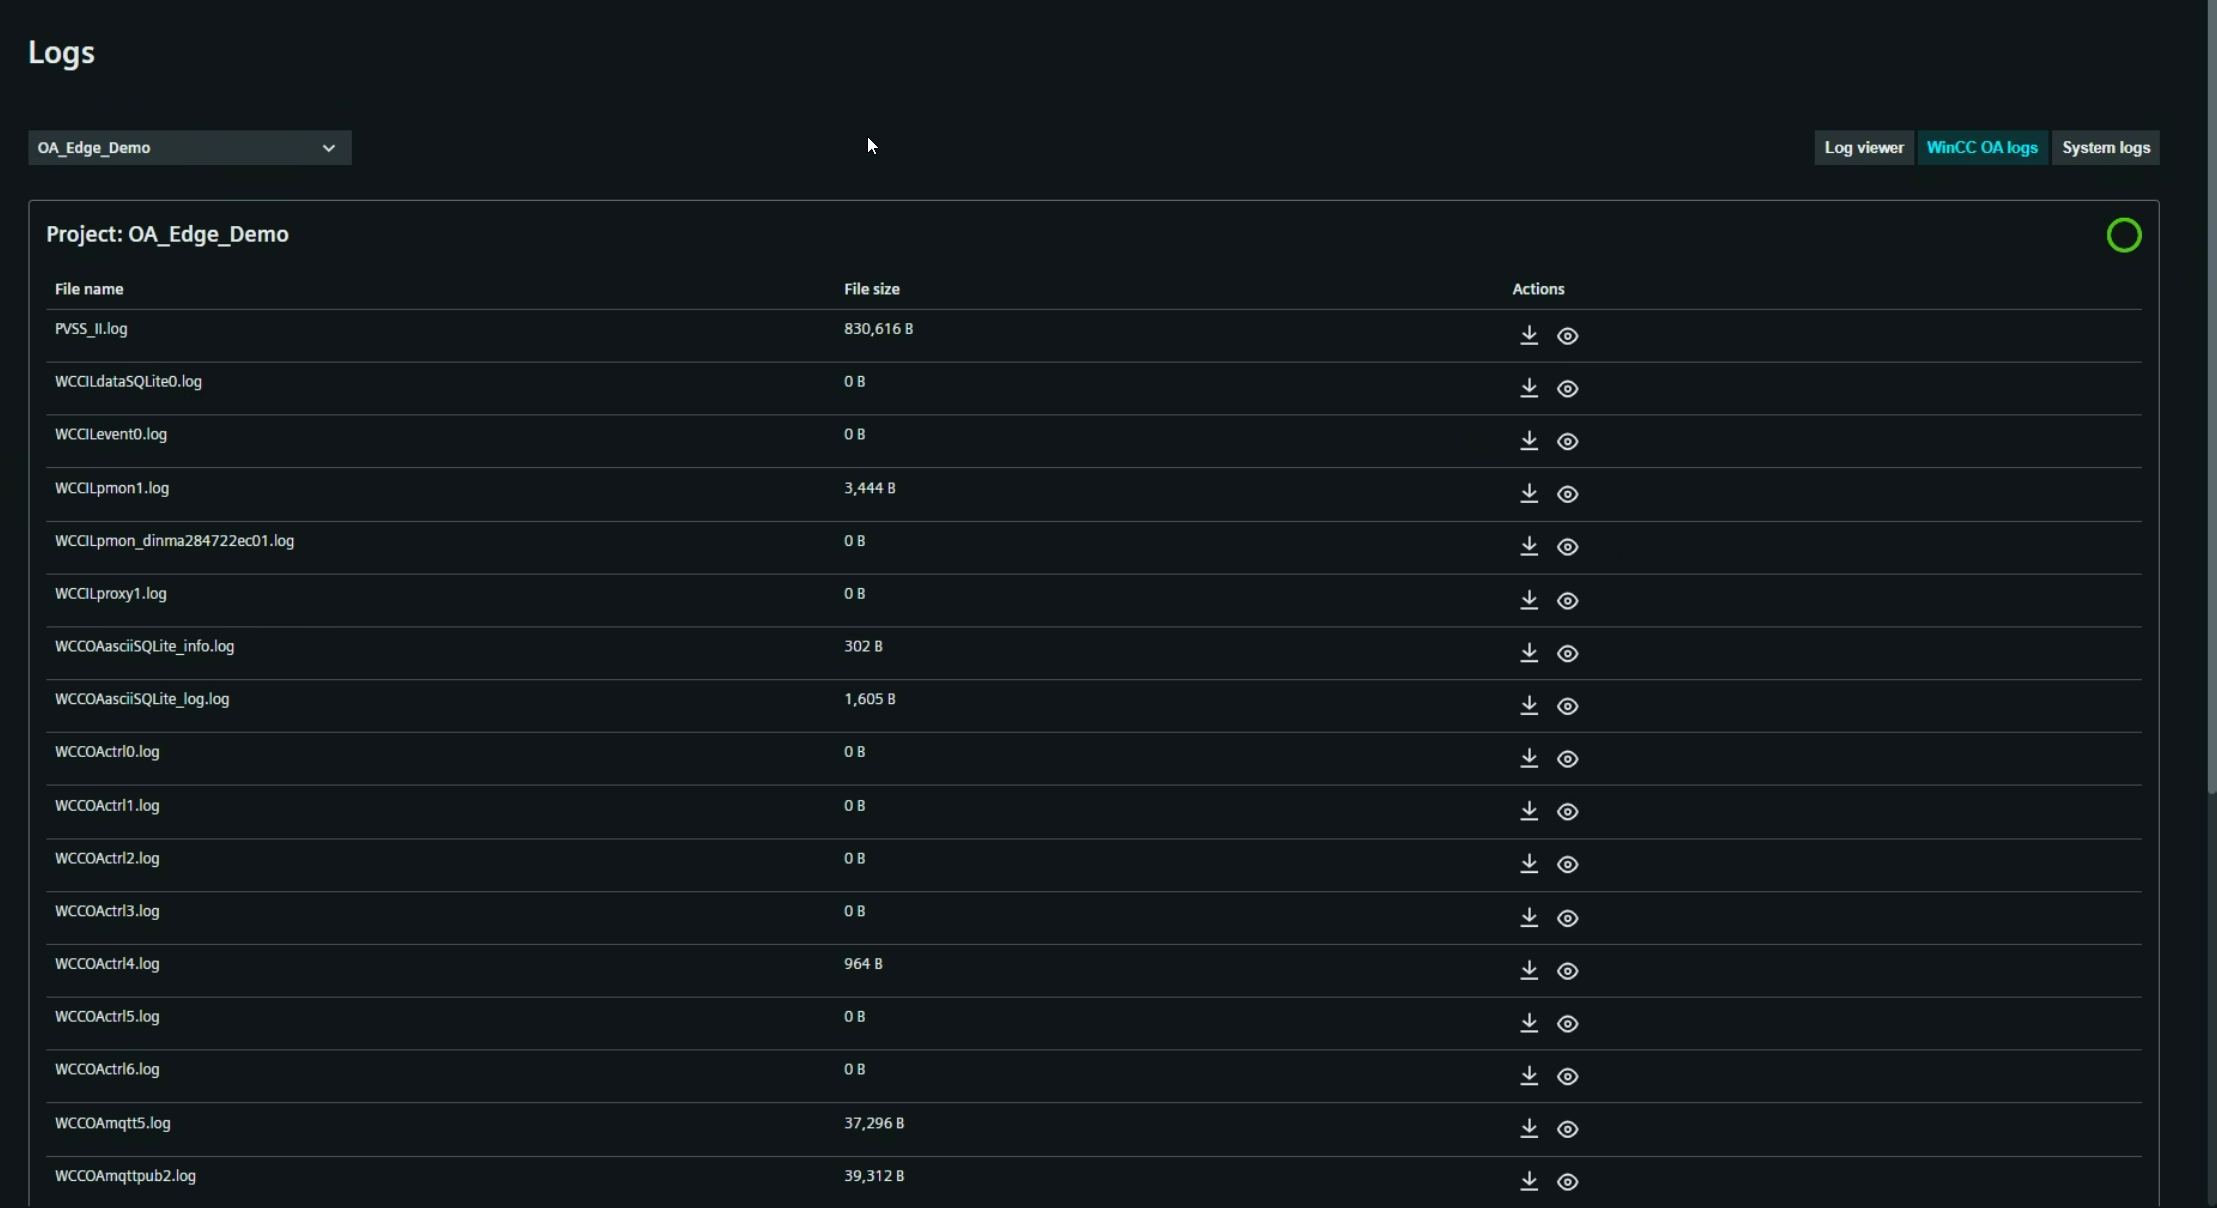
The WinCC OA logs and System logs tabs list the available log files:
- File name – Name of the log file.
- File size – Size of the log file.
- Actions – Download, view, or delete the log file.
Project Configuration
The Project Configuration page gives you direct access to the configuration of the project selected in the drop-down list. The page provides the following tabs:
- Config – Access to the configuration files of the project.
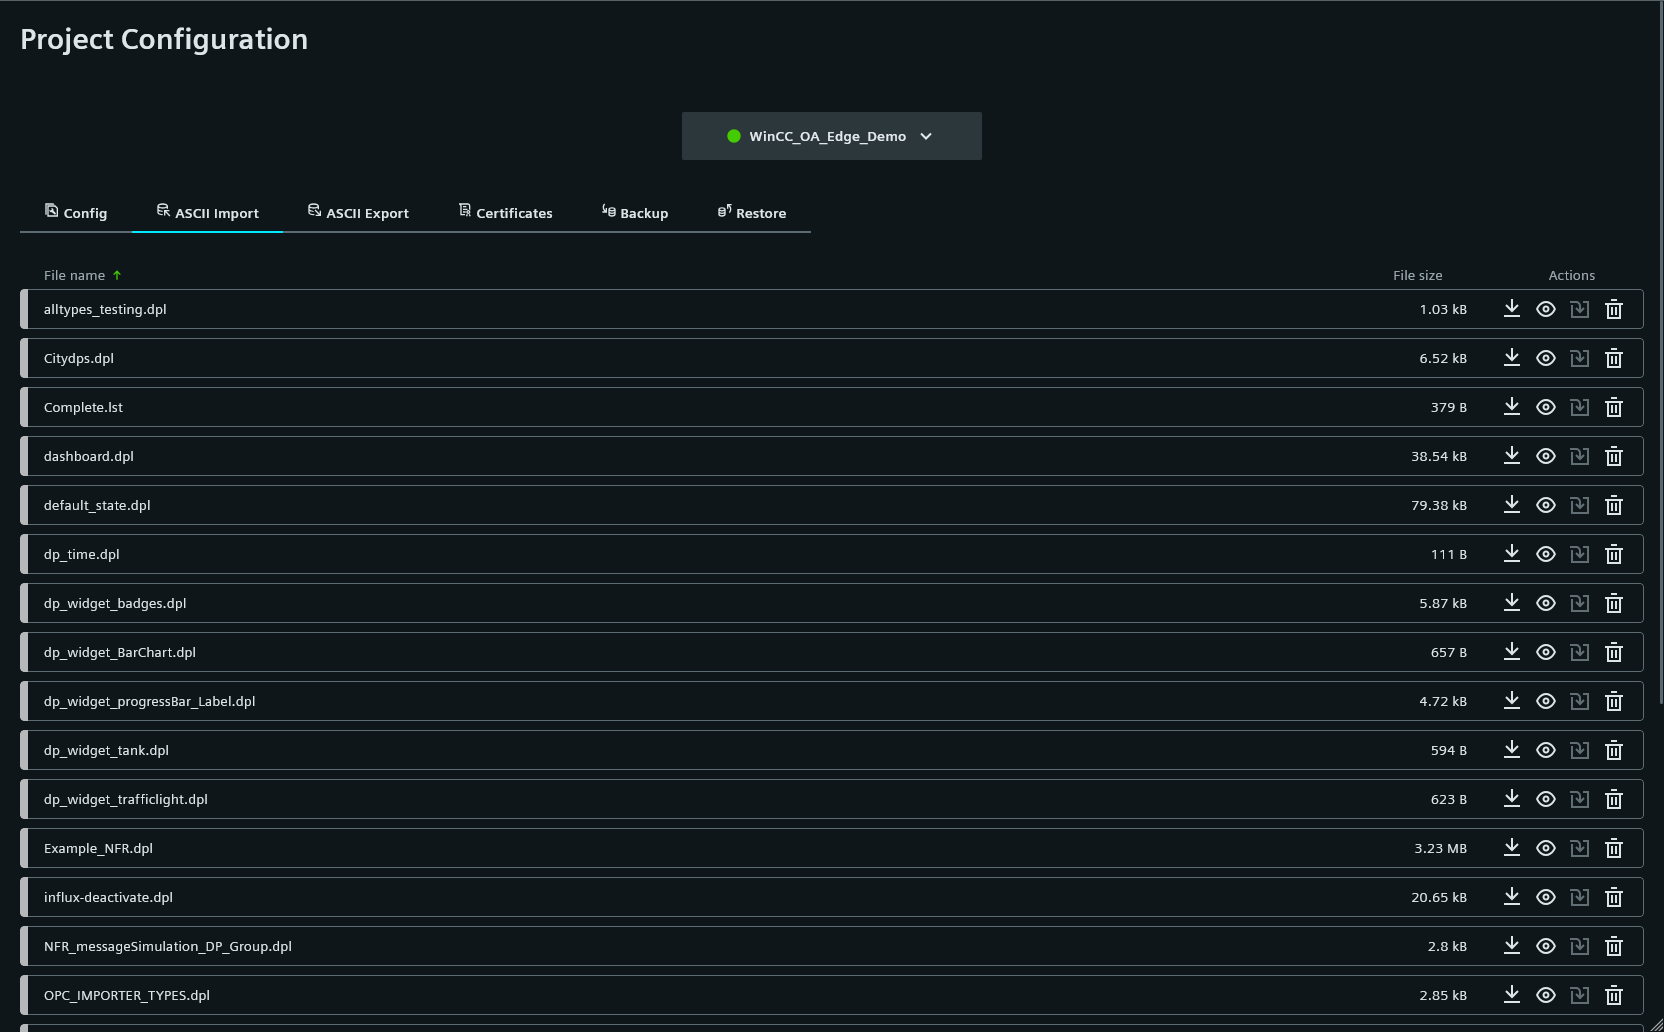
- ASCII Import – Lists the ASCII files (for example, .dpl and .lst files) of the project with their file size. Use the actions to download, view, import, or delete a file.
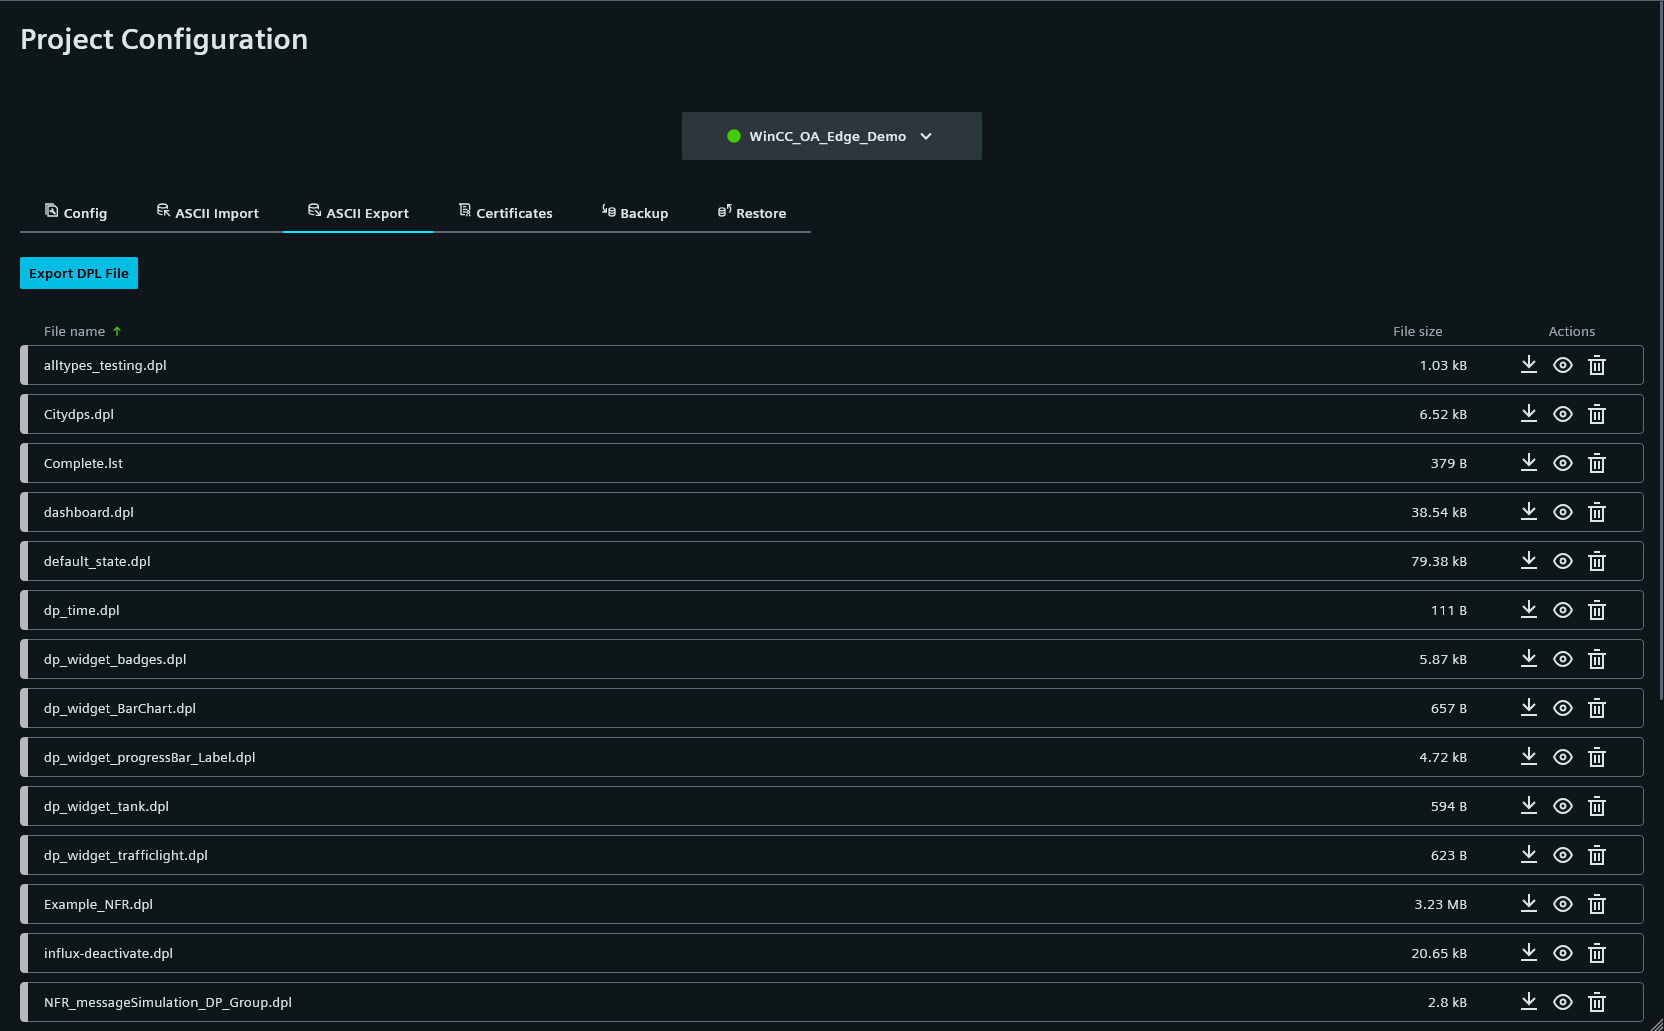
- ASCII Export – Click Export DPL File to export data from the project. The exported files are listed and can be downloaded, viewed, or deleted.
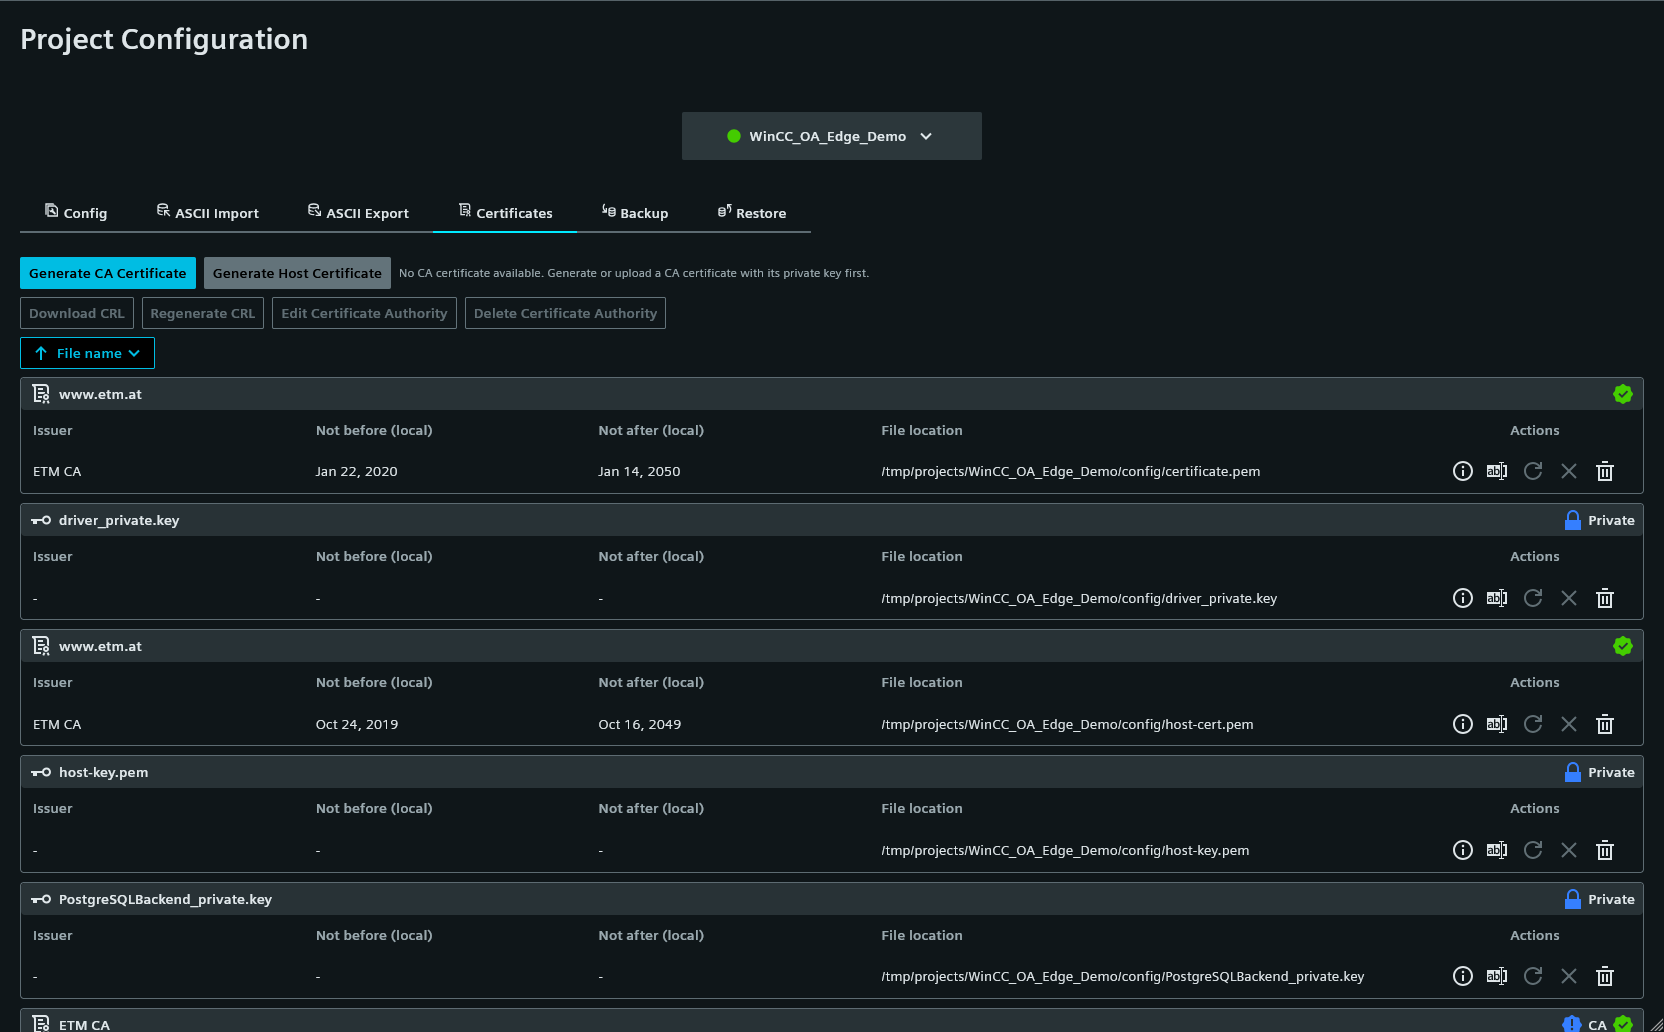
- Certificates – Manages the certificates and private keys of the project. You can generate a CA certificate and host certificates, download or regenerate the certificate revocation list (CRL), and edit or delete the certificate authority. For each certificate, the issuer, the validity period (Not before (local), Not after (local)), and the file location are displayed.
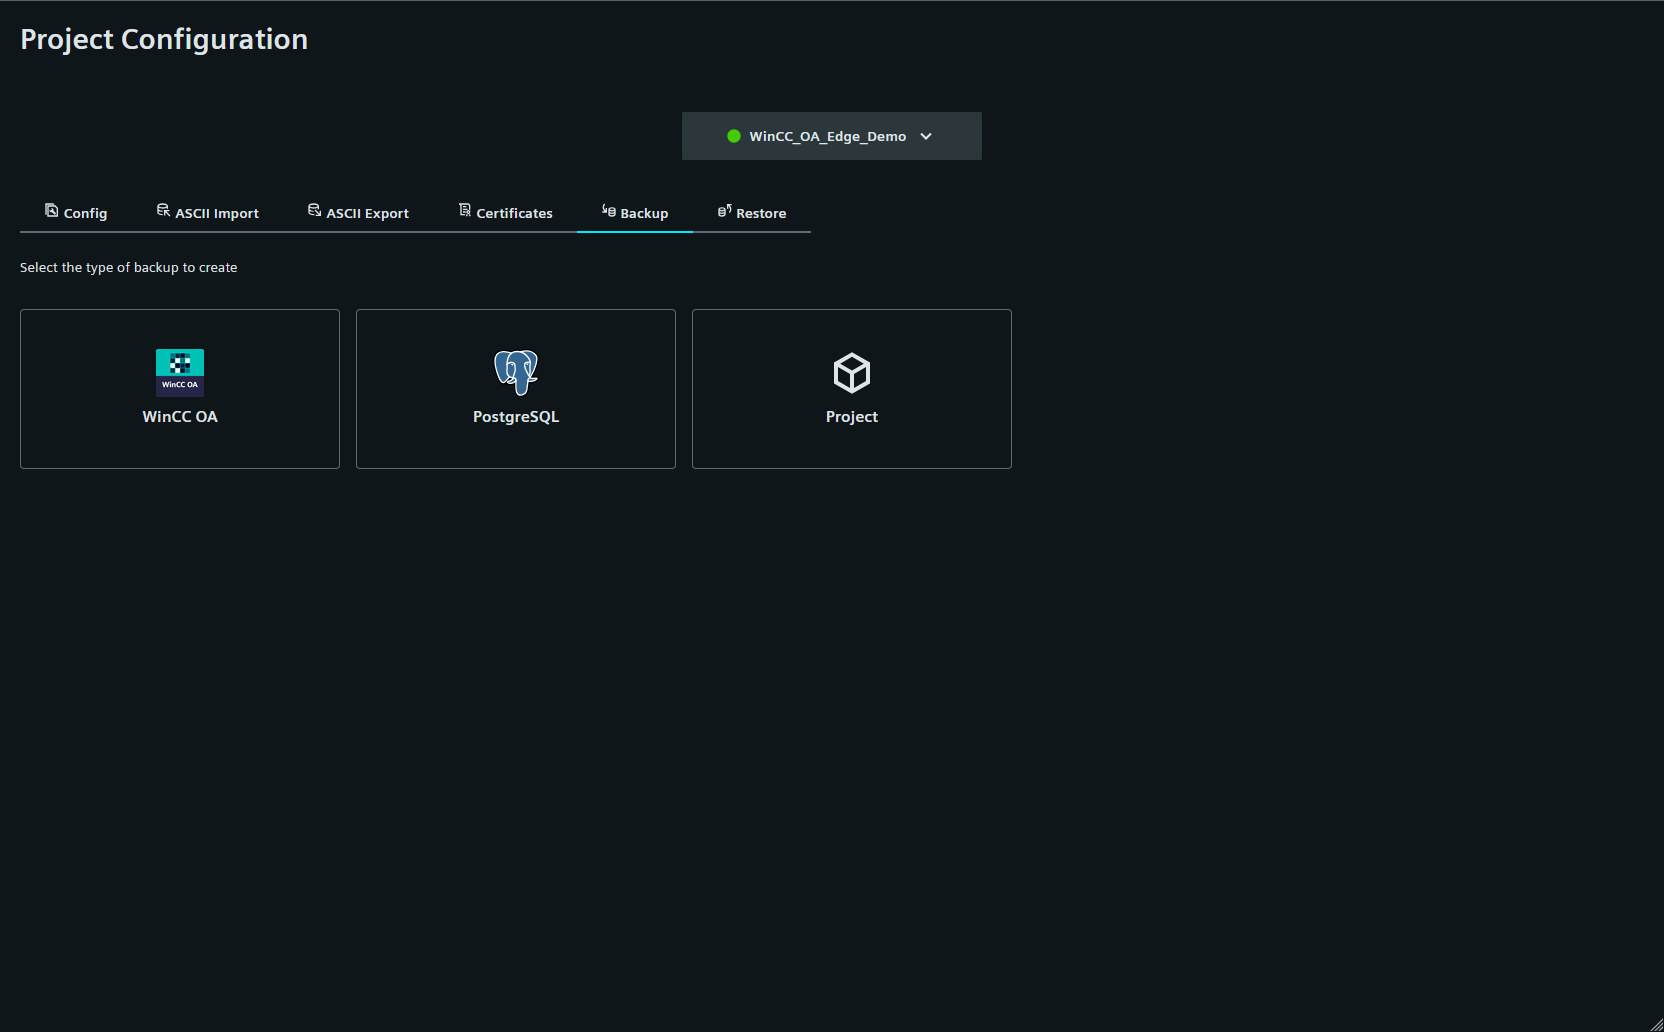
- Backup – Creates a backup. Select the type of backup to create: WinCC OA, PostgreSQL, or Project.
- Restore – Restores a backup.
System Configuration
The System Configuration page provides access to the system configuration.