
Configure with Plantmodel
Configure a Plantmodel as the data source for the Sparkplug B EoN Node.
It is assumed, that you already modelled your plant within the Plantmodel Editor.
-
Inside the Northbound Manager interface, create a new connection with the connection
name, that has been added to the JavaScript Manager, see Basic Configuration.

-
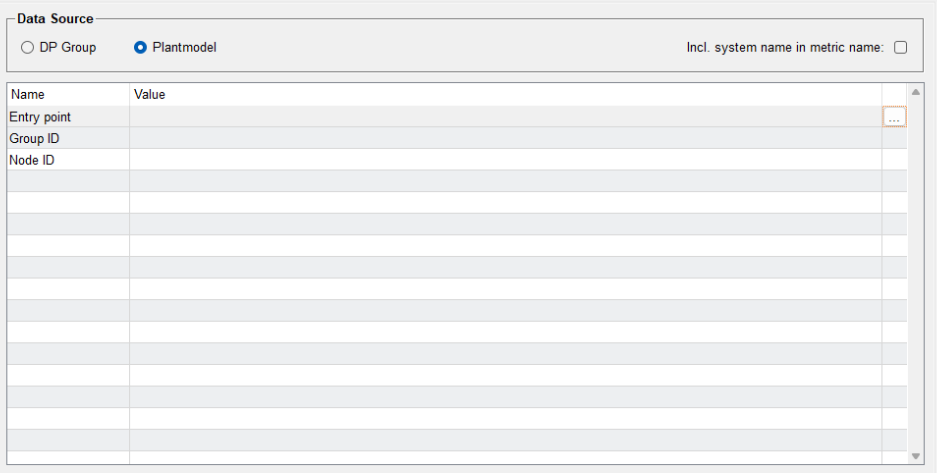
Select Plantmodel as the data source in the Northbound Manager.
-
Click the entry point selector and choose the desired view as the entry point.
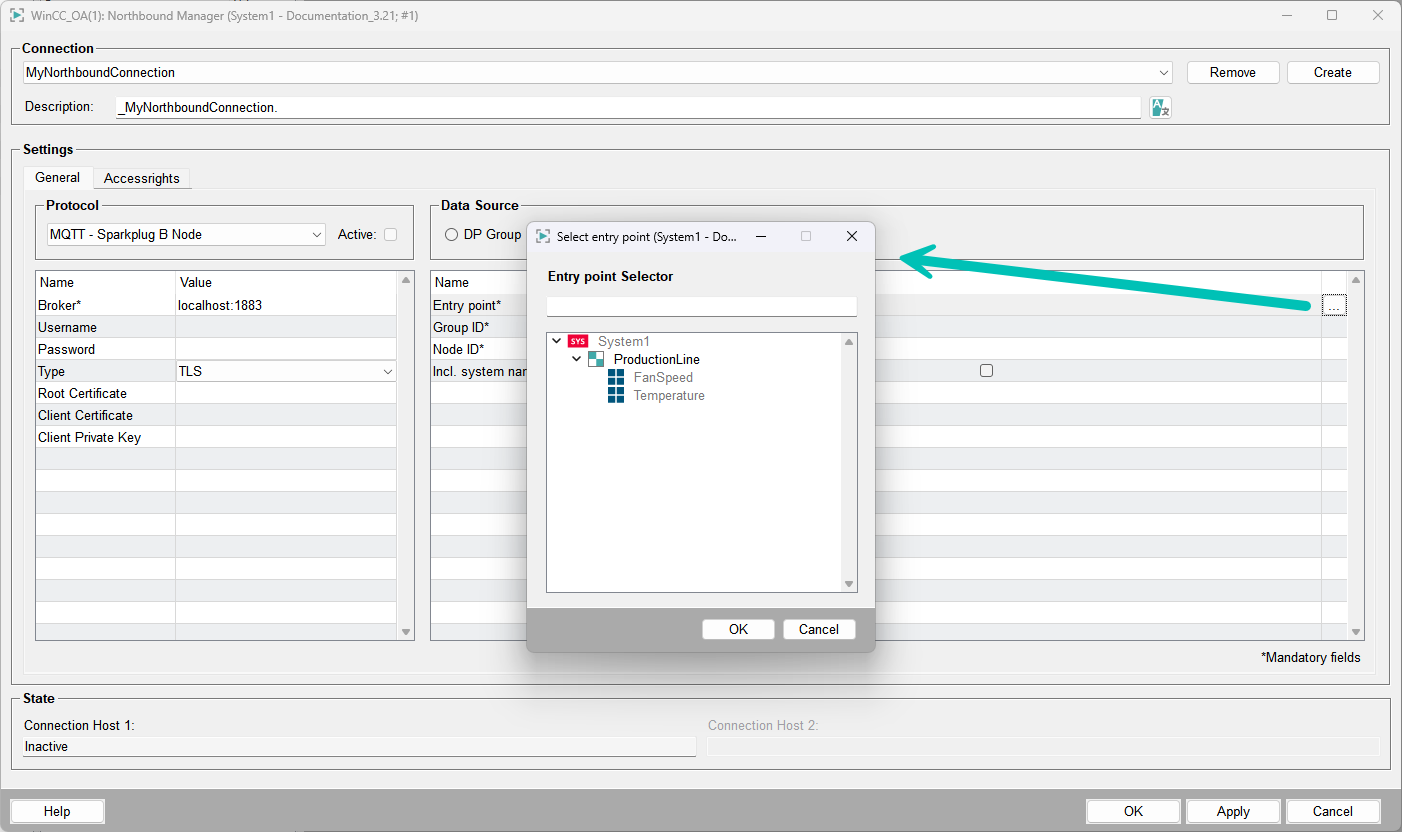
- Set the Group ID and Node ID as required.
-
Configure access rights for the nodes and datapoints as needed.
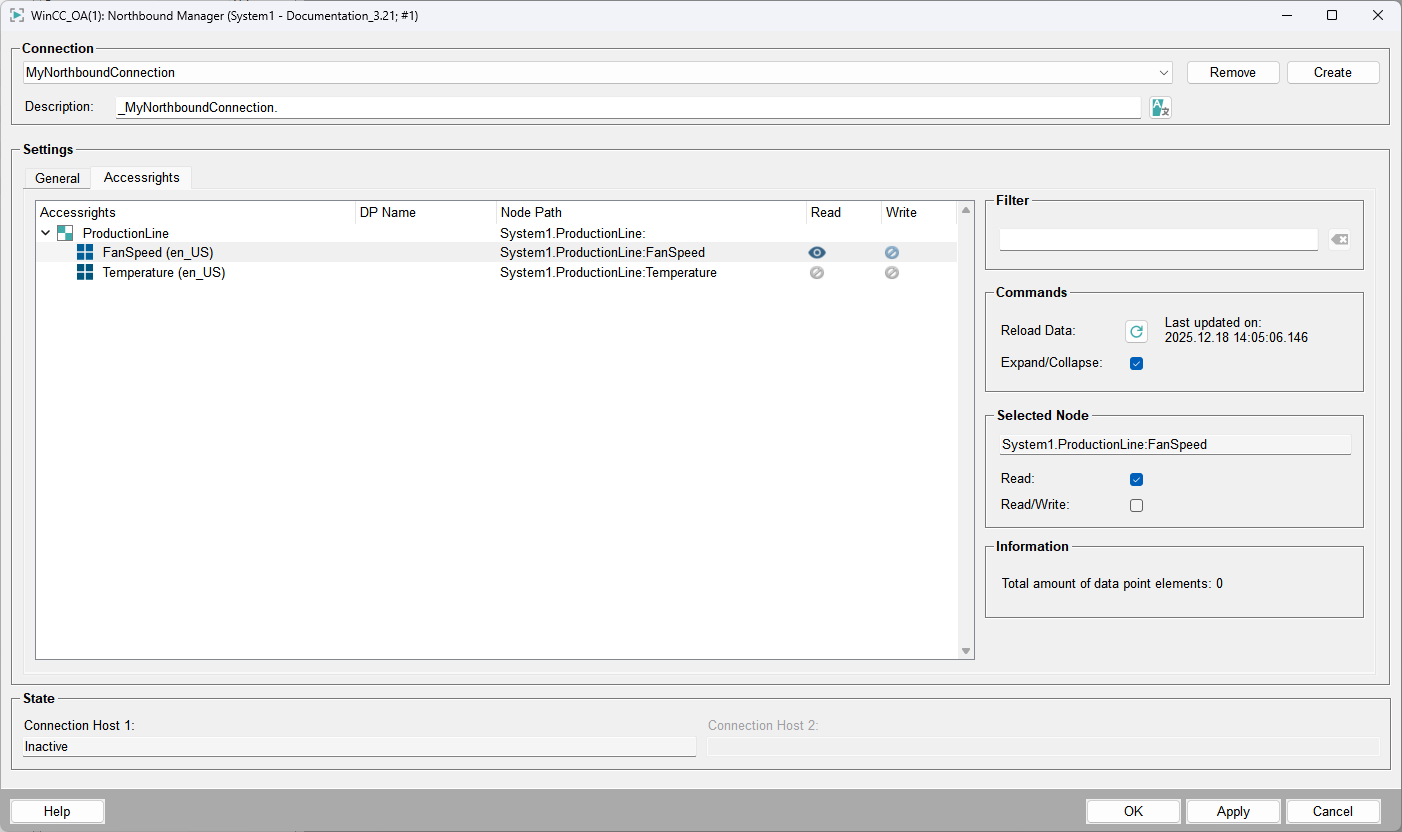
- Click Apply to save the configuration.
The configured nodes are now available for the broker communication.
The metric names for the examples above are "ProductionLine:FanSpeed", "ProductionLine/FanSpeed", and "ProductionLine/Temperature". If the option Incl. system name in metric name is enabled, an additional prefix with the system name, such as "System1/", is added.
In a Distributed System, the Plantmodel can include datapoints from remote systems. Enabling the system name prefix is recommended in distributed setups to clearly identify the source system of each metric.
Quality Mapping
The Northbound Manager supports quality mapping for Sparkplug B data publishing. When
enabled, the WinCC OA
_invalid attribute is mapped to the Sparkplug B quality property of each
metric.
WinCC OA _invalid |
Sparkplug B Quality | Behavior |
|---|---|---|
false (valid) |
GOOD (192) | Quality property omitted (per Sparkplug B specification) |
true (invalid) |
BAD (0) | Quality property included in metric |
-
Set
"usequalitymapping": truein the datasource configuration on the DPE .Config.Datasource:{ "entrypoint": { "node": "Views/SparkplugB", "includesystemname": false, "usequalitymapping": true } } - Restart the Northbound Manager for the change to take effect.