Areas
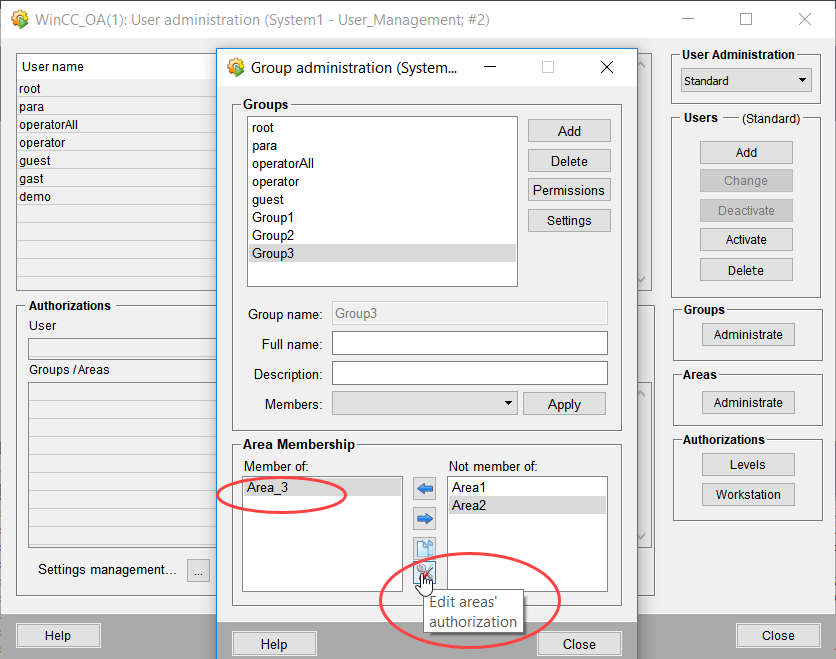
Areas which are logical or geographical zones of e.g. a plant again can be assigned to different groups. The rights of a group for an assigned area apply to all users belonging to this group. Thus, different rights can also be defined by assigning areas to different user groups. The area authorization is defined in the area member section of the group administration panel.
An area can be, for example, a tunnel. The tunnel is assigned to a group. As an example three different areas: tunnel 1, tunnel 2 and tunnel 3 could be assigned to three different groups OpAll_tunnel1, OpAll_tunnel2 and OpAll_tunnel3. All these groups could have different rights according to the area (tunnel). The group OpAll_tunnel1 would, for example, have the advanced operator authorization (this means the authorization level 3) for tunnel1 and normal user authorization for tunnels 2 and 3. In the same way, the OpAll_tunnel2 group could have the advanced operator authorization for the tunnel 2 and normal user authorization for tunnels 1 and 3.
The users of these different groups could in this case either only visualize (normal user authorization) the tunnel or also set replacement values (advanced operator authorization). This way the users can work effectively and have only access to restricted areas which belong to their own field of duty.
This chapter describes in detail the areas and the panel used to administer them.
Area administration
The area administration panel (see the figure below) is used to create, modify and delete areas:
The rights of an area are not checked in WinCC OA automatically. You have to call the function getUserPermissionForArea() to check the rights.
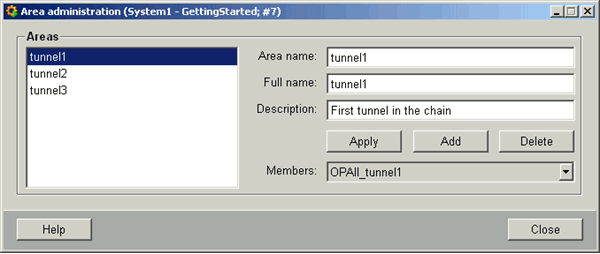
The Areas view shows all existing areas. Detailed information about an area can be viewed by choosing the area from the Areas view.
Area name : The name of the area.
Full name : Allows to define a more specific name for an area.
Description : Description of the area.
![]() Applies the changes.
Applies the changes.
![]() Adds a new area.
Adds a new area.
![]() Deletes an area.
Deletes an area.
Members : Shows the groups that are members of the chosen area and have rights for this area.
To create a new area
-
Click on the Area administration ... button.
-
Define the area name, full name and description.
-
Click on the Add button. A new area was created.
-
Set the area authorization via the Group Administration panel: