
Root Certificate & the Trusted Certification Authorities for Browsers
This example shows how to add a root certificate to the Trusted Certification Authorities in Chrome, Mozilla Firefox,Internet Explorer and EDGE browsers. For the Chrome Browser you can find screenshots of the import below. For the other browsers you can find a brief description of the necessary menu options to import a root certificate or a link to a description of the manufacturer.
The import is necessary to guarantee that a certificate is trusted and not blocked by the browser.
The descriptions were created with the, at the time of the creation, current browser versions. Due to continuous updates of the individual producers, we cannot guarantee that the screenshots of the browsers are up-to-date. This description only serves as guide in order to facilitate the import process of the root certificate.
Use this import for the features ULC UX and Desktop UI
Chrome
-
Open the Certificate Settings via Settings -> Privacy and Security -> Manager Certificates - see figure below.
-
Select Trusted Root Certification Authorities and Import - see figure below.
Figure 1. How to Import a Root Certificate to Chrome 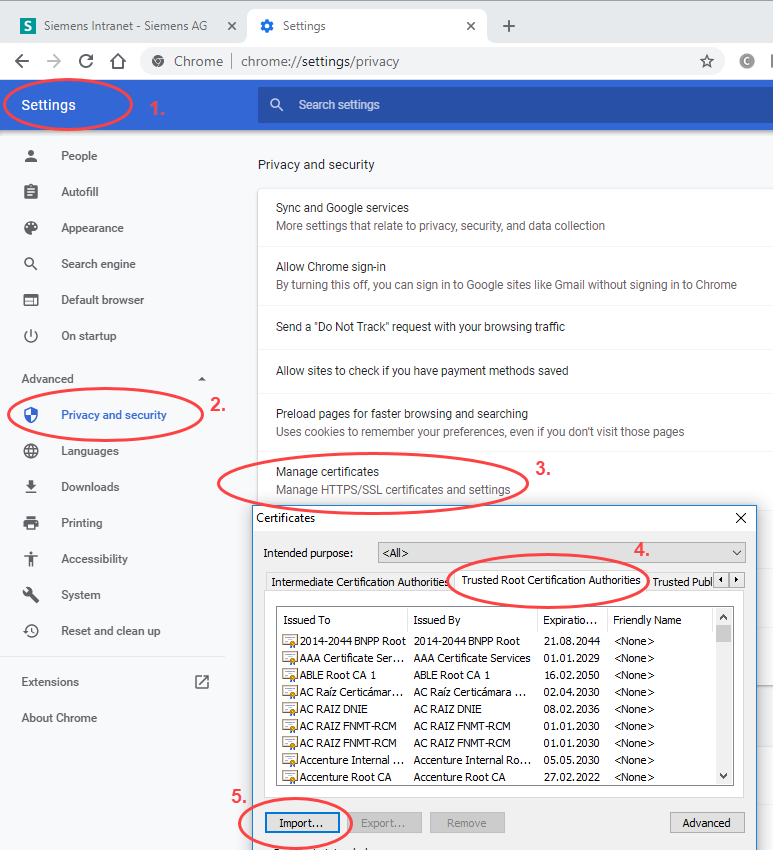
-
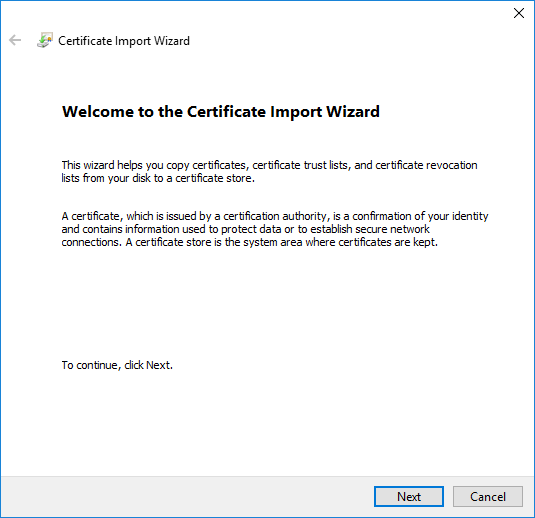
Then click "Next" in the "Welcome to the Certificate Import Wizard" - see figure below.
-
Select the root certificate either from the directory where you saved it when creating a Standard project or from the config directory of the project if you did not create a Standard project but another project type - see figure below.
-
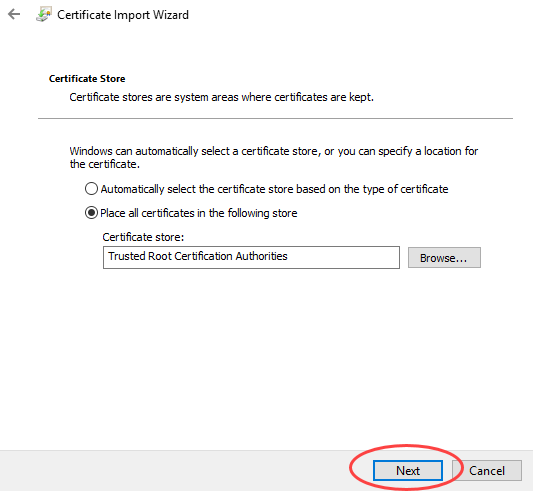
Click on "Next" and place the certificate in the "Trusted Root Certification Authorities" store. Then click on "Next".
-
Click on Finish to finish the import.
Figure 4. How to import a Root Certificate to Chrome 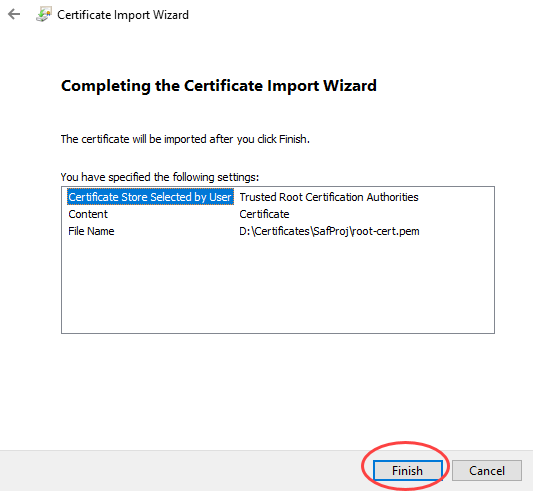
Mozilla Firefox
You can find the description of how to import a root certificate to the Trusted Certification Authorities here: https://wiki.mozilla.org/PSM:Changing_Trust_Settings
Note that the certificates imported to the Internet Explorer and EDGE are also imported to the operating system certificate store.
Internet Explorer
In the Internet Explorer select Tools -> Internet Options -> Content -> Certificates -> Trusted Root Certification Authorities" -> Import -> Then click on "Next".
Select the root certificate either from the directory where you saved it when creating a Standard project or from the config directory of the project if you did not create a Standard project but another project type. NOTE that you select the file type: All Files (*.*) from the file selector when selecting the certificate.
Click on "Next" and place the certificate in the "Trusted Root Certification Authorities" store. Then click on "Next" and "Finish" to complete the import.
EDGE
Windows
Under Windows select Settings -> Privacy & Security -> Certificates -> View certificates -> Authorities Tab -> Import -> Then click on "Next".
Select the root certificate either from the directory where you saved it when creating a Standard project or from the config directory of the project if you did not create a Standard project but another project type. NOTE that you select the file type: All Files (*.*) from the file selector when selecting the certificate.
Click on "Next" and place the certificate in the "Trusted Root Certification Authorities" store. Then click on "Next" and "Finish" to complete the import
Linux
Under Linux select Preferences -> Privacy & Security -> Certificates -> View certificates -> Authorities Tab -> Import -> Then click on "Next".
Select the root certificate either from the directory where you saved it when creating a Standard project or from the config directory of the project if you did not create a Standard project but another project type. NOTE that you select the file type: All Files (*.*) from the file selector when selecting the certificate.
Click on "Next" and place the certificate in the "Trusted Root Certification Authorities" store. Then click on "Next" and "Finish" to complete the import