Configuration of an AC type
In this example you will assign three compression levels to the datapoint type motor1. You will specify the calculation of 5-minute means, hourly means and daily means, plus the minimum and maximum in each case, and set up various archives to save these values. You will then create the datapoints.
The example contains the following steps:
- Creation of a new datapoint type
- Creation and configuration of compression levels
- Creation of datapoints
- Selection of exception datapoints (if necessary)
- Applying the structure to all required datapoints
- Deleting datapoints
Step 1 - Creating an AC type
The creation of an AC type can be equated to the creation of a new datapoint type. Having opened the AC configuration panel (see: AC configuration panel)
- Click on the New DPT... button.
- The following dialog box opens:
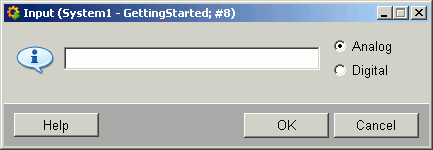
- Enter motor1.
- Select Analog, for instance, as data type for the datapoint element .value. This means that analog input values are allowed. With "Digital" selected the element would be of type bool, and in the first compression level you would only be able to select functions for binary values.
- The datapoint type is created automatically.
Step 2 - Creating compression level 1
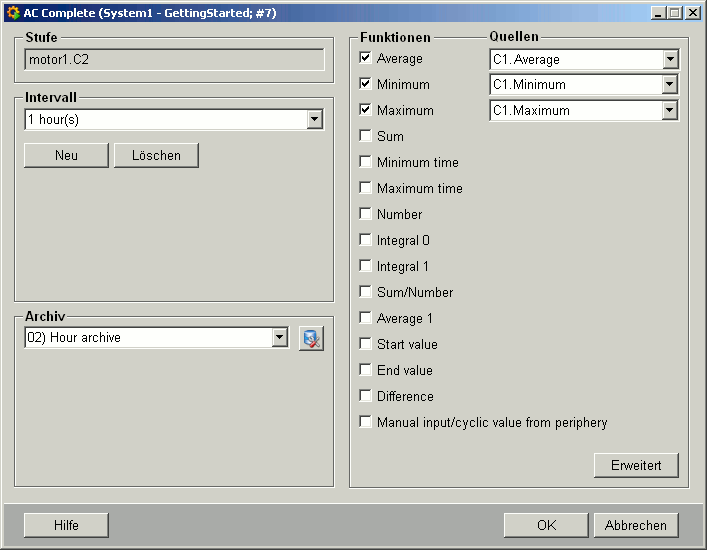
- Click on the Configuration button in the DPT configuration panel.
- This opens the AC type configuration panel.
Figure 1. Panel for AC type configuration 
- Either select a predefined interval from the combo box or define different intervals using New. Delete removes the intervals from the combo box again.
- Assign the default 01) 5-minutes archive to the datapoint type for the measured values.
- Select the functions minimum, maximum and average for the compression.
- Click on OK.
SOLUTION
The DPT configuration panel now contains compression level 1 with a 5-minute interval, whose data is saved in the 5-minute archive. The statistical functions are AVG_WT0, MIN and MAX
7. Click on Save in the DPT configuration panel; this saves the parameter settings for the datapoint type and writes them to the sample datapoint _mp_typename (for example, _mp_motor1).
Creating compression level 2 and 3
It is required that at least one of the previous levels shall be used as source for the integer multiple of the interval:for example, C1: 3min, C2: 6min, C3: 9min (->C1), C4: 24min (->C1 or C2), C5: 30 min (->C1,C2). An error message will appear if you set incorrect parameters.
- Click on the New level button in the DPT configuration panel.
- Specify an hourly interval (see above).
- Assign the hourly archive to the interval.
- Click on the functions mean, minimum and maximum. This means that only these three values are saved for the 5-minute interval irrespective of how much data has actually been collected.
- Combo boxes open next to the functions for specifying the sources of the values for the higher-level compressions. Here you can specify the source value for the second compression level.
- Select C1.Average, C1.Minimum, C1.Maximum (the default values) in each case.
- Click on OK.
- Repeat points 1 to 6 for a daily interval with daily archive.
The default source is the same function as in the previous level, if this exists. In C1 the function source is the element value; for manual input there is no source because the values are entered manually in the Laboratory Values panel (see Laboratory Values panel).
In level 1, you can select either manual input ONLY, OR any other functions, but you cannot select manual input and other functions (see Laboratory Values panel).
SOLUTION
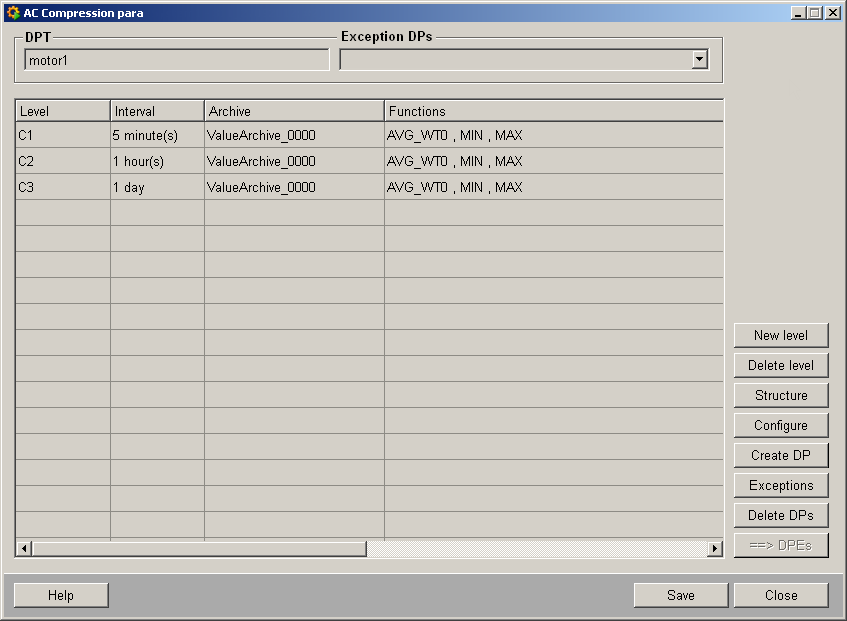
Your DPT configuration panel should now look as follows:
Step 3 - Creating datapoints:
You can create datapoints for the datapoint types that you have set up with your own structure and settings, and these datapoints will then adopt these parameters.
- Click on Create DP.
- Enter a datapoint name.
Step 4 - Defining exception datapoints (optional)
If you wish, you can define datapoints that will not adopt your parameter settings.
You can define exception datapoints as follows to prevent your archiving or compression applying to all datapoints of one type.
- Click on Exception datapoints
Figure 2. Panel for exception datapoints 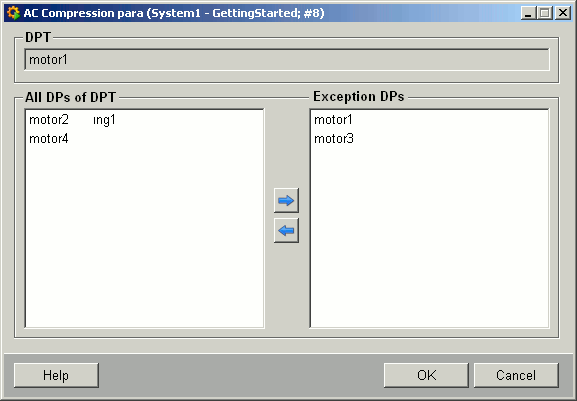
- Select a datapoint on the left of the panel
- Use the arrow to transfer datapoints to become exception datapoints.
- Click on OK when you have specified your exception data points.
- Click on Save in the configuration panel.
Step 5 - Applying the parameter settings to all datapoints
A final step is still required to apply the parameter settings to the data points.
- Click on ==>DPEs in the configuration panel.
Figure 3. Panel during data transfer 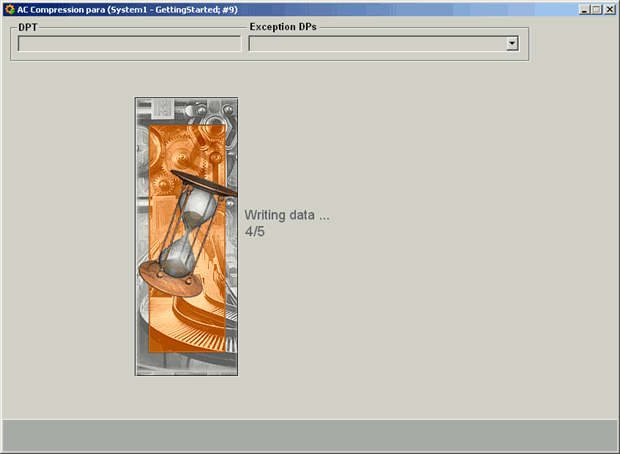
- Your datapoints have now adopted the structure and settings for your datapoint type.
Open a PARA Module and a new datapoint: each of its leaves contains the _archive and _dp_fct configs. This is not the case for the exception datapoints.
Step 6 - Deleting datapoints
- Click on Delete datapoints.
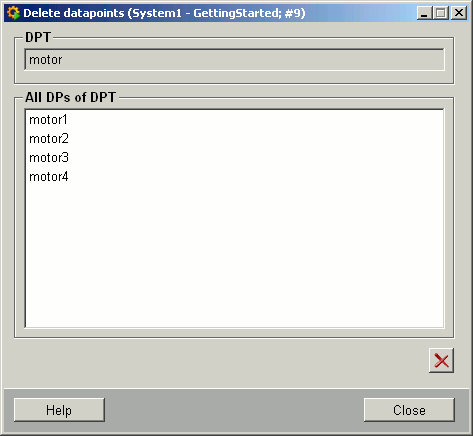
- Select the datapoint that you want to delete.
- Click on the lower-left button (showing a cross).
- Close returns you to the configuration panel.