
Requirements and Installation
Requirements
- WinCC OA and the Add-on package SmartSCADA (SmartSCADA_3.21)
- A valid license for SmartSCADA. The following license options are available for SmartSCADA: smartscada_kpi >= 1, smartscada_analyt = Expiration date of the package (YYYYMMDD) e.g. 20171031. See chapter WinCC OA License Options
- Windows or Linux 64bit.
R Software Version well as further R packages. For information on the supported R version, see chapter Software requirements.
Installation
In the following the installation of SmartSCADA is described. Some of the installation steps are only necessary under Windows and others only under Linux. These steps contain a reference to the respective platform. All other installation steps are valid for both platforms. To install Smart SCADA, proceed as follows:
R Installation
- In order to use SmartSCADA, the installation of R is necessary: Install the R
version 4.5.1.: https://cran.r-project.org/bin/windows/base/
(Windows) or https://cran.r-project.org/bin/linux/ (Linux) as an
administrator.
Figure 1. R Installation 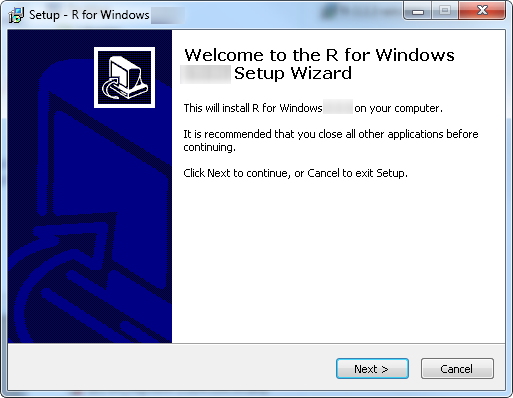
- Install the "Core files", the 64 bit files as well as Message translations:
Figure 2. R Installation - Select components 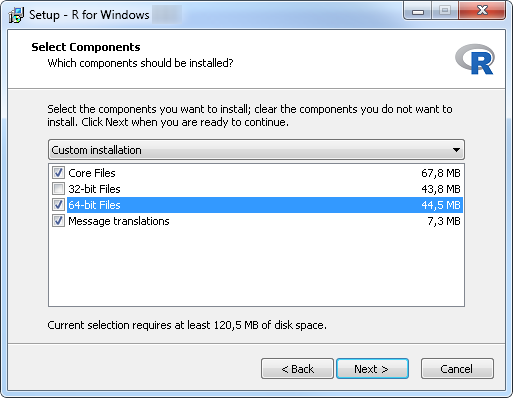
- Furthermore, open the RGUI and install the R packages. Select the mirror
"0-Cloud [https]". Execute the following commands in the R console:
>install.packages("RInside") install.packages("Rcpp") install.packages("forecast") install.packages("randomForest") install.packages("skmeans") install.packages("tseries") install.packages("xts") install.packages("binhf") install.packages("TSA")Figure 3. R program in the start menu 
Figure 4. R Console 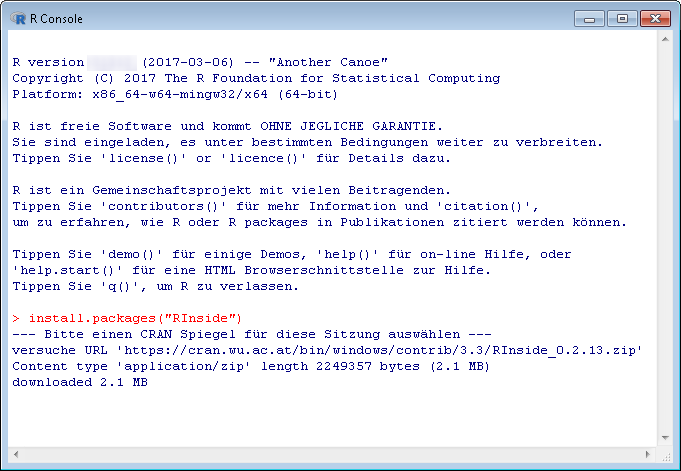
- After installing R and the packages, set the system variables listed below ( ):
Environment variables Under Windows:
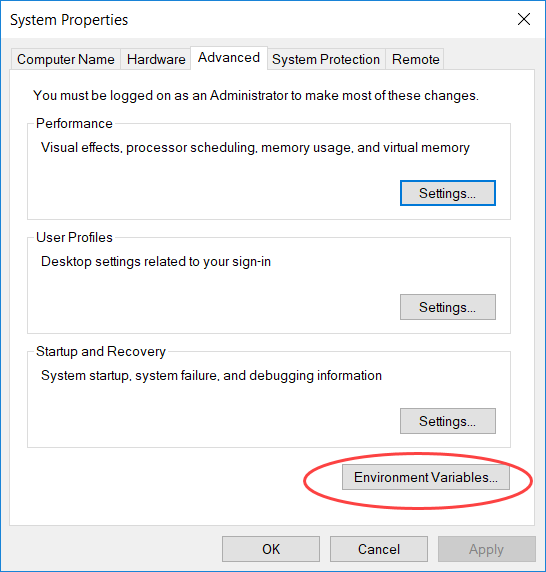
R_HOME ... to the R installation directory:

R_LIBS_USER ... to the R extension packages Rcpp and RInside:
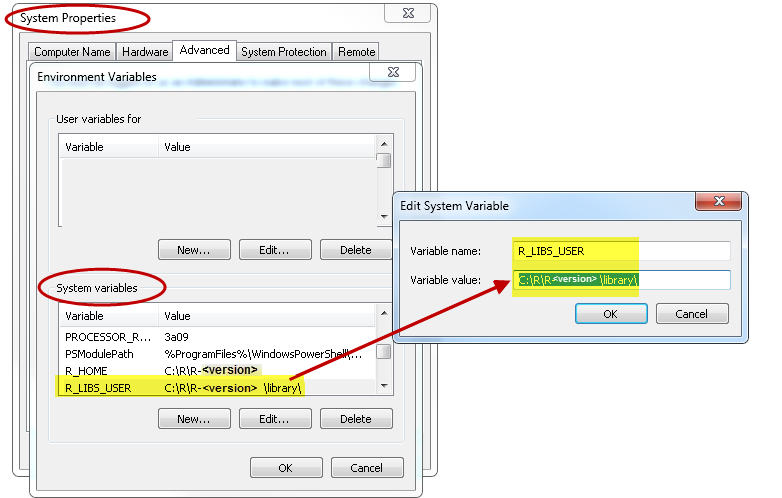
Additionally set the Windows path to:
%R_HOME%\bin\x64%R_LIBS_USER%\RInside\libs\x64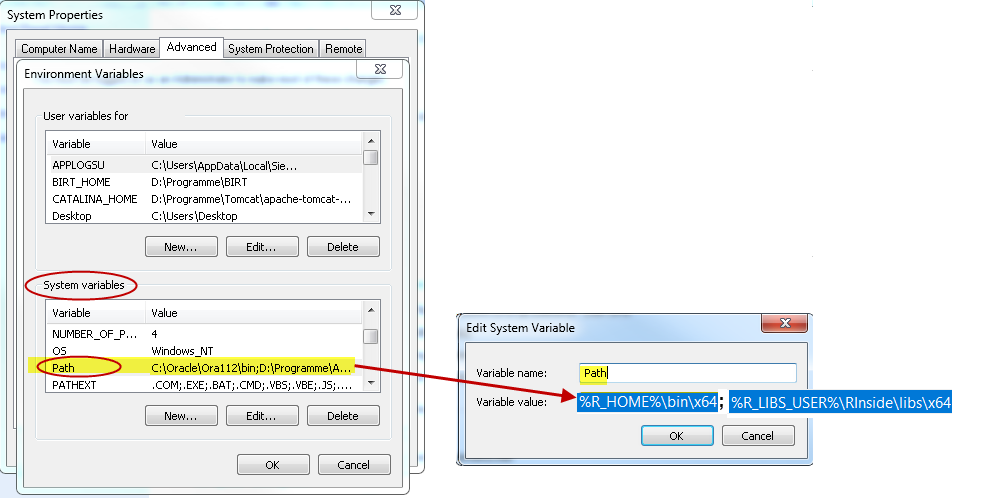
To reload the environment variables, stop the project and restart it.
Environment variables under Linux
To reload the environment variables, stop the project and restart it.
Main Project integration into your project
- Install WinCC OA Version 3.21, for the installation see chapter Installation under Windows or Installation under Linux.
-
Install the SmartSCADA package
via R Shell:
install.packages("wincc_oa_path/SmartSCADA_3.21/data/SmartSCADA/smartscada_1.2.tar.gz", repos = NULL, type="source", INSTALL_opts="--no-multiarch")
e.g. install.packages("C:/Siemens/Automation/WinCC_OA/3.21/SmartSCADA_3.21/data/SmartSCADA/smartscada_1.2.tar.gz",repos = NULL, type="source", INSTALL_opts="--no-multiarch")
Figure 6. R program in the start menu
Figure 7. R console 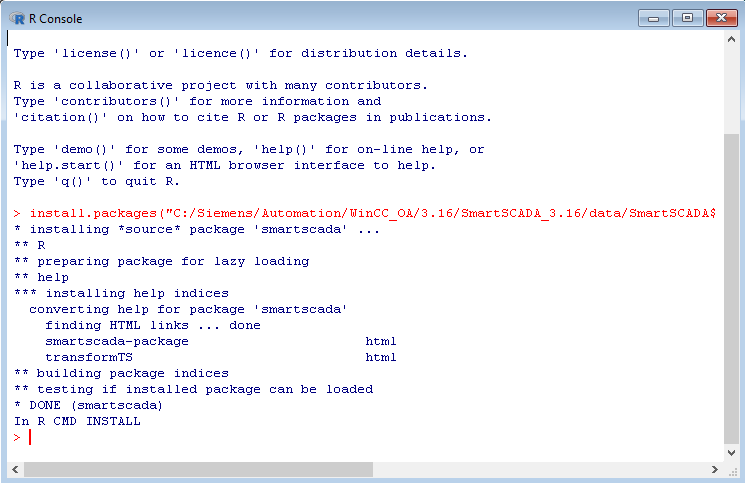
- Include the sub project "SmartSCADA_3.21" into your main
project. How to include a sub project, see chapter Change Project properties. Note that by including the SmartSCADA sub
project into your customized project, you can also use SmartSCADA in customized
projects.
Figure 8. Include sub projects 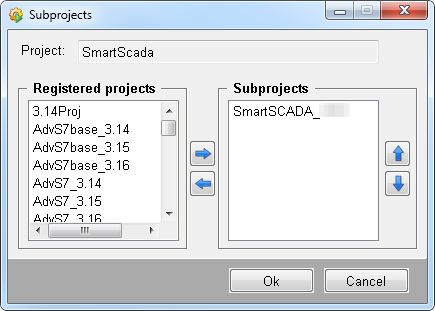
- Add a CTRL manager with the script SmartSCADA.ctc and start mode "always" to the
WinCC OA
console:
SmartSCADA.ctcFigure 9. WinCC OA console and the CTRL manager with the script SmartSCADA.ctc 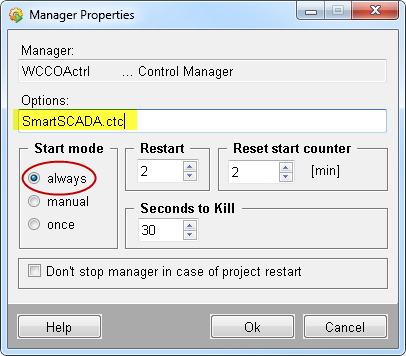
Figure 10. WinCC OA console 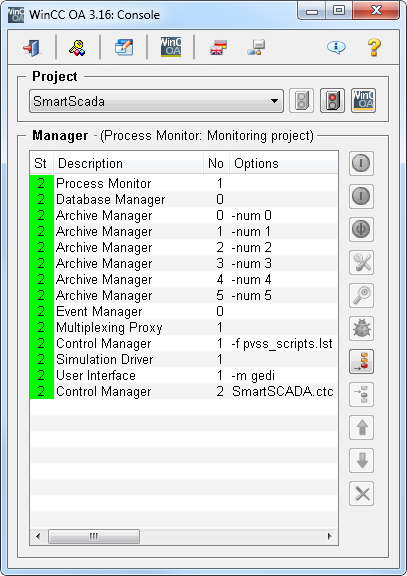
- Add a CTRL manager with the script webclient_http.ctl and start mode "always" to
the WinCC OA
console:
webclient_http.ctlCAUTION:In case the parts used are not the default the ports can be changed by the config entries [[webClient] httpPort or [[webClient] httpsPort. Additionally the port for the web server has to be changed with [[ui]_httpServer for usage of loadSnippet.Figure 11. WinCC OA console and the CTRL manager with the script SmartSCADA.ctc 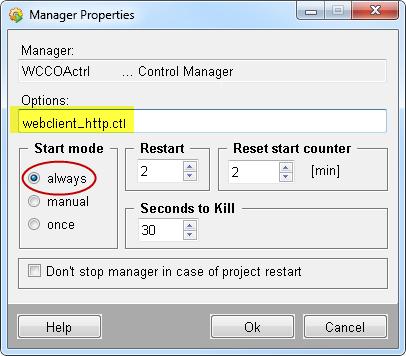
Figure 12. WinCC OA console 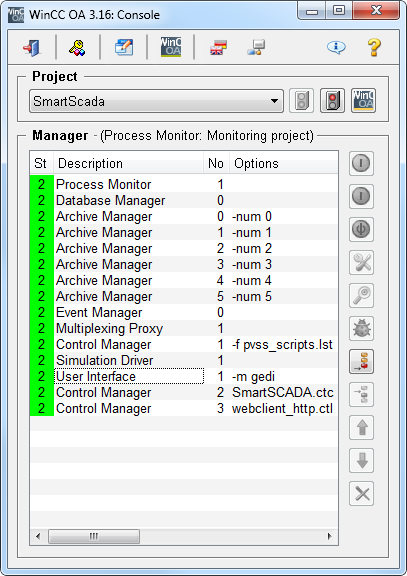
- You can find the SmartSCADA wizards in the System Management ->on the
SmartSCADA tab.
Figure 13. System Management and the SmartSCADA tab 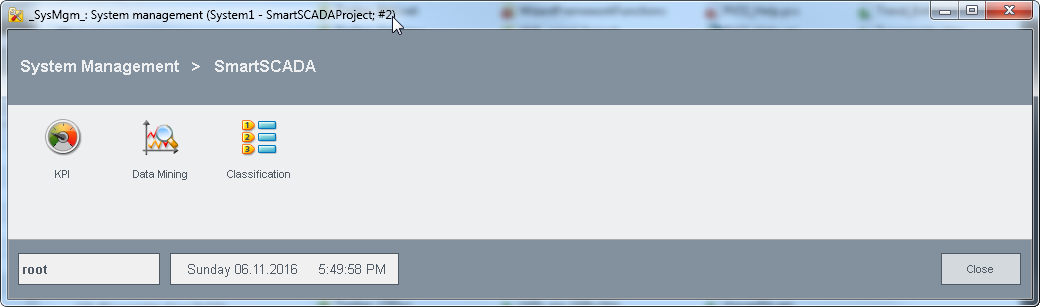
General debug Flag for SmartSCADA
A general debug flag is available for SmartSCADA:
-dbg ssc_debug
Shows general debug information for SmartSCADA.