
Working with recipe types
This topic provides instructions on how you can create a recipe type with associated recipes. In the example you will create the recipe types using the Recipes panels.
Example
Even in simple installations, one often has the task of transferring a relatively large number of predefined values from the control system to the peripheral devices. If several different sets of "predefined values" or "set points" are needed for operating an installation, then a Recipe Management tool can represent a significant simplification in operation.
Objective
In the following example, the aim is to enable an imaginary brewery to set simultaneously the set point values required for brewing a particular type of beer. As this is only intended as a simple example, it does not include the real-life situation where peripheral devices would return actual values, and additional elements would be required for valves, motors and heaters.
System requirements and conditions of use
- Create a datapoint type "beer" containing the datapoint elements "hop", "water", "malt1", "malt2", "yeast", "brewing_time", "boiler" and "temperature".
- Your datapoint type should have the following example structure for the set point values:
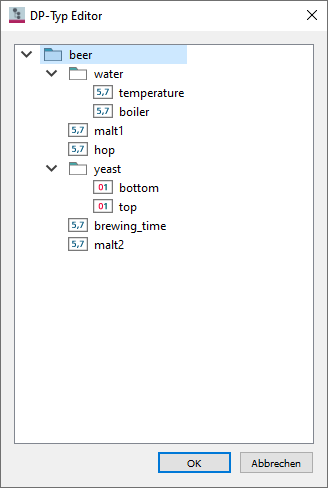
- Create the datapoint beer_boiler1.
- Assign alias names, descriptions and units in the _common config.
- Save the datapoint.
Procedure
Once you have made these preparations you can create recipes for your brewery. Open the System Management panel > Settings tab
Creating a recipe type
- Click on Recipes.
- This opens by default the Activation tab which as yet contains no entries.
- Switch to the Recipe types tab.
- Click on the New button in the lower left corner
 .
. - Enter "BeerTypes" say as the name. The empty panel of the Recipe type editor is opened.
- Enter "Brewery settings" for example as the description.
- Then use the DP Selector
 to insert an element from the datapoint beer_boiler1:
 - Click on add
 to add each selected element to the table.
 - Your table might look as follows:
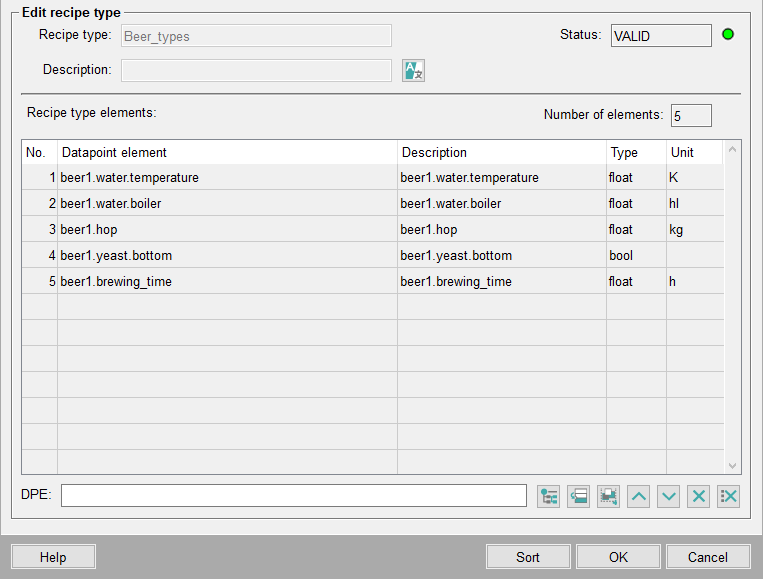
- Click on OK when you have assigned all the elements for a recipe type.
If you have set the parameters correctly then the entry is added to the list of recipe types and is given the status of valid:
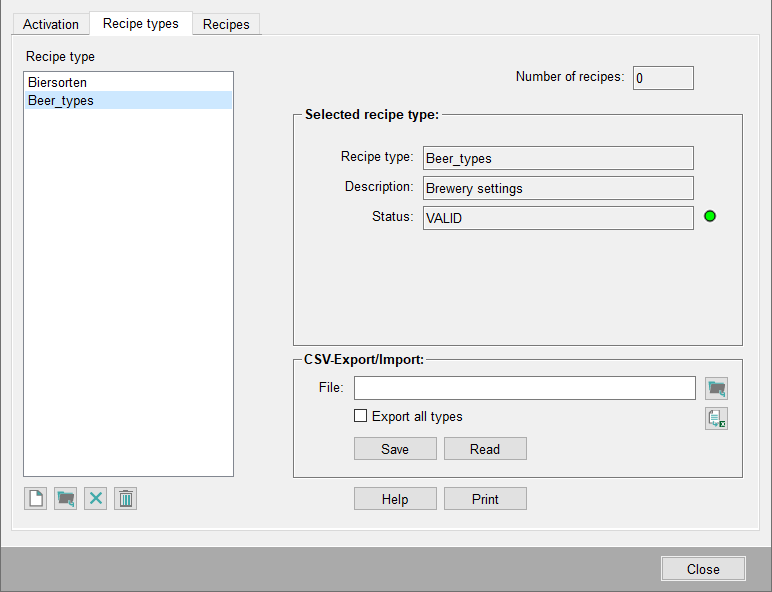
If you have used a non-existent datapoint or an incorrect data type then the following panel opens highlighting the erroneous datapoint element:
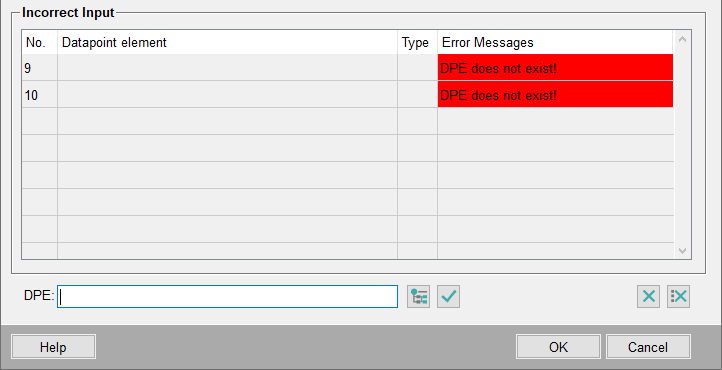
You can either edit this entry, assign a different one or delete it (see Recipe type editor).